Inspired by conversations on the Food52 Hotline, we're sharing tips and tricks that make navigating all of our kitchens easier and more fun.
Yesterday, we talked about how to bake the building blocks of a great wedding cake. Now it's time to talk about fillings and frostings, and to prepare for assembly.
If you followed part one of this wedding cake series and all went according to plan, your cakes are now safely chilling in the freezer. Today, we're going to tackle everything else you need to prepare before assembling your wedding cake: the filings, the frosting, and the equipment.
Fillings
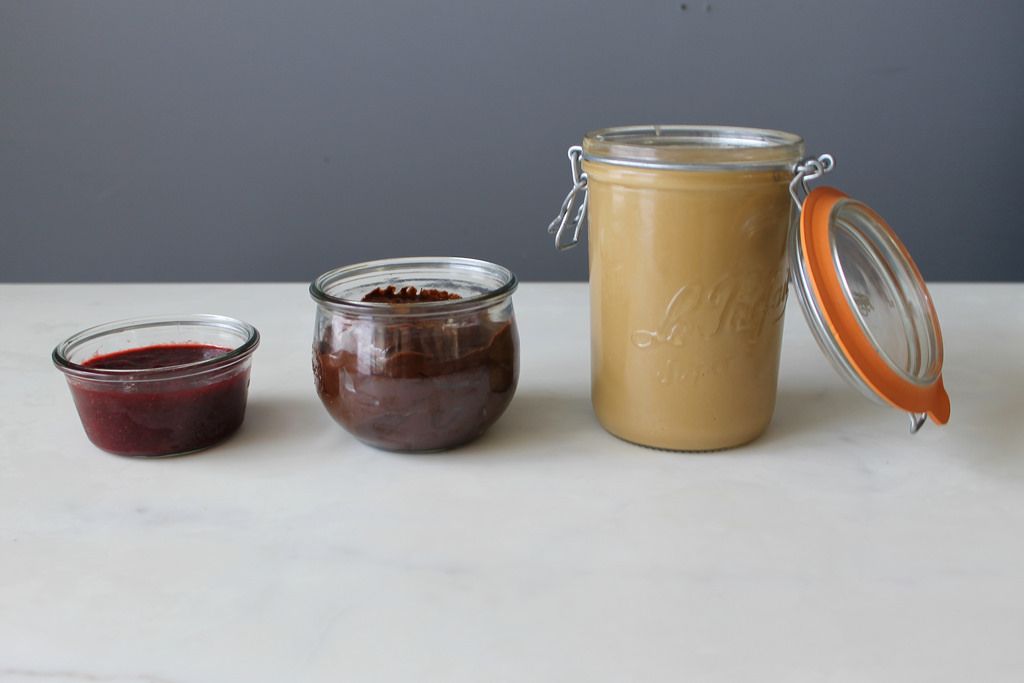
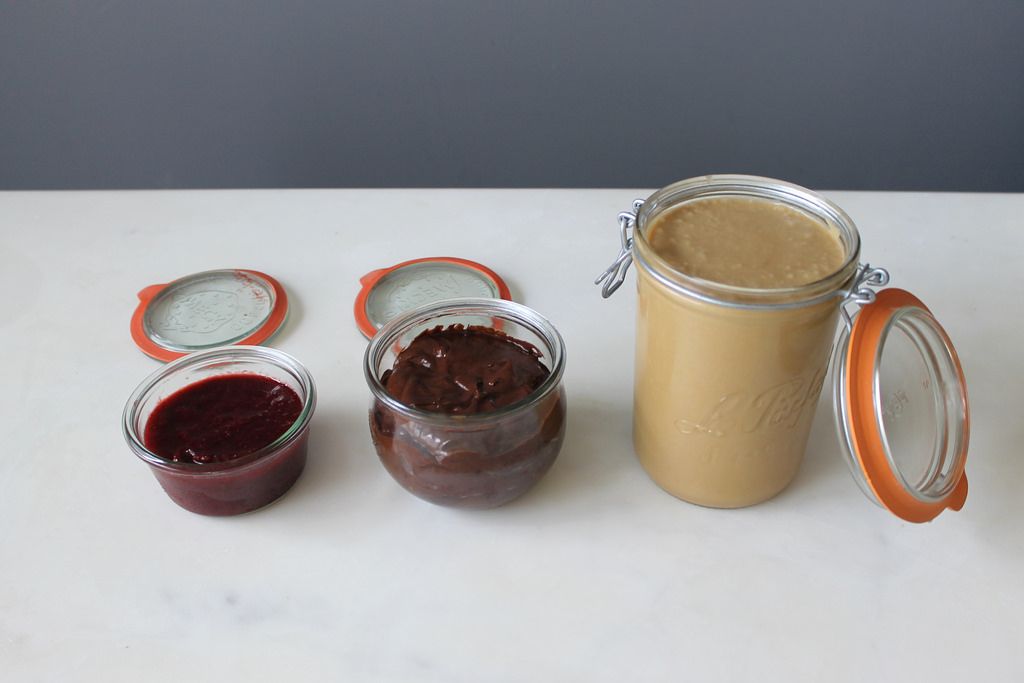
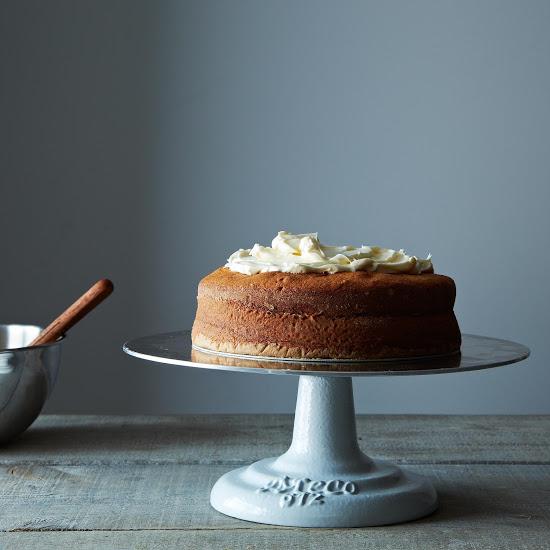
Fillings can be deceptively tricky. They should be neither cloying nor gummy, neither greasy nor mortar-like. And that's a tall order -- especially for a tall wedding cake. When I talked to the happy couple about flavors for the cakes and fillings, the bride immediately asked for a caramel icing. Caramel is my favorite, too -- especially a good Southern caramel that's on just this side of burnt, with a noticeable dose of salt for good measure. So I decided to layer the yellow cake, the largest tier, with caramel icing. I chose this recipe, mostly because it didn't require caramelizing sugar to a certain temperature, and I was trying to reduce my workload in any way I could.
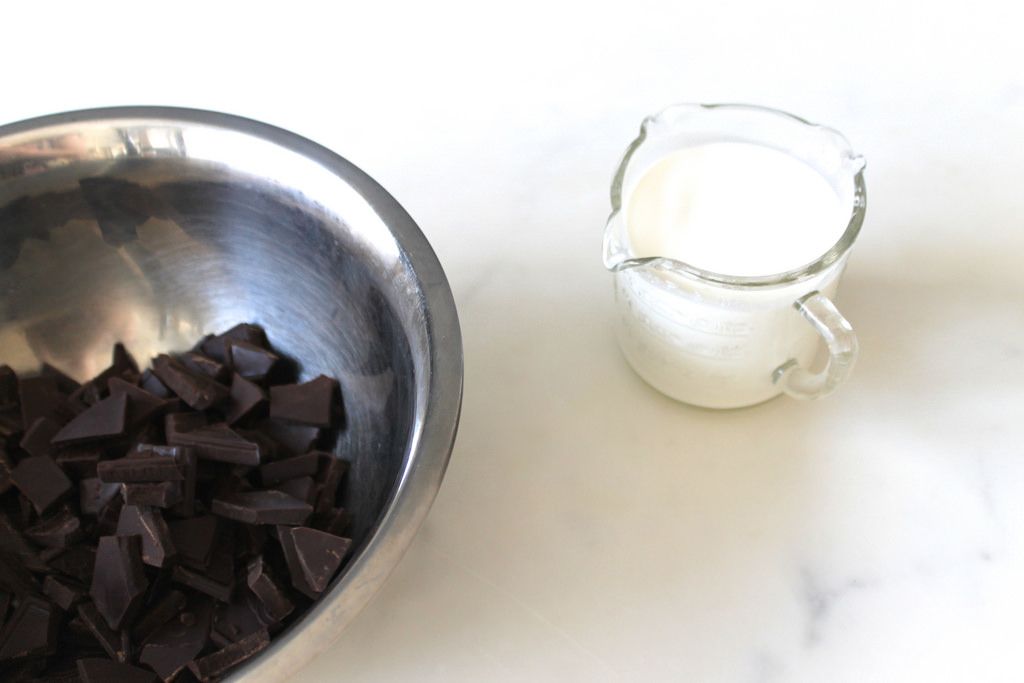
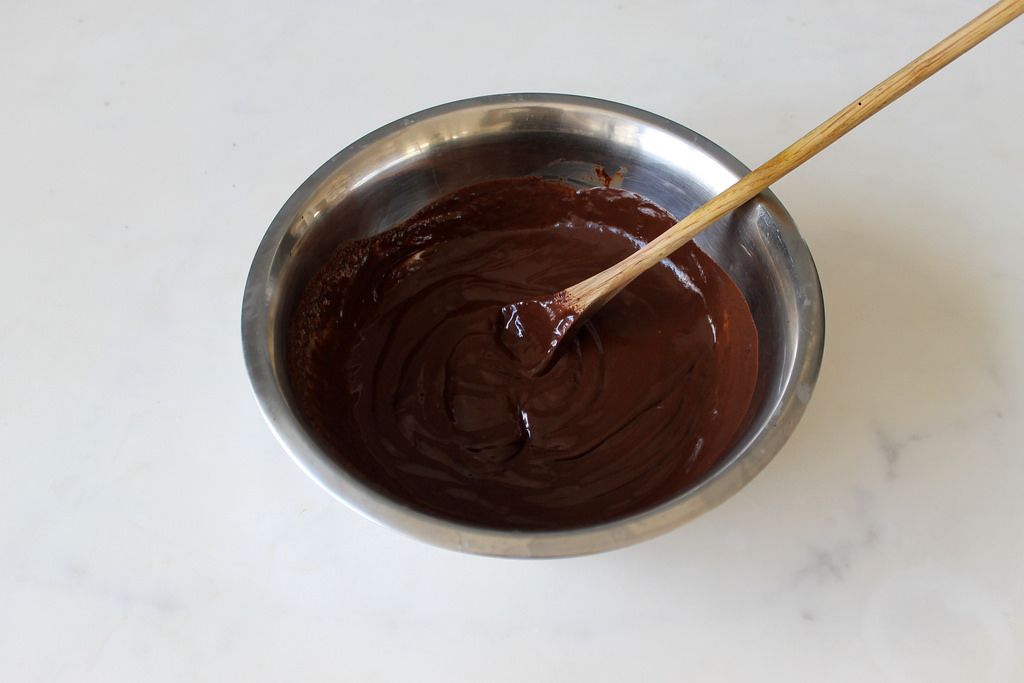
The groom was quick to respond with a request of his own: chocolate frosting. So I decided to layer a simple chocolate ganache between the cocoa-filled layers of the second tier. I wanted a thick, dense ganache, so I used equal parts chopped bittersweet chocolate and cream. I heated the two in a metal bowl over a pot of simmering water, whisking until the chocolate had melted and it all became a gloopy mess I wanted to bathe in. Done.
More: If you're wary of chocolate ganache, check out Alice Medrich's 3 tips for making it a success.
Lastly, I decided to layer the white cake (which I had already dubbed the "fairy cake" in my head) with a raspberry compote. I was hoping that the bright tang of the fruit would cut the airy sweetness of the almond-flavored cake -- and would look really fancy, too. I melted down a few pints of raspberries with a quick pour of sugar, a slip of vanilla, the zest of two lemons, and a pinch of salt.
More: Make any compote you please, without a recipe.
These fillings keep for a week in the fridge, so feel free to do this all several days in advance. Before assembling your cakes, take the fillings out of the fridge and let them come to room temperature. If need be, re-whip to nudge them towards a more spreadable texture.
Swiss Buttercream
Next, I tackled the frosting that would cover the entire cake and dictate the flavor profile for the whole project: Swiss Buttercream.
Its name alone is scary. Regular buttercream seems comforting, familiar -- it’s the stuff that you licked off of grocery store sheet cakes of yore. But put “Swiss” in front of the name, and it becomes a whole different beast. It’s European, it’s fancy, it’s…got an incredible amount of butter in it. Perhaps scariest of all, you have to add the butter to hot egg whites and sugar, all while whipping frantically at high speeds.
A note: Do not attempt this if you don’t have an electric mixer; this is another “borrow it from a friend” situation. Or, do as I did, and make it all at your parents’ house.
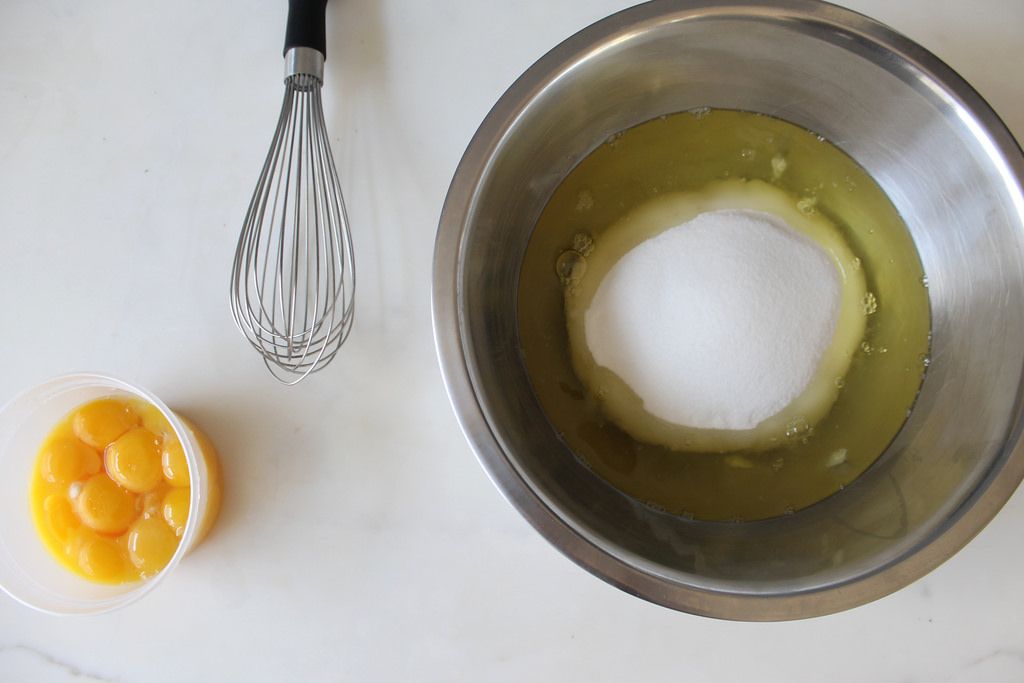
Despite how intimidating it looks on paper, Swiss buttercream is actually quite simple in terms of ingredients -- especially when you have Deb Perelman by your side to guide you. This frosting asks nothing more of you than sugar, egg whites (remember all those whites you saved from the cake?), a splash of vanilla, and so, so much softened, unsalted butter. I used 15 sticks (one and a half times Deb's recipe) to make enough to frost a three-tiered cake.
There are two keys to making a successful Swiss buttercream: organization and patience. Make sure all of your ingredients are laid out, your butter softened, the water under your double boiler (or hacked double boiler) just simmering, and your mixer ready to go. Heat the egg whites and sugar in the top of the double boiler, stirring constantly just until the sugar dissolves -- you don’t want to scramble the eggs. Pour them immediately into the mixer and flick it up to high. Pray that it won’t die on you.
Note: If you're worried about salmonella, make sure to heat your egg whites to at least 160° F.
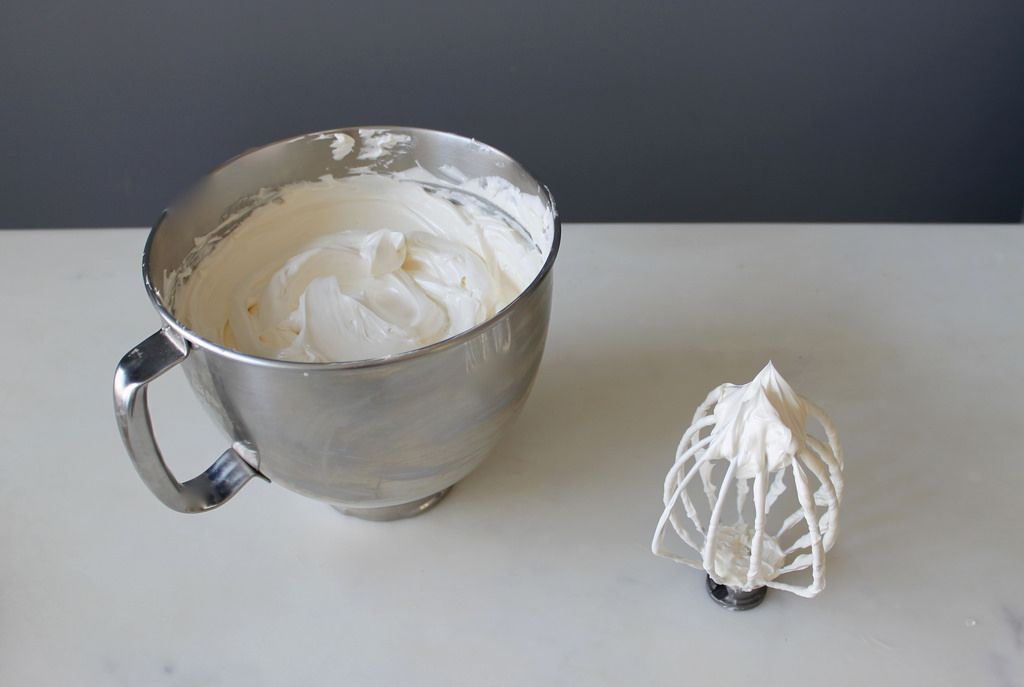
When your egg whites are whipped and glossy -- this will take five to ten minutes -- add in your vanilla. Start adding your softened butter one stick at a time, waiting a few seconds between each to make sure the whole stick has a chance to thoroughly incorporate.
Once all the butter is in, all you can do is be patient. At first your Swiss buttercream will look like a chunky, unappetizing mess. Don't worry! It's supposed to look like that. Just have some faith, maybe drink a glass of wine, do some downward-facing dog -- whatever it takes to calm you down for the next fifteen minutes or so. Because slowly, ever so slowly, your buttercream will start to come together. It will become creamy, and fluffy, and pearly white, and will look like something you want to slather on your face like beauty cream. Stop the mixer, scrape it down, and whip it some more. When it’s solid, shiny, thick, and beginning to look like cream cheese, you’re ready.
If you’re not using the frosting immediately, store it in a container in the fridge. Before using, bring the frosting to room temperature and re-whip it until it’s light and spreadable.
Assembling Equipment
When I started looking into the process behind building a wedding cake, it became clear that I came to this project extremely naive. Don't be like me -- get prepared ahead of time. Gather the following pieces of equipment and keep them at the ready. Then, when I walk you through the final assembly process (tomorrow!), you won't be scrambling around trying to find your pastry tips.
Dowels
I had assumed that the tiers of a wedding cake somehow hovered a centimeter over each other, as if on invisible magic carpets. In reality, tiered cakes require plastic or wooden rods, called dowels, to support them. You can find them at most craft stores, at specialty baking stores, or online.
Cardboard Cake Circles
Each layer cake is built upon a cardboard circle, cut to the exact circumference of the cake. I used designated cake circles for this, which I found at Michael's -- however, any (clean) piece of cardboard will work just fine. Trace your cake pans onto the circles, and cut them out with an X-acto knife or scissors.
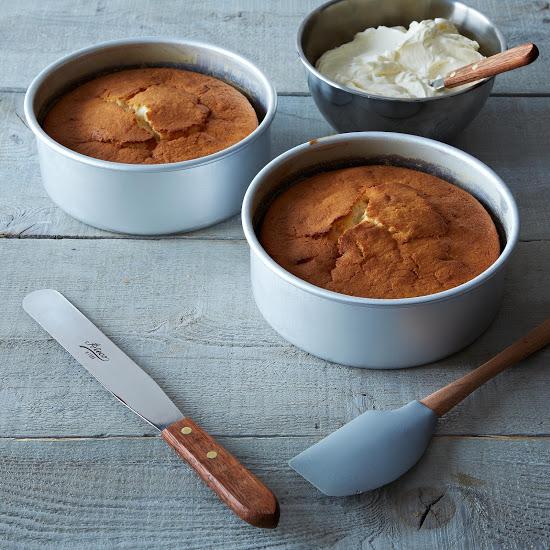
Offset spatula
This is the perfect tool for spreading and smoothing icing. The angle helps you keep your hands at a safe distance from the cake -- so that you don't smudge your handiwork -- and gives you more leverage for spreading.
Serrated knife
You'll use this to even out the cake layers.
Rotating cake stand
This allows you to keep a constant angle when spreading on the icing and offers you a full range of motion. If you don't want to invest in one, you can MacGyver one by placing a pie pan upside-down on top of a secure base.
Pastry bag and tips
If you're going really old school (and low-tech), you can also use a zip-top bag, which I attempted here.
Simple syrup
Make a small batch, just a cup or so, and store it in the fridge. You'll use it to keep the cake moist during assembly.
Pieces of Flair
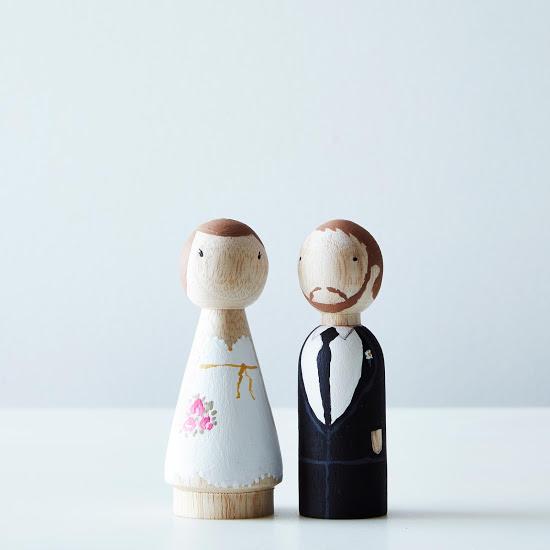
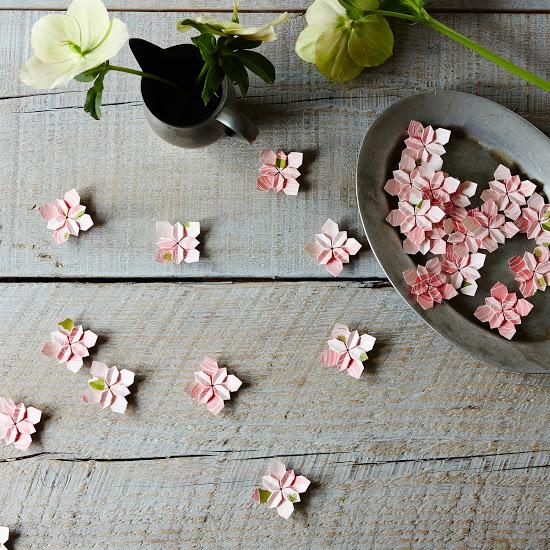
Finally, unless you're a master cake decorator (and then why are you reading this article? Just for kicks?), you'll need some accents that are naturally beautiful to jazz up the cake's exterior. I used fresh flowers, but you could also use paper ones. If you want to go really over the top, or very personalized, you could also paint a customized bride and groom cake topper.
In the next (and final!) post, I'll walk you through assembling the wedding cake. Go get a good night's sleep -- tomorrow's going to be a busy day.
Photos of frosting and filling by Catherine Lamb; all other photos by James Ransom
Written by: Catherine Lamb
Popular on Food52
10 Comments
Sincerely,
Pregnant Lady Who Still Eats Sushi
See what other Food52 readers are saying.