It's always more fun to DIY. Every week, we'll spare you a trip to the grocery store and show you how to make small batches of great foods at home.
Today: Be forewarned. The surprising simplicity of these Shanghai shao mai by Betty from Le Jus d'Orange may lead you to swear off dim sum outings altogether.
Shanghai shao mai, more commonly known as pork shu mai, is a common breakfast street food in Shanghai, China. Slightly different from the ubiquitous dim sum shu mai, which is made with pork and shrimp, Shanghai shao mai is specific to the Jiang Su region and is filled with sticky rice and pork. My mother, who was born in Shanghai, often cooked these for me as I was growing up.
Years later, as a college student in the midwest with very little authnetic Chinese cuisine around me, I began to crave the comfort of my mother's cooking. The next time I returned home, I begged my mom to send me back with a care package. As I packed my luggage, my mom wrapped frozen Shanghai shao mai in sandwich bags and stuck them between my clothes for the five-hour flight. Once back in my dorm, all I needed to do was retrieve the frozen dumplings and stick them in the microwave.
More: The perfect dumpling deserves the best sauce -- borrow some from this Vietnamese Style Shu Mai.
As I gobbled up each shao mai, I was transported back to my mother's kitchen, surrounded by the comfort of home. Soon, my carry-on frozen shao mai became a tradition, and they started to gain a reputation among my friends; everytime I returned from home, there would be little Chinese dumplings in my dorm room up for grabs (not really, but that's okay).
For years, I hesitated to learn how to make the shao mai myself on the basis that learning the method behind a magic trick can cause the trick to lose its wonder. Fortunately, once I finally watched my mom make these, the magic didn’t disappear. Instead, I marveled at how simple this recipe is, and how such basic ingredients can make something so delicious and comforting. Even though I can now make shao mai for myself, I know that when I visit home again, I’ll still beg Mom to make them.
Makes 20
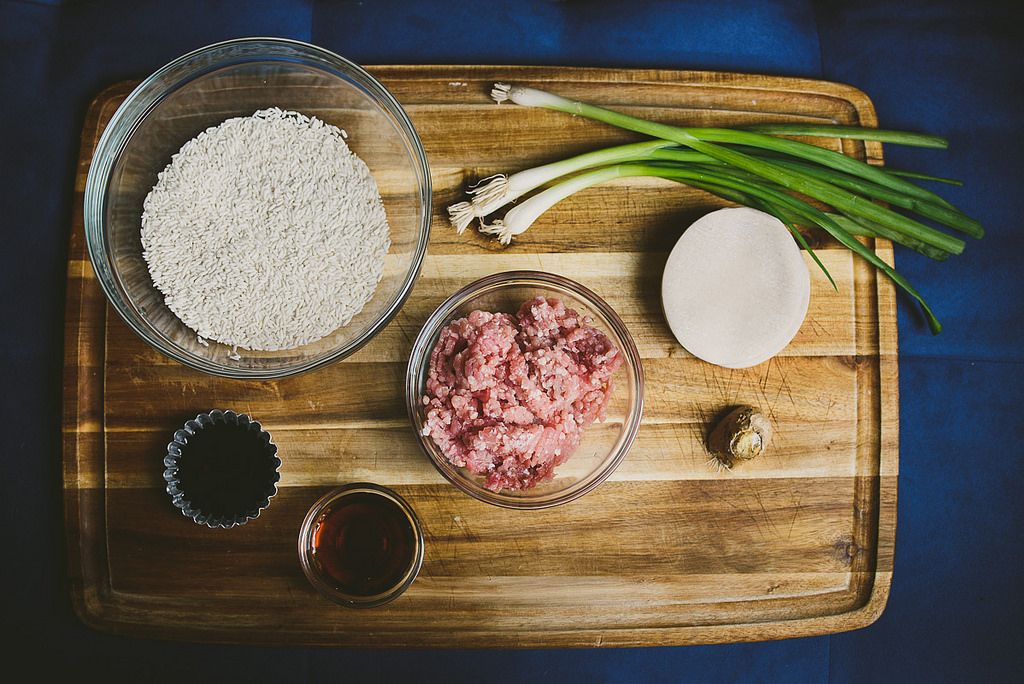
3 cups glutinous sweet rice (sticky rice)*
3 tablespoons cooking oil (plus some to coat the pan)
1/2 pound ground pork
1/4 cup dark soy sauce*
3 tablespoons Shaoxing cooking wine*
1 tablespoon sugar
1 teaspoon finely grated fresh ginger
3 stalks scallions, finely chopped
1 packet shao mai skin (or wonton wrappers)*
*Many of these ingredients can be found at Asian supermarkets and, once purchased, last for a long time, which means you can make several batches of dumplings without having to make another trip to the store.
Start by soaking the sweet rice in water overnight so that it is moistened for the next day. When you're ready to prepare the shao mai, steam the moistened rice using a cheesecloth over boiling water for about 15 to 25 minutes until the rice is translucent, then set it aside with a damp towel on top to prevent the it from drying out.
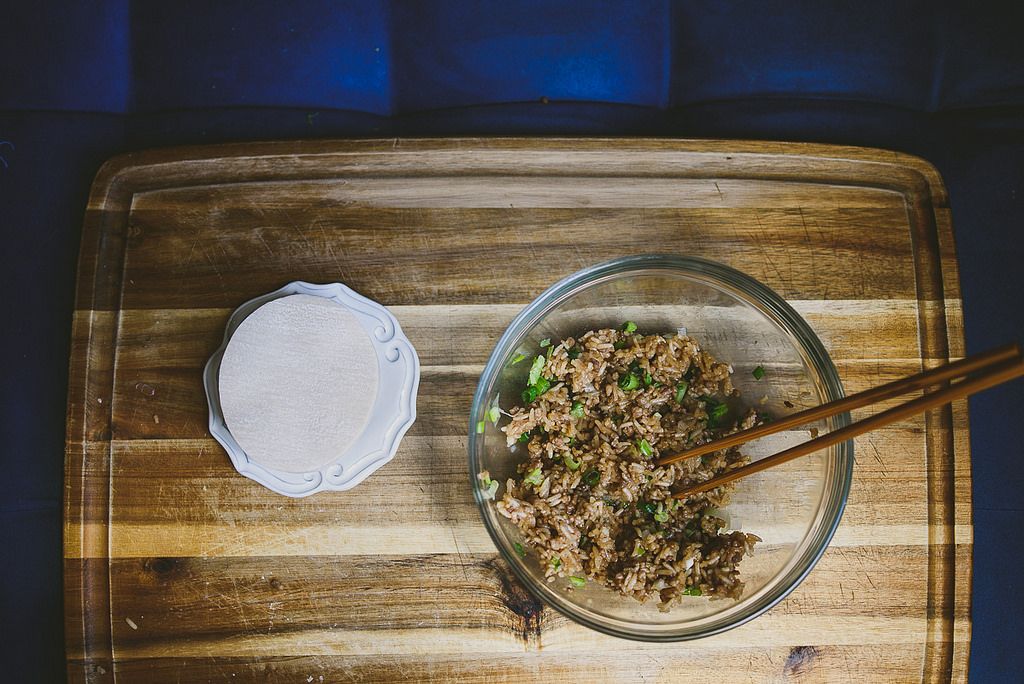
While the rice cools, cook the pork until browned in a hot wok with olive oil, then add soy sauce, cooking wine, and sugar, and cook for another 1 to 2 minutes. Pour water into the wok so that it just covers the pork, then add ginger. Taste the mixture to make sure it is salty, and add additional soy sauce to taste. Finally, add in the steamed sticky rice and cook until all of the liquid is absorbed.
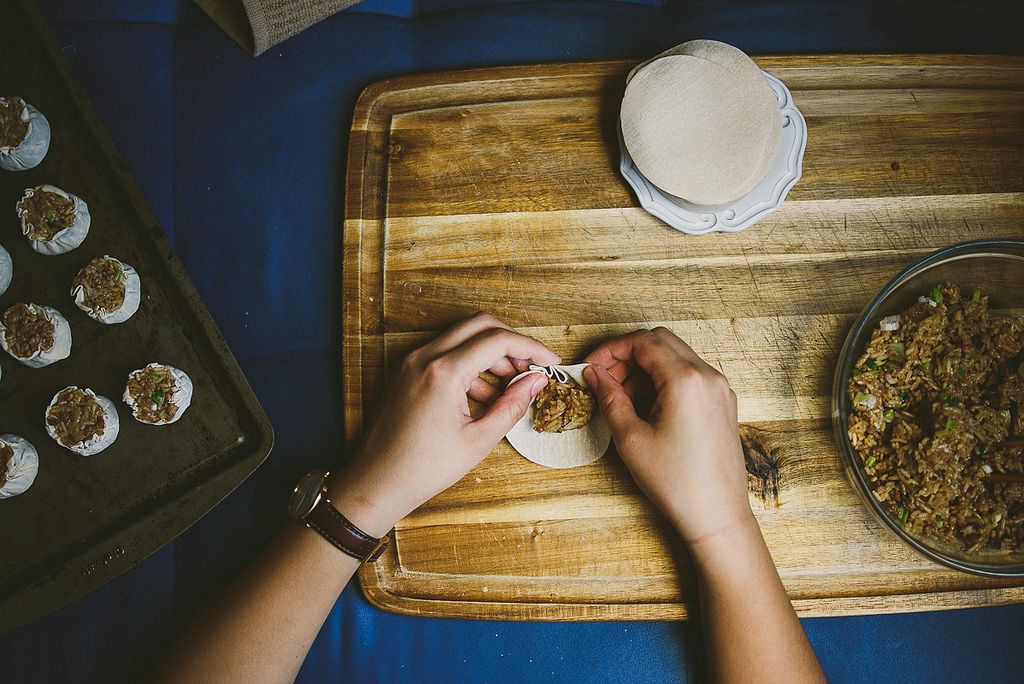
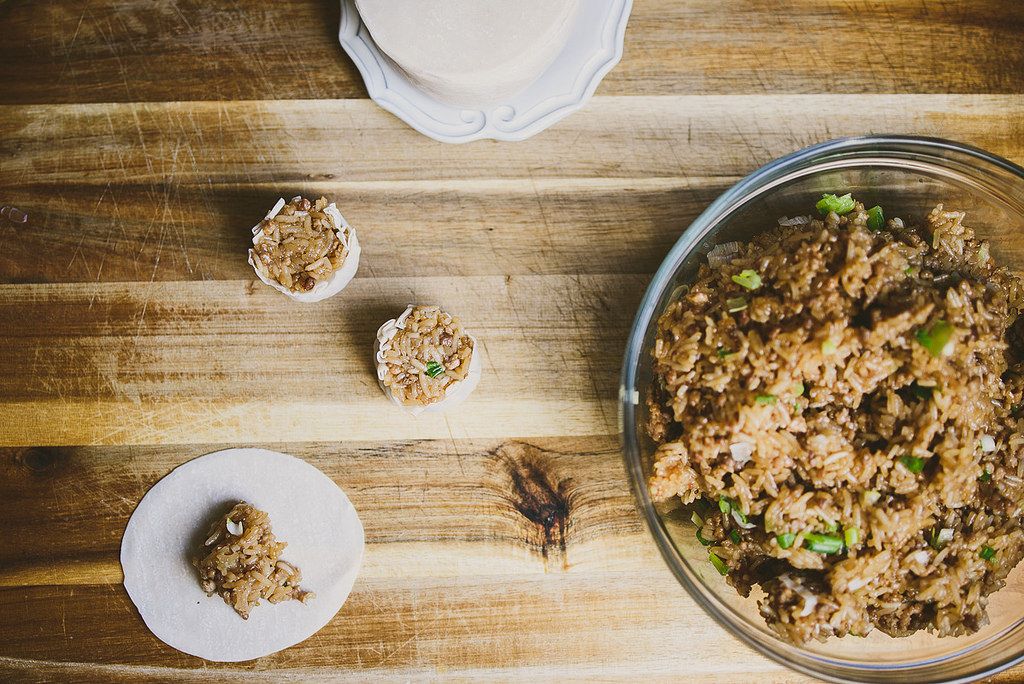
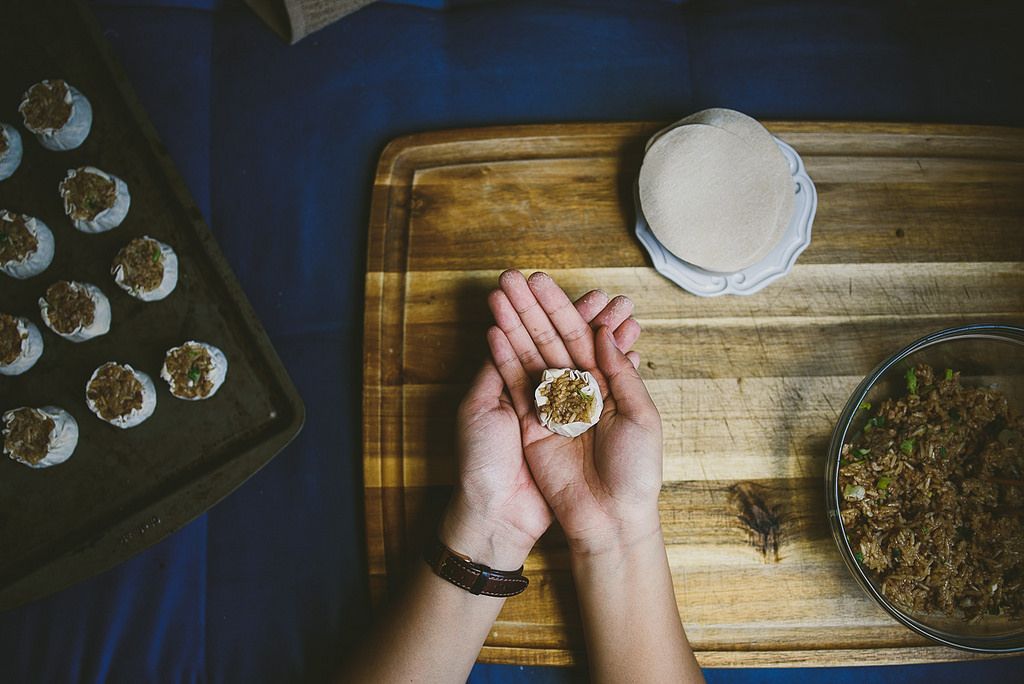
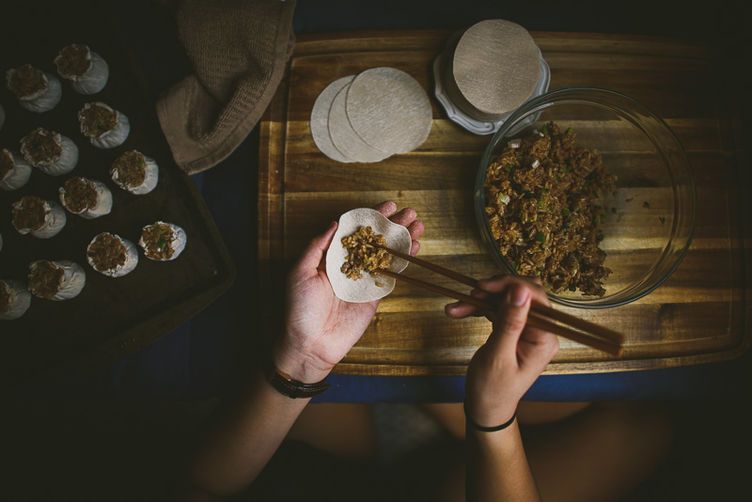
Here comes the fun part: wrapping the shao mai. Take a shao mai skin and place one tablespoon of rice in the middle. Holding the wrapper at its bottom, start loosely pleating the edges, as depicted in the photo above. Once you’ve pleated the circumference, start to hold the pleats together and fold them back onto each other to form an accordion shape around the rice.
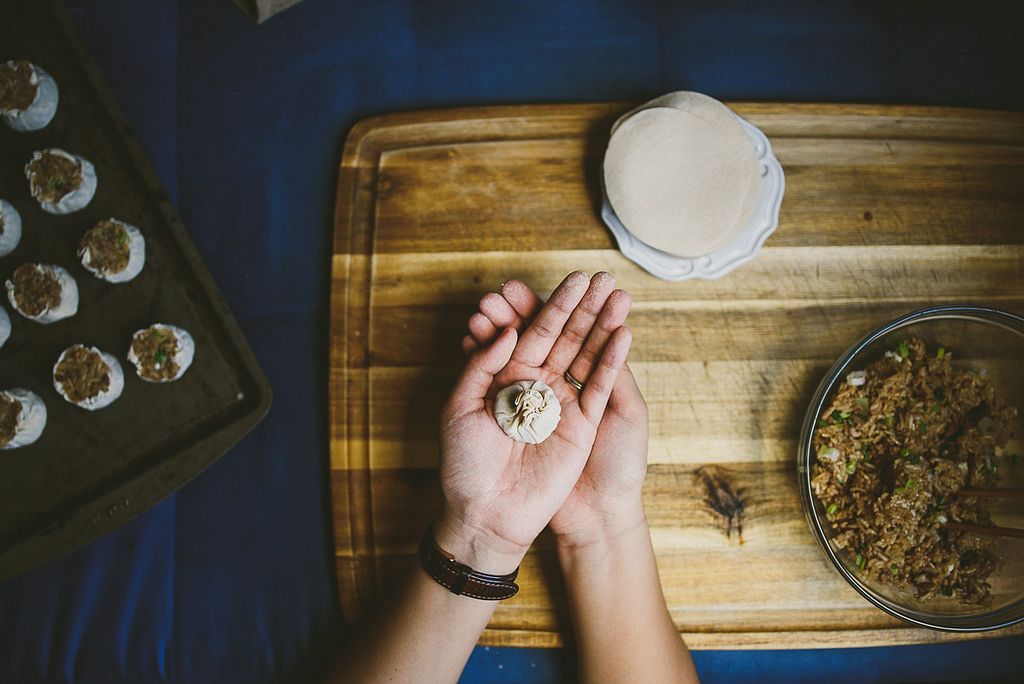
Twist the edges together as if you were twisting a plastic baggie and push down, forming a little pouch of rice, then unwrap the pocket slowly from the edges so that you can stuff more rice in using your thumbs. It's necessary to wrap, then unwrap each pocket in order to maximize the amount of rice in each one while keep them compact and tight so that they don't fall apart later.
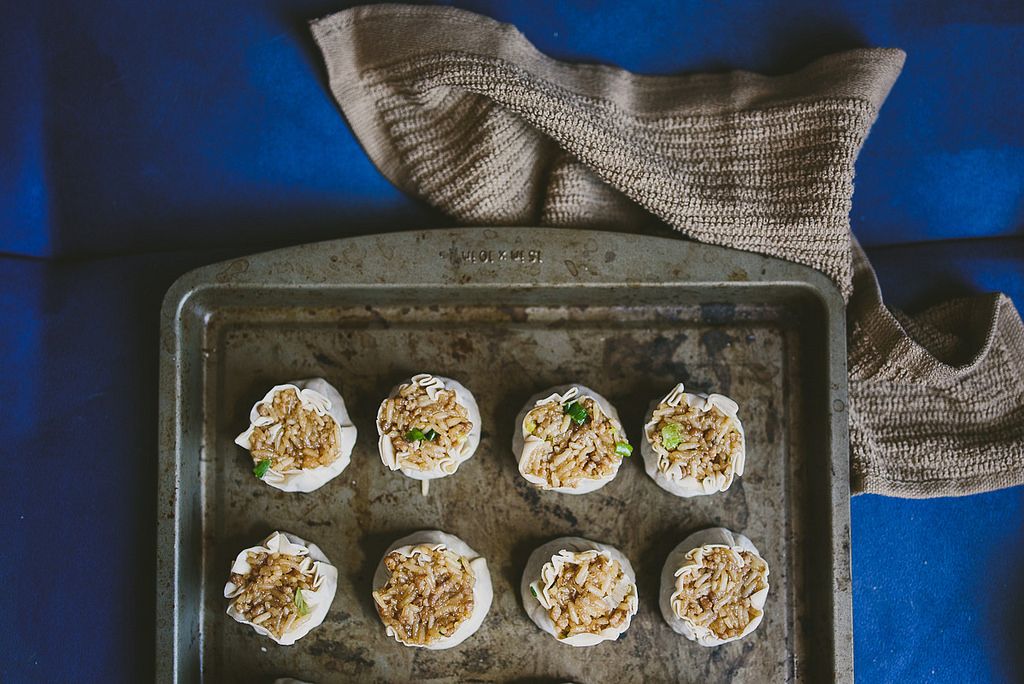
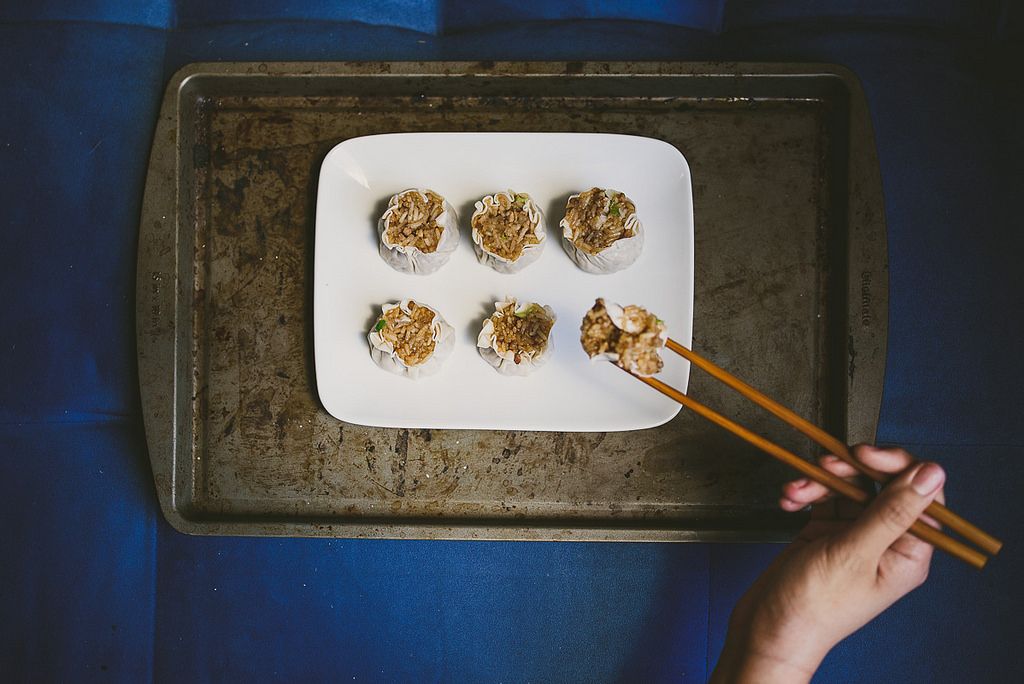
Once you've finished wrapping all of the shao mai, steam them for ten minutes on a steamer basket over boiling water and serve right away. Not hungry? To store the shao mai for later, let them cool to room temperature. Then, place them on an aluminum foil-lined baking sheet, and freeze. Once they have frozen, transfer the dumplings to a zipper bag. When you're ready for more, steam the dumplings in steamer basket until warm, or go the quick route and microwave the frozen dumplings in a bowl with a damp cloth draped on top to "steam" them.
See the full recipe (and save and print it) here.
Photos by Betty Liu
See what other Food52 readers are saying.