Great crafts not only teach you to make something pretty and useful with your own two hands -- the best ones also make use of things you might have otherwise thrown away.
Today: Francesca Stone from Fall for DIY shares her trick for turning empty cans into chic herb and succulent planters.
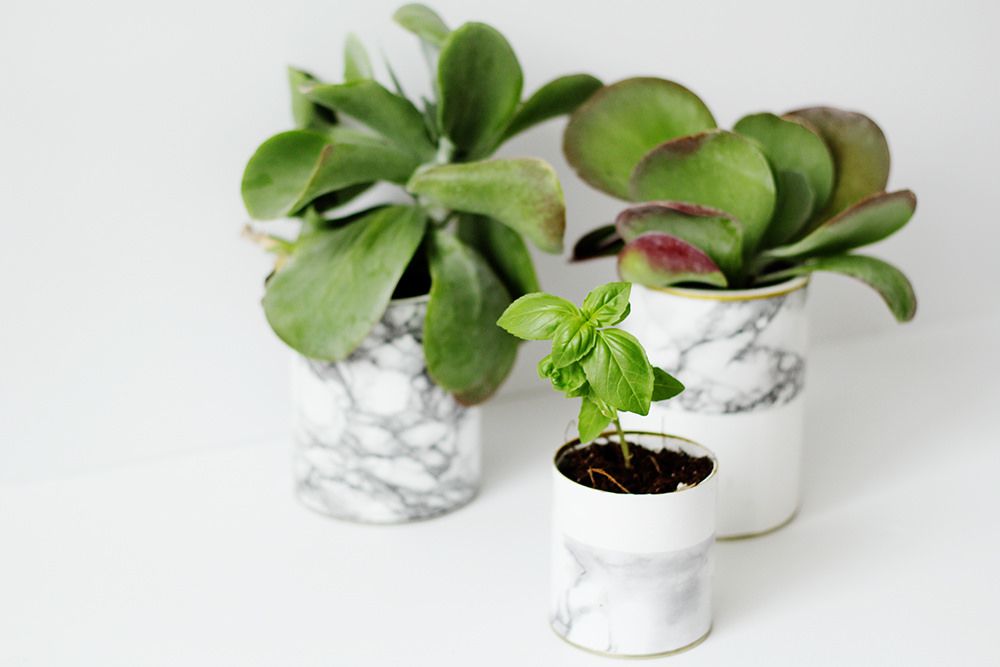
These DIY marble planters are quick, easy, and ridiculously cheap to make. I’ve been hoarding empty food packaging to make concrete vases (alas, one day) but it was getting a little too bag lady in my office and I needed somewhere nice to put my one remaining basil plant. Such a trooper, he’s come back from near death and needed somewhere to grow. Plus, I’m always looking for excuses to pull out the marble contact paper.
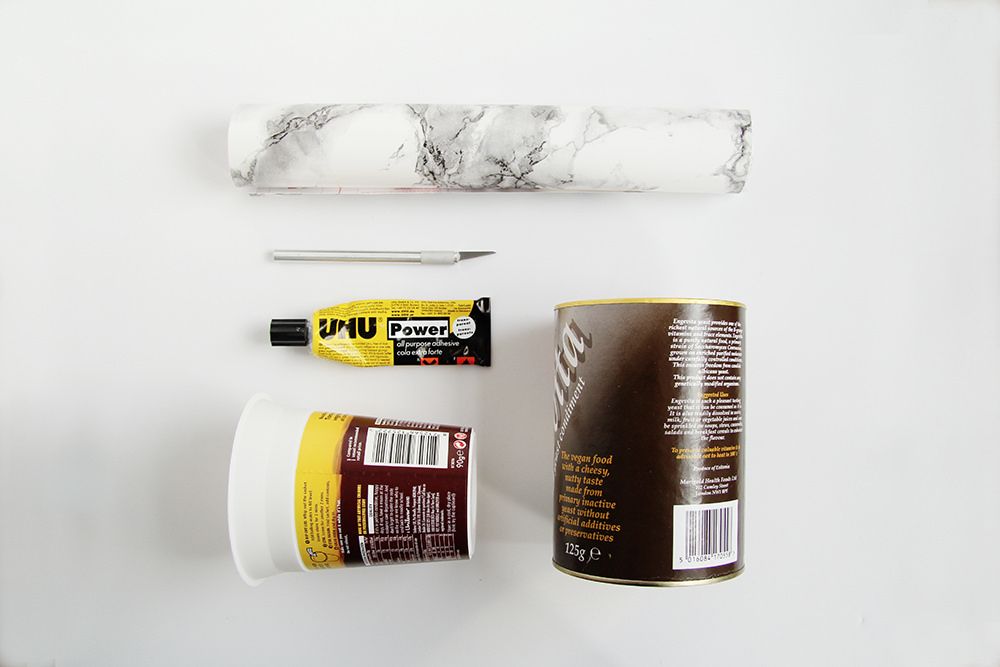
What You'll Need:
Cylindrical packaging, such as an empty, clean can
Noodle Pot container, empty and cleaned (This is totally my guilty pleasure; if it's not yours, a styrofoam coffee cup will do.)
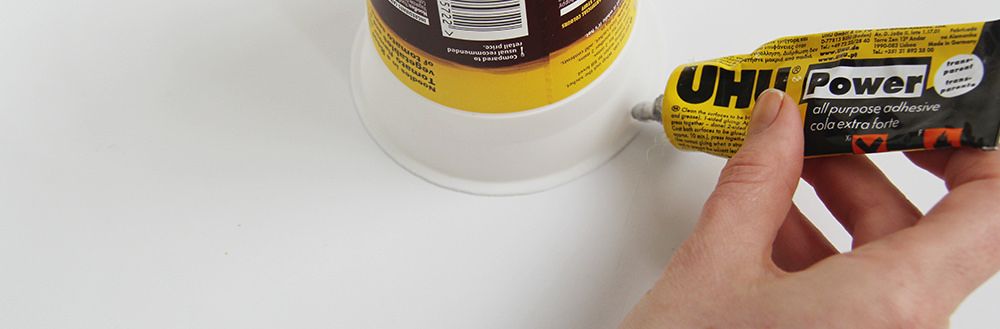
Strong multipurpose glue, such as Uhu
Craft knife
3 to 4 pieces of marble contact paper, depending on the size of your can
How to Make Your Marble Planters:
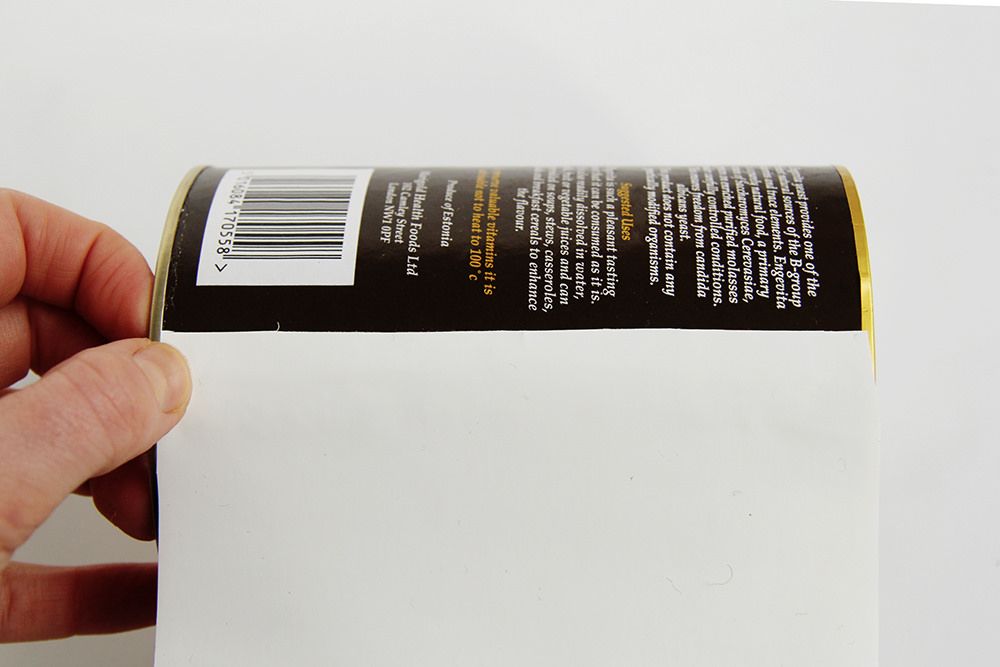
1. Measure the length and diameter of your cylindrical packaging and add 2 centimeters to both measurements.
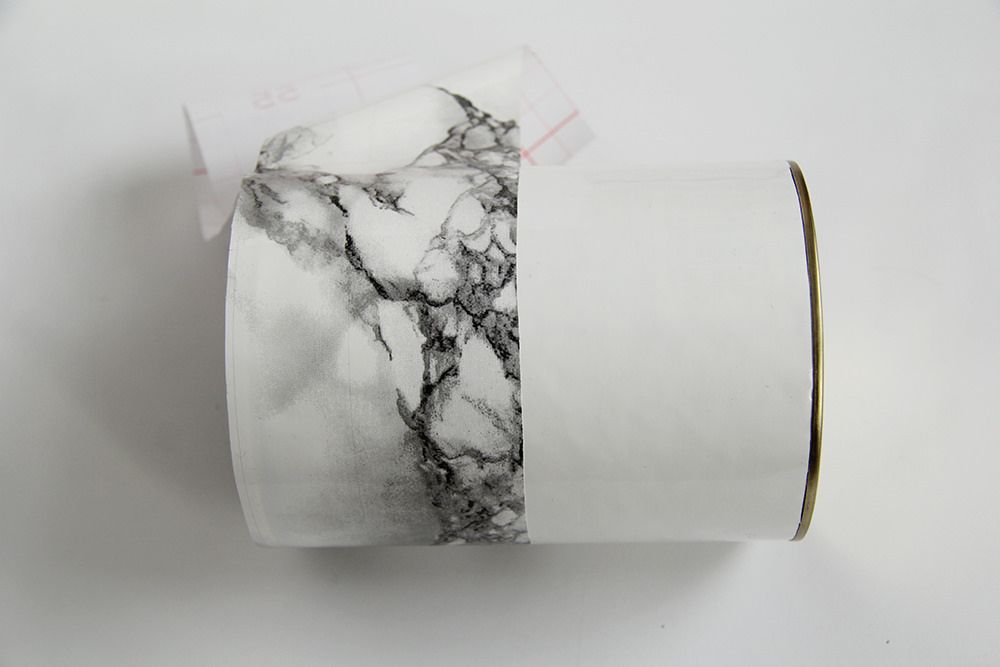
2. Peel off the back of the contact paper and carefully stick it to the packaging, slowly working your way around and removing air bubbles as you go. Pull the paper tight as you wrap it around the tube -- this will stop bubbles from forming.
3. Cut off the excess at each end with a craft knife.
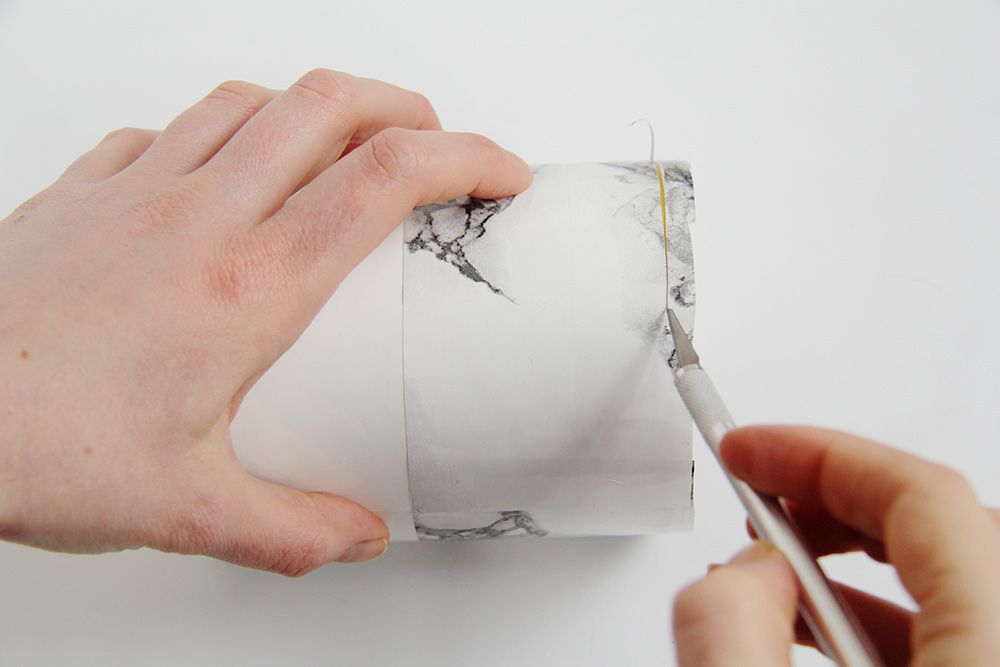
4. If you like, create blocks of contact paper for variety: Using the straight edge of a spare sheet of contact paper, draw a really nice, crisp line around the ‘middle’ of the pot, and then follow it with your craft knife. Peel off just one half of the contact paper backing for a two-toned look. Experiment! You can draw this line at any point along the can to change the amount of marble on your planter.
5. Affix the lip of your styrofoam cup inside the can with strong glue, so it hangs from the top of the planter. The plastic will be able to hold the water well.
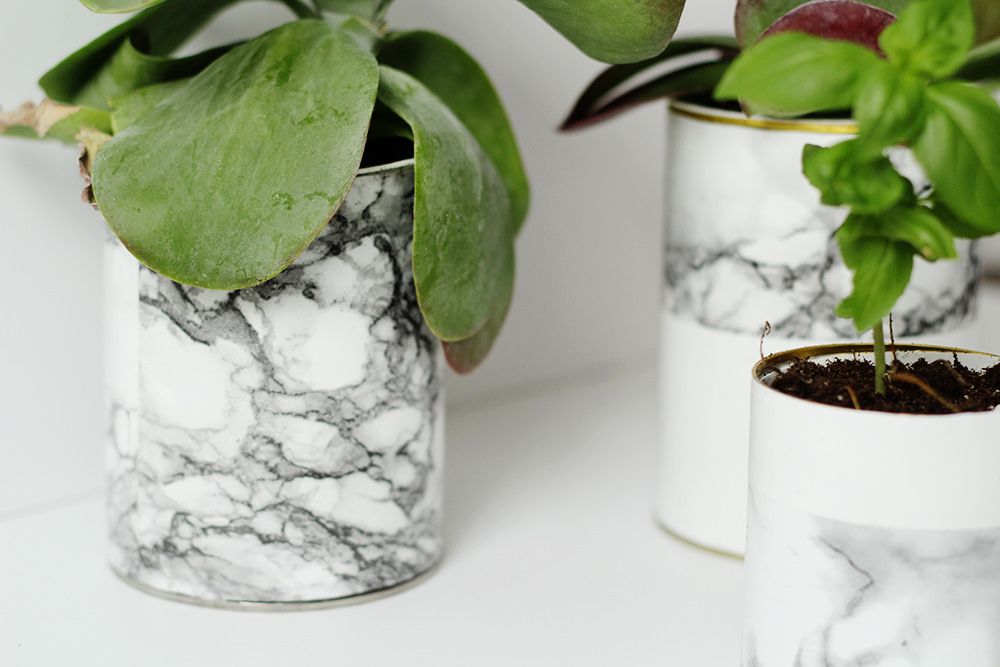
6. Voila! Only grow plants that don’t need drainage in these pots. Succulents are perfect and massively fashionable right now. Win!
What other DIYs do you love that upcycle empty cans? Are there other crafts you'd like to see here? Tell us in the comments and tag your favorites on instagram with #F52home.
Photos by Francesca Stone

It's here: Our game-changing guide to everyone's favorite room in the house. Your Do-Anything Kitchen gathers the smartest ideas and savviest tricks—from our community, test kitchen, and cooks we love—to help transform your space into its best self.
Grab your copyWritten by: Francesca Stone
Popular on Food52
4 Comments
Raquel
www.raquelmanuela.com
See what other Food52 readers are saying.