Bake It Up a Notch
How to Master Pâte à Choux (For Éclairs, Gougeres & Cute Little Cream Puffs)
Six ingredients, a fancy French name, and the promise of great pastries.
This original article was written to detail the process of specifically making crullers, a fried pâte à choux based pastry. For the February episode of Bake it Up a Notch, we took a deep dive into all things pâte à choux, and I wanted to update the article to discuss the broader scope of this process—one of my favorite pastry building blocks and baking standbys.
–
Pâte à choux should be on your “to bake” list. This classic pastry dough/batter hybrid is incredibly versatile: It’s the foundation for tasty baked goods like éclairs, cream puffs, and gougeres. It can also be fried into light, crisp, and golden pastries like crullers or churros. But unlike many recipes with fancy French names, it’s also fantastically achievable. The ingredient list is short, the procedure is relatively quick and can be pulled off without a lot of special equipment (though some comes in handy, if you’ve got it). Best of all, the method is easy to master once you understand the basics.
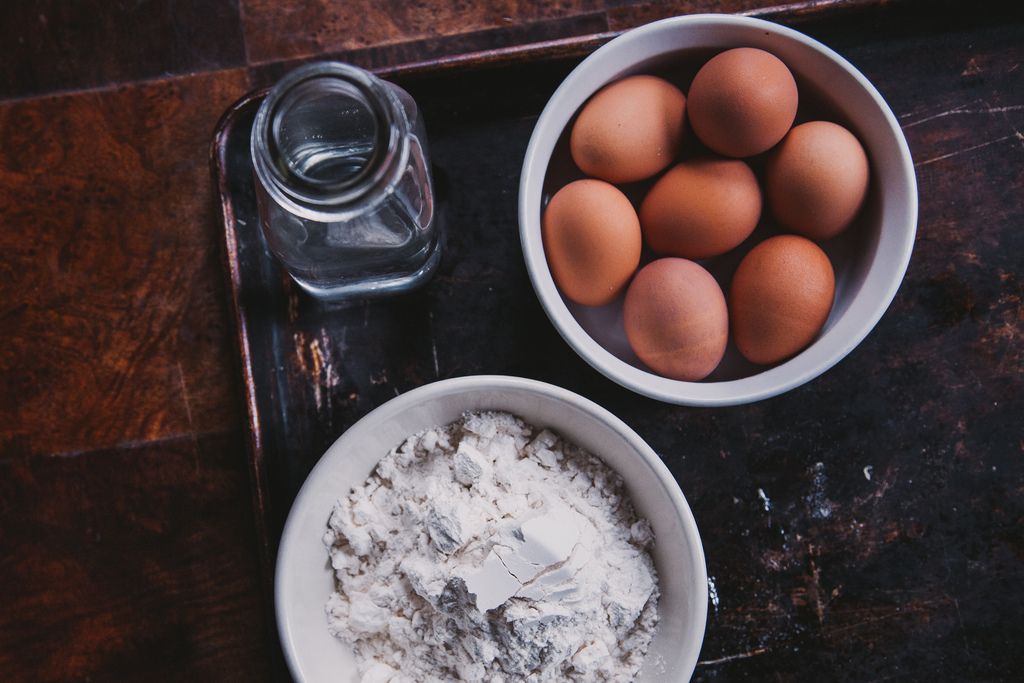
1. The ingredients.
Here’s the good news: There aren’t a lot of them. You’ll need a liquid (typically water and/or milk), butter, flour, salt, and eggs. With that being said, several of these ingredients have a few variables to consider.
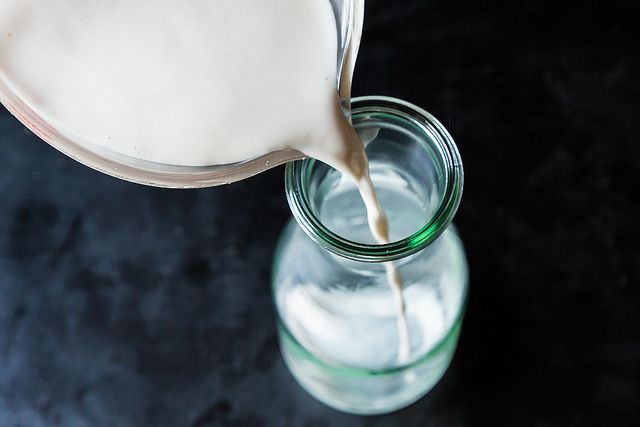
The first debate in pâte à choux world: Water or milk? Some folks swear that milk is the way to go. Others say don’t waste milk—water does just fine. I’ve always used 50/50, so I’m pretty much toeing a neutral line on this argument. Essentially, the only real difference is that the additional fats, sugars, and proteins in the milk can promote more (and more even) browning of the choux when it’s baked.
I like the browning results, but I also like how crispy choux products made with water are, which is why I opt for a combination—but water alone definitely works. Basically, if you’ve got enough milk in your fridge to spare some, I’d recommend using it. But if you’ve only got enough for two cups of morning coffee, skip it—your choux certainly won’t suffer.
I like the browning results, but I also like how crispy choux products made with water are, which is why I opt for a combination. But water alone definitely works. Basically, if you’ve got enough milk in your fridge to spare some, I’d recommend using it. But if you’ve only got enough for two cups of morning coffee, skip it—your choux won’t suffer.
The second ingredient worth weighing in on is the type of flour to use. Many recipes call for all-purpose flour, which works great. But some recipes (including mine) call for bread flour. I use it for a few reasons. For one thing, the higher protein levels in bread flour help give the choux more structure, helping to produce an ideal rise and crispness. These higher protein levels also play a role in moisture absorption during the cooking process.
Generally speaking, the higher the protein content in the flour, the more moisture it will absorb; and the more moisture absorption in the batter, the more we’re able to ensure a quick, even cooking process when making choux. That said, I mentioned how flexible this recipe is; if you’ve only got all-purpose flour, still feel free to choux away! You can use it in equal measure, but just take care to check the final consistency well (more on that later).

The last ingredient is possibly the most important to the equation: the eggs. No matter how precisely you follow a recipe for pâte à choux, the eggs are the most delicate and finicky part. How many you need can—and will—vary depending on how much moisture loss occurs during the cooking process, as well as the size of the eggs themselves. As I often suggest when baking, the most accurate way to measure a recipe of this sort is to scale it out using weight (ideally grams). But just plan on having an extra egg or two on hand when you’re mixing the batter to help you adjust the consistency of the batter, if needed.
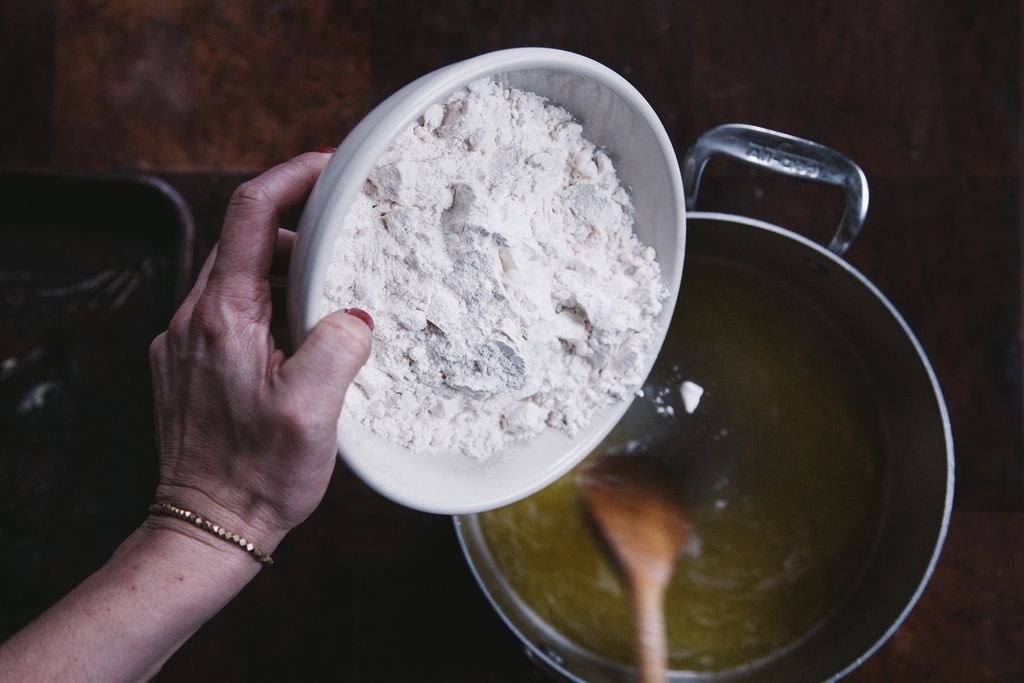
2. Cooking.
The first step of preparing pâte à choux is the making of the panade on the stovetop. Think of the panade like a sort of pastry roux: It’s the base of the dough, to which eggs are added to in the next step.
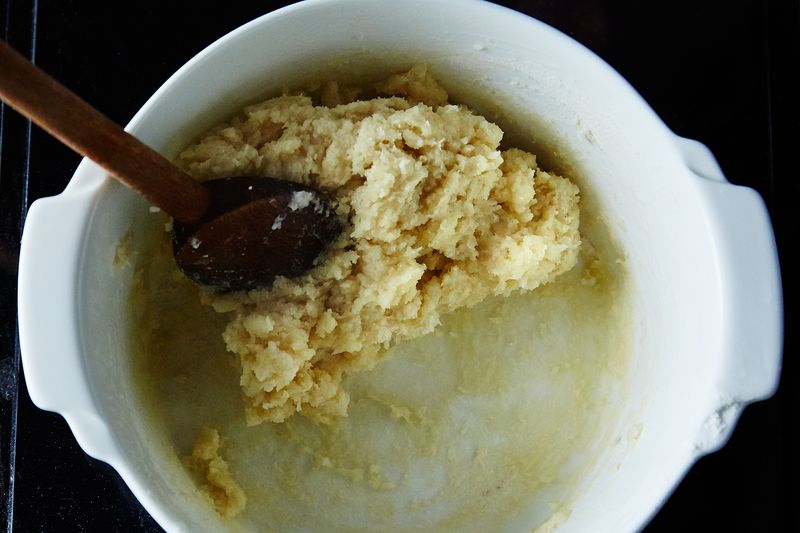
In a medium pot (you’ll want to leave room to allow yourself some vigorous stirring space), bring the milk and/or water, butter, and salt to a boil. I opt to use a pretty gentle heat here—it’s important to avoid scalding. Stick to medium or medium-low and just know it may take a little while. Once you’ve brought your liquid and fat mixture to a boil, add your flour all at once (side note: I find the action of dumping the flour into a pot of boiling liquid, stamping it down, and watching it turn into a paste incredibly satisfying). This process sets the stage for everything that is to follow. Reduce the heat to low and cook, stirring constantly, until the mixture forms a ball around your spoon.
As we alluded to above, pâte à choux contains a proportionately high level of moisture, much like popover or pancake batter. But unlike those products, baked goods made with pâte à choux have a crisp exterior and a firm structure because of the unique nature of this moisture absorption and a two-step cooking process which activates different properties in the batter.
The first step of cooking gelatinizes the starches in the batter, meaning the starch granules take in water at a higher rate than if they weren’t heated, and the structure of the granules essentially disintegrate and become pliable and flexible. Then, during the second cooking (that is, baking for pastries like éclairs or cream puffs; frying for things like crullers), the moisture is released in the form of steam, which creates one large air bubble. That bubble expands and expands until the structure of the pastry sets, leaving the interior hollow.
So at this stage of the process, the paste will be slightly sticky to the touch, but will resemble more of a dough than a batter. In addition to the formation of the dough ball, look for a film to form at the bottom of the pan—this is the sign that the starches in the flour have absorbed the liquid effectively and have gelatinized.
3. Mixing.
In the next steps of the pâte à choux process, the eggs are incorporated into the base mixture. I like to transfer the paste to the bowl of an electric mixer fitted with the paddle attachment. It is absolutely possible, however, to mix your pâte à choux by hand. If you opt to do so, I suggest transferring it to a heat-safe bowl to help it start to cool slightly before you start adding the eggs. Then, use a wooden spoon or silicone spatula to beat in the eggs by hand.
Some recipes will tell you to let the paste cool for five minutes or more so that you don’t scramble the eggs when you add them. I’ve never followed this rule, and word (from my Instagram followers) shows I’m not alone! I turn my mixer on low speed and mix it for about one minute to help cool the dough down a little before introducing the eggs; I start by adding them in a thin stream to help bring things to a more regulated temperature. But if you’re scared, let the pâte à choux chill out in the bowl for a few minutes or so before you begin the next step.
Here’s how you do it: Crack the eggs into a container with a spout (like a liquid measuring cup), but keep a couple extra eggs nearby, uncracked. With the mixer running, pour the eggs into the mixer in a few additions, each time adding the liquid in a slow, steady stream, and mixing on medium speed until fully combined. Don’t be tempted to add the eggs too quickly—think of this process as making an emulsion. The egg yolk helps emulsify the fat (butter) with the gelatinized flour to form one smooth dough. The protein in the eggs also promotes stability, and the albumen in the whites promotes drying out come bake time (i.e. crisper choux)!
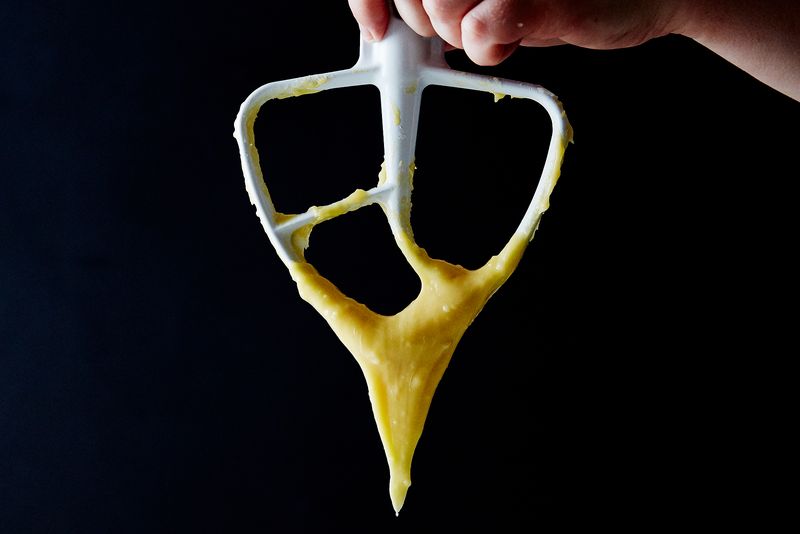
Once the eggs have been fully incorporated, stop the mixer to check the consistency of the pâte à choux. Dip the paddle into the choux and lift it up—it should form a V shape, eventually breaking off from the batter in the bowl, hanging off the paddle and holding the V. If it breaks off too quickly or is just generally stiff, you need to add more eggs. Start with one, whisking it and gradually adding it in the same fashion as before, then test for the V again. This will probably be enough, but if not, use part of or the whole second egg. Hopefully this trick will ensure you don’t end up with a too-dry choux (which is hard to pipe and also won’t brown or crisp as nicely, and may even be dense instead of light and hollow).
Why is this extra egg sometimes needed? Several factors contribute to the texture of the choux each time you make it: How long the liquid takes to come to a boil on the stovetop, and how much evaporation occurs. How quickly the mixture cooks on the stovetop once the flour is added. Even environmental concerns like cold, dry ambient temperature or increased humidity can play a role. Looking for the right visual cue in that final texture allows you to easily adjust the consistency so you get the right texture every time.
4. Piping.
Most pâte à choux recipes call for piping the choux into its final shape before baking or frying. This is one of the trickier parts of working with pâte à choux for most folks—but it’s nothing to fear. Start by checking out my Piping 101 and Pâte à Choux episodes of Bake it Up a Notch for some guidance that will have you piping like a pro in no time. I think the biggest fear for most people with piping is that it won’t look “right” or “even,” but practice really does make the difference with skills like these!
In the case of pâte à choux pastries, proper piping will lead to the correct shape, as well as even and uniform rise while baking. Itcan also contribute to the evenness of finished results, especially in baked preparations. Whatever you’re making, be it crullers, cream puffs, or éclairs, aim for evenness in shape, size, and placement on the sheet tray. You can even draw guides (like evenly spaced lines for éclairs or tracing circles for cream puffs) on the parchment paper, then flip the paper over on the baking sheet. You'll be able to see the guides but no ink comes in contact with the choux. It also helps if the parchment paper is adhered to the baking sheet; do this by putting a small amount of choux at the corners of the parchment to weigh it down. This way, the paper doesn’t move around as you pipe.
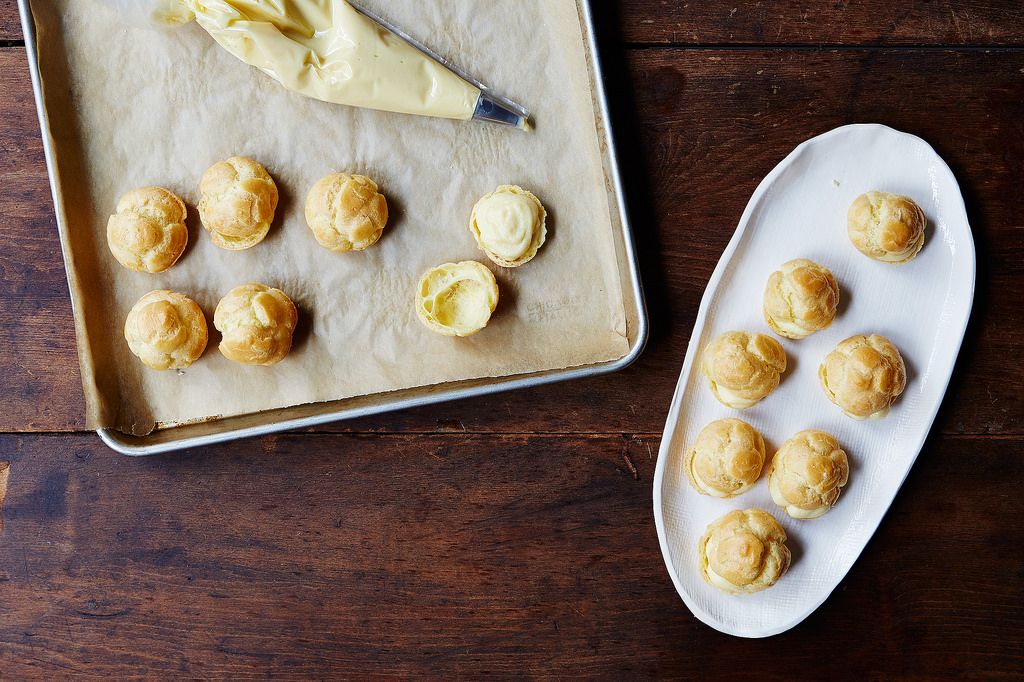
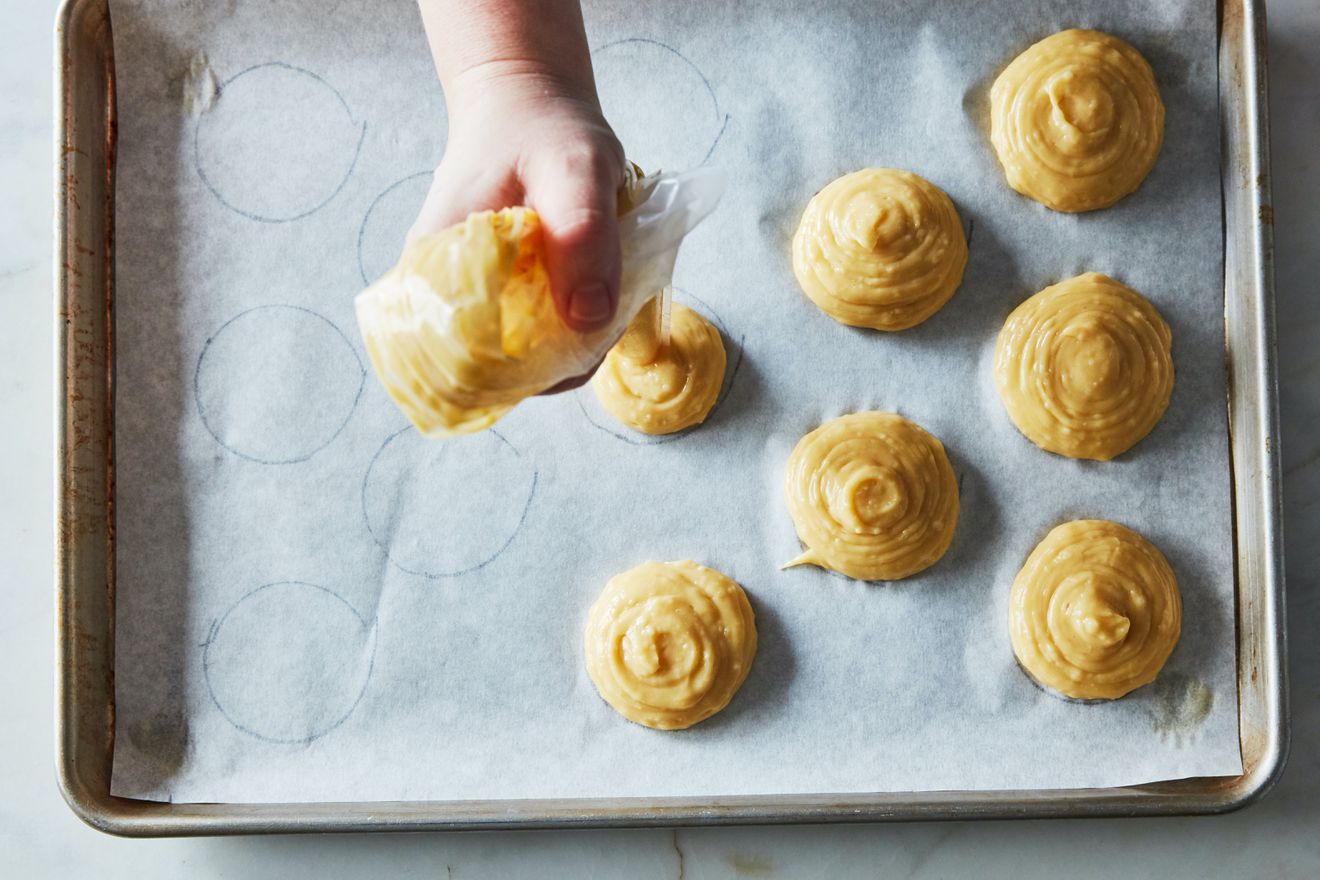
Cream Puffs
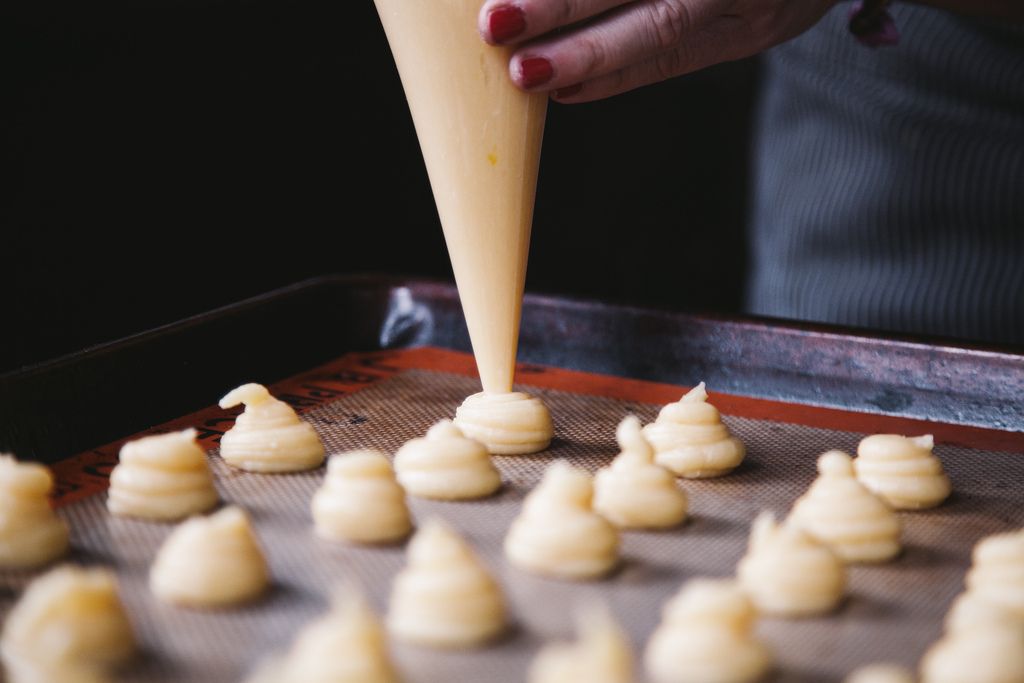
Cream puffs are piped as mounds of pâte à choux. You can use a round pastry tip or just the cut opening of the pastry bag. Hold the bag perpendicular to the baking sheet, and begin to apply pressure; the idea is for the batter to flow out over the initial point of contact, creating a rounded shape. Continue to apply pressure until you achieve the size you were going for, then stop applying pressure. Use a flick of the wrist in a quick circular motion to help break the connection from the pastry tip to the cream puff.
Éclairs
Éclairs are piped as thick lines of pâte à choux. I usually like to pipe éclairs four inches long, so before I start, I draw straight lines four inches apart on my parchment paper to serve as guides. When you’re piping, move in a line between the guides, applying steady pressure as you go and taking care to keep the shape as straight as possible. When you reach the size you’re aiming for, stop applying pressure to the bag, and move the tip quickly in the opposite direction than which you were originally piping. This will help break the connection between the tip and the éclair.
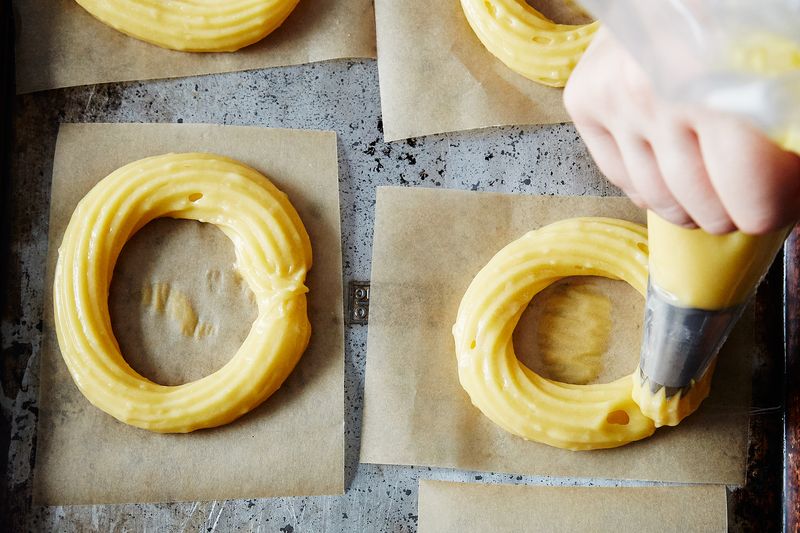
Crullers
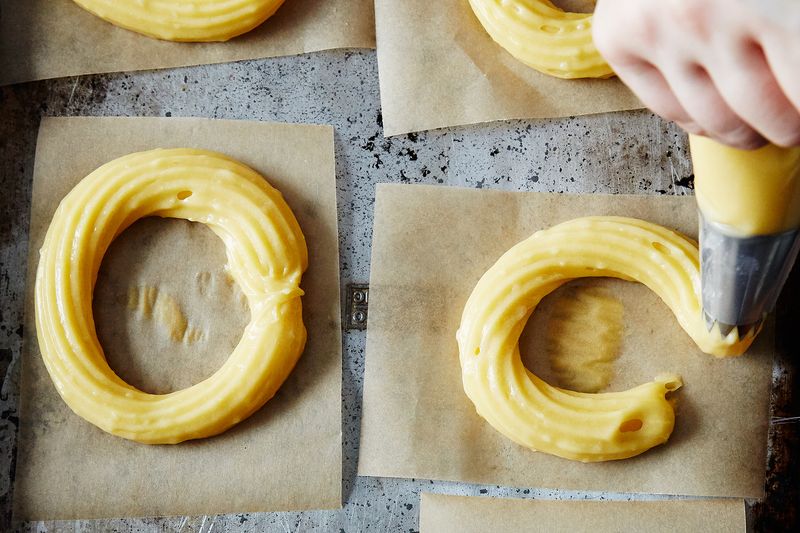
To pipe crullers, you’ll want to use a star tip inside a pastry bag to make the signature ridges. Cut three-inch squares of parchment paper and pipe the dough onto each square in a round (you can trace circles onto the bottom of the parchment as a guide if you want). Pipe the choux into a round on the parchment, aiming for a pretty wide round with a hole in the center. Stop squeezing just before you reach the beginning of the circle and let the batter remaining in the tip fall to the circle, finishing the rounded shape.
Fixing Imperfections
It is possible to smooth out any imperfections on a pâte à choux pastry, like a little excess batter mounded on top of a cream puff, or an air bubble on the edge of an éclair. Just dip your finger in cool water and use it to smooth the imperfection before baking.
5. Resting.
This is a step I learned in pastry school that I find is worthwhile—but it is totally optional! Allowing the piped pâte à choux to rest before baking allows a slight skin to form on the surface of the raw pastry, and hence helps with a more even rise during baking.
If you’re baking your pâte à choux, you can just let it rest for the time it takes the oven to preheat: ten-ish minutes, and up to about 30 minutes max. When frying pâte à choux, the rest has an additional purpose of helping the pastry keep its shape better, and the help of chilling or freezing might be used. For my cruller recipe, for example, I like to freeze the piped crullers on the parchment before frying, meaning much more pronounced signature ridges!
6. Baking or frying.
Baking (Éclairs, Cream Puffs, Gougeres, etc.)
Pâte à choux is typically baked at a higher temperature, from 375 to 400°F. This helps the pastries rise quickly, creating a big steam bubble in the center of the pastry, which will make it hollow inside.Typically, the choux is egg washed before baking. The main goal is to bake the pastries until they are evenly golden brown in color, the structure is set, and the pastry is very crisp.
But for extra-crispy, extra-special choux pastries, here’s a trick from my favorite instructor in pastry school: Bake the pâte à choux until it just begins to turn lightly golden and the structure is set, but the exterior is not fully browned or crisp—five to ten minutes before the end of the final bake time (shorter for bite-size treats like gougeres, longer for larger pastries). Remove the sheet pans from the oven and allow the pastries to cool on the baking sheet to room temperature. Then, return the cooled pâte à choux to the oven and bake until fully golden and very crisp, finishing out the expected bake time in the recipe.
For some reason, this process makes the pâte à choux brown very evenly all over—the same color on the sides as on the tippity top—like, fantastically, perfectly evenly. I don’t know why or how (but oh, how I want to—food scientists out there, lend me an ear!). But I know it works. For the record, pâte à choux will still be delicious and look pretty good if you skip this step. But the rewards of super-crispy, super-brown pastries are absolutely minimal extra effort.
One other thing to keep in mind when baking pâte à choux is venting the baked pastries to keep them crisp. When baking is finished, use the tip of a paring knife to cut a vent in the side or base of the pastry to allow steam to vent out as the pastry cools. This helps to ensure extra crispness as the last of the steam hiding inside the pastry will escape through the vent.
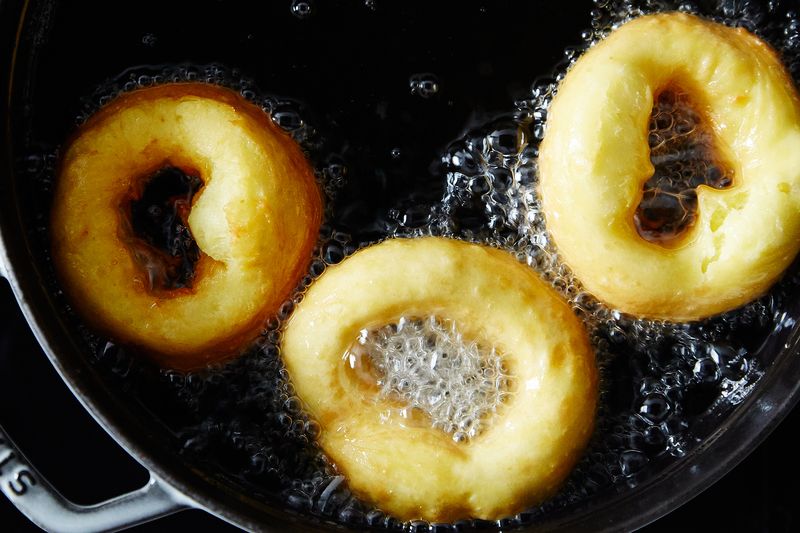
Frying (Crullers, Churros, Etc.)
Fry crullers in 350 to 360°F oil. If you’ve frozen them first, you can remove them from the parchment. If you haven’t, leave the parchment on—the crullers will release from it as soon as the structure sets and then you can just pull the paper out of the oil.
You'll want to fry these pastries until very golden brown, between 3 and 6 minutes per side, depending on the size of the pastry. When fried properly, your crullers will have a lightly crisp exterior and a soft, slightly hollow interior; if you under-fry them, they’ll be doughy instead of crisp. Once they’re totally cooked through, transfer them to a wire rack set on a sheet tray lined with absorbent paper towels, and allow to cool completely before glazing and digging in.
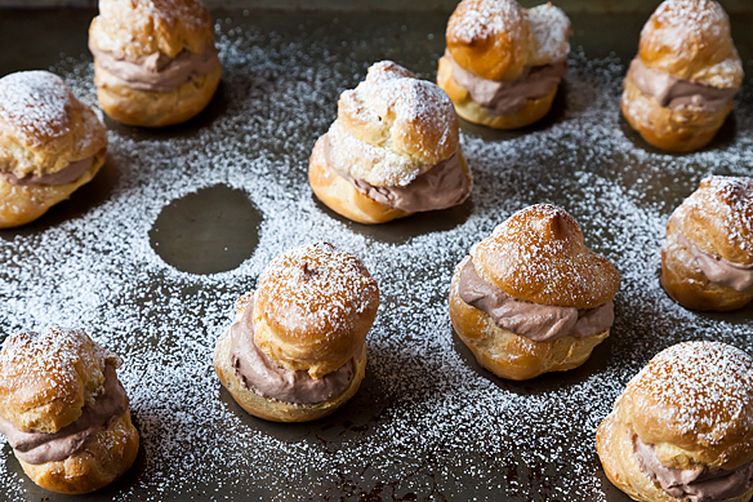
7. Filling & finishing.
Pâte à choux pastries can be finished with anything from pearl sugar, sanding sugar, or powdered sugar to a variety of glazes and toppings. For filled pastries, you’ll typically find custard or cream based fillings inside—things like pastry cream, whipped cream, or even a combination of the two. Other fillings, like fruit, jam, ganache, caramel, and the like can also be used.
Filled pâte à choux pastries are allowed to cool completely before the filling is added. The easiest way to fill a pâte à choux pastry like an éclair or cream puff is to cut it in half horizontally, then spoon or pipe the filling inside. The leveled-up way is to pipe the filling in through an entry point - often on the base or side of the pastry. I typically use a skewer, paring knife, or the handle of a small spoon to make a hole in the center of the bottom of the pastry or on the side.
When you're ready to fill, use a round piping tip or a Bismarck tip—a long pastry tip specifically made for filling pastries—to insert the filling into the choux. Since you can’t really see the filling inside, the best way to tell if it’s full enough is to feel its heft; the filled pastry should feel significantly heavier than when it was empty. If you fill too much, the filling may burst out of a weak/thin spot in the pastry—so keep a close eye!
8. Serving.
Most pâte à choux pastries are best the same day they are made—especially fried or filled versions. It is possible to keep the pâte à choux plain (fully baked but unfilled and ungarnished) and refresh it to re-crisp the pastry. You can bake your pastries and store them in an airtight container at room temperature for up to 48 hours, or freeze them for up to three months. Then, when you’re ready to serve them, place the pastries on a parchment-lined baking sheet and re-crisp them in a 350°F oven to allow them to dry out before filling and serving. For most pastries, this should take five to ten minutes (less for smaller pastries, longer for larger ones).
Don't Choux Want to Make These Recipes?
Pâte à Choux
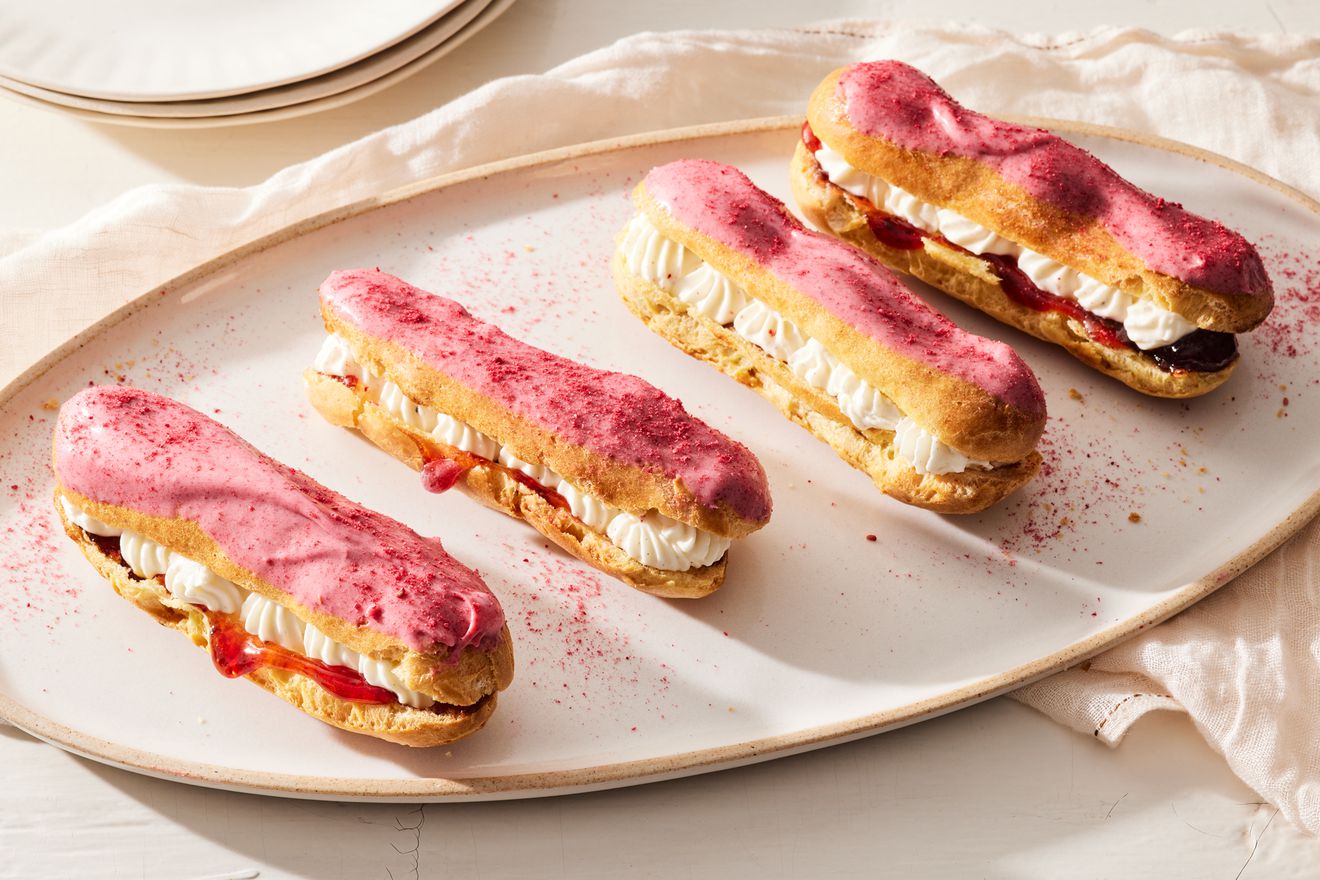
Strawberries & Cream Éclairs
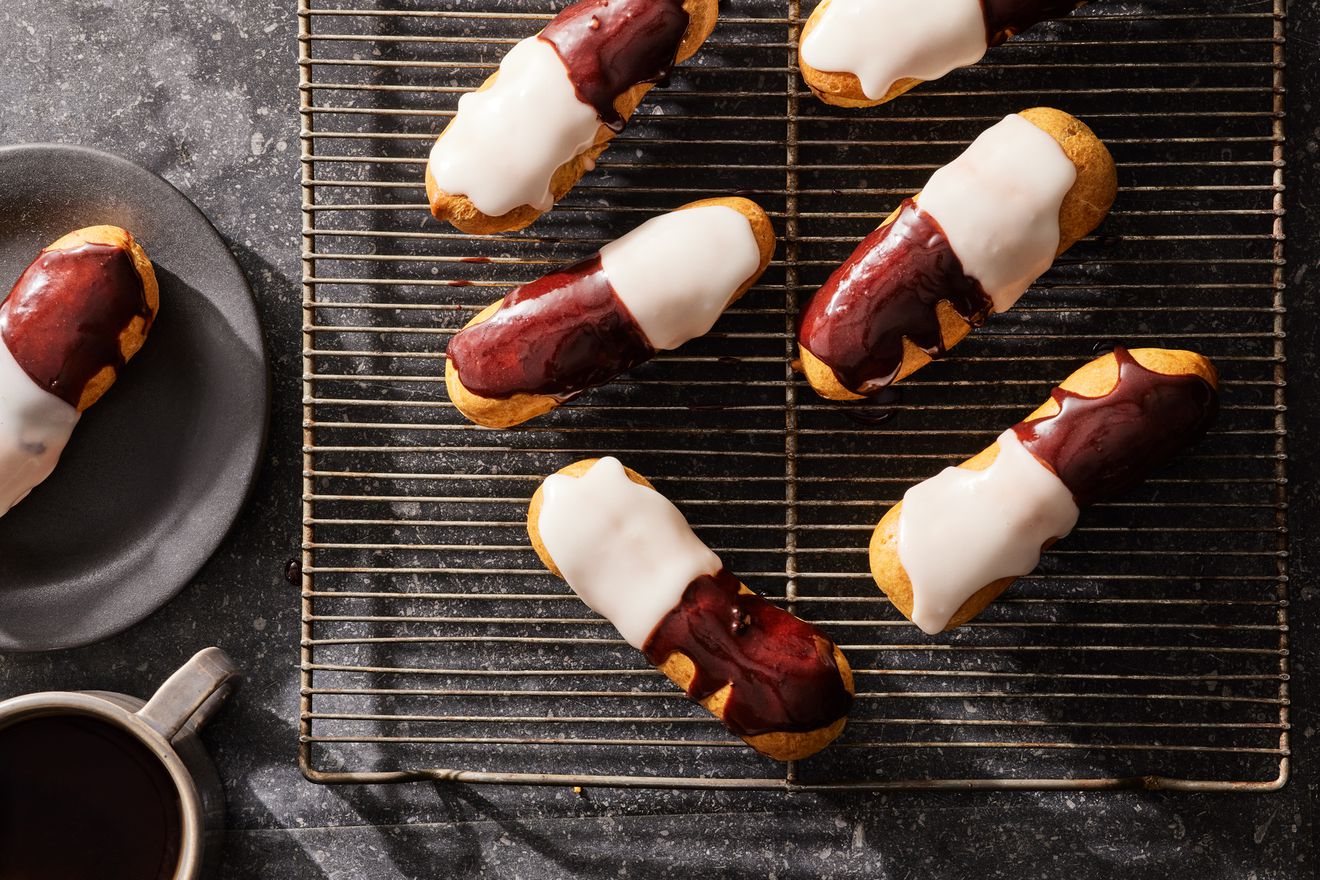
Black & White Éclairs
Berry-Glazed Cream Puffs

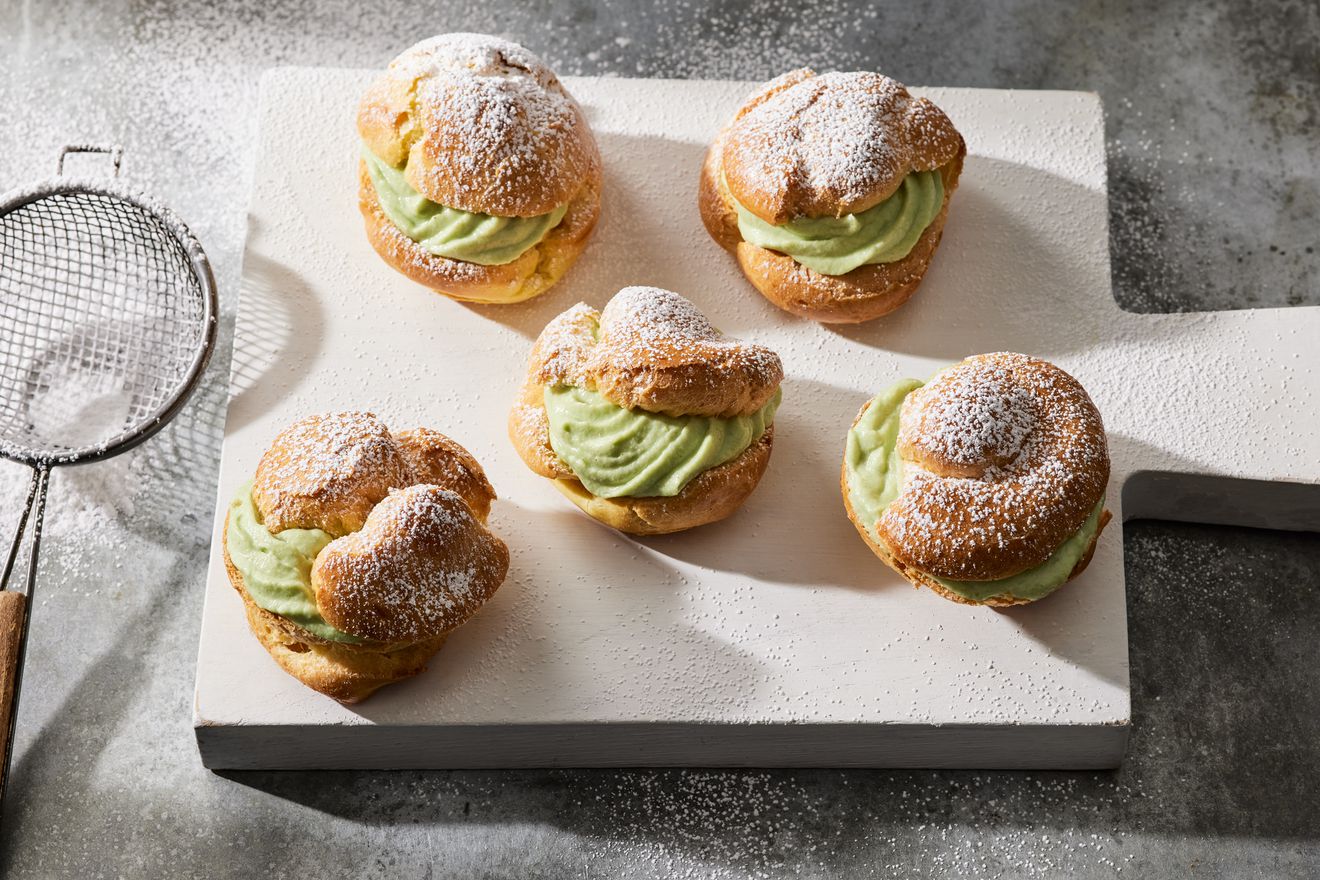
Pistachio Cream Puffs
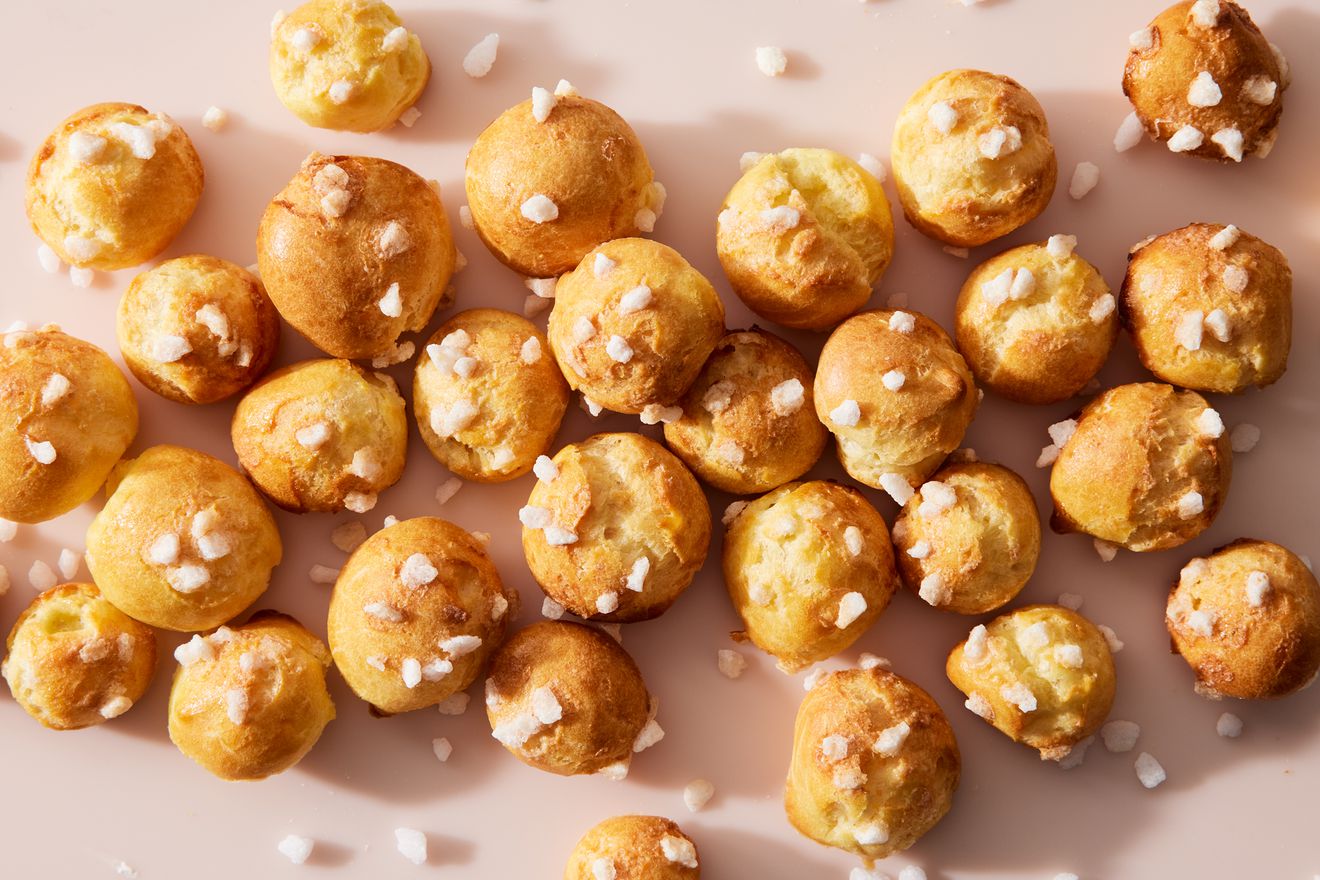
Chouquettes
Written by: Erin Jeanne McDowell
Popular on Food52
15 Comments
Love her!
I did once make crullers and had a problem with them remaining crispy outside after taking out of the fryer just 10mins. I guess I should try freezing them this time around like you said.
See what other Food52 readers are saying.