Kitchen Confidence

Renovating the Food52 Kitchen

August 15, 2012

After photo of renovated kitchen

Just as my husband’s and my bank account was at low tide last fall, I decided it would be a good time to renovate our 13-year-old kitchen. If we were going to lose everything, at least it would look nice.

The kitchen had been a workhorse. When we moved to our Brooklyn Heights apartment in 2002, it had recently been gut-renovated by the previous owners, who gave it a perfect layout and larded it with status appliances – a 6-burner Viking stove, a Miele dishwasher, and a Sub-Zero fridge. All it lacked was an abundance of cabinet space, so we had a pantry custom built in the adjacent dining room. In the 10 years that followed, I gave the appliances a serious workout. Merrill and I tested 1,400 recipes in it for one of my books, and Food52 has used the kitchen for weekly photo shoots since we launched the site.

Shop the Story

Old kitchen

Old Kitchen sink

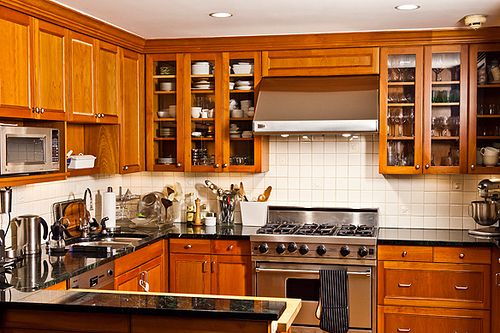
The kitchen comfortably fit 2 cooks, even 3, and I generally liked its bones. But it had been done to full 1990s luxury splendor, which meant cherry wood and shiny green marble. Did I mention that I hate cherry wood? Almost worse than I loathe tile backsplashes. Especially tile with fruit shapes on it. And shiny marble countertops. Unless they’re white Carrera marble, and even then I’d want to lose the gloss. No matter what tricks our wonderful Food52 photographers pulled, the kitchen looked orange, and so did the food.

Being in the kitchen felt like one of those anxiety dreams where I was forced to go to a great party wearing big hair and a boxy 1980s power suit. Last fall, I told my husband that if we were never going to be able to move/upgrade/afford a car, we should at least improve -- to the extent we could afford it -- the place where I spend the most time, the place that represented Food52, and what Merrill and I were building. So we ended up with that strange thing – a compromise, in the form of a reckless renovation.

It was also a great decision, one that made me wish I’d done all our previous renovations on the tightest possible budget. First, because you don’t make lazy decisions, get bitten by the-most-expensive-must-be-the-best bug, or buy everything at once.

Second, because you must work harder and more creatively to get the details done -- every little knob that you track down on sale, every fixture from a little-known shop in Brooklyn, feels like a triumph, and you appreciate the results so much more. I’ve never been this happy with a renovation.

But I needed help. I work around the clock. I have kids. And I’d grown so irrationally angry at the kitchen that I needed someone to help me filter the bile.

I couldn’t have done any of the work without Lithe Sebesta, a designer (and now friend) who, as luck would have it, was just getting her design business off the ground. She was the person several friends pointed to when I asked for help. They revered her off-kilter yet impeccable style and her knack for spotting under-priced design treasures. They said she would take our style into account while gently pruning and nudging objects into place. I told her we had absolutely no more than $15,000 to spend, including her fee. And then I told her this several more times. She didn’t flinch.

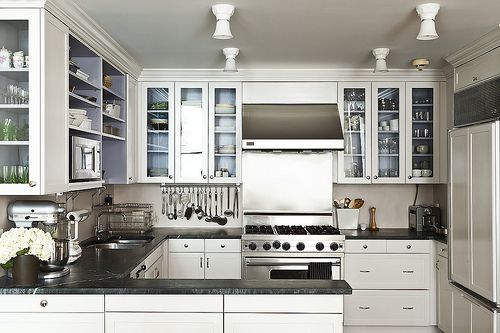
And so we got to work. Within a few months, I had not only a serene grey kitchen, I also had a refurbished and streamlined dining area, all for less than the budget. Here’s how we did it:

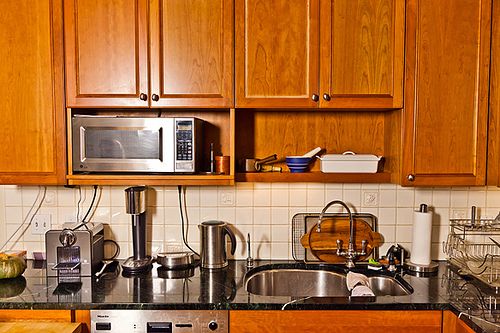
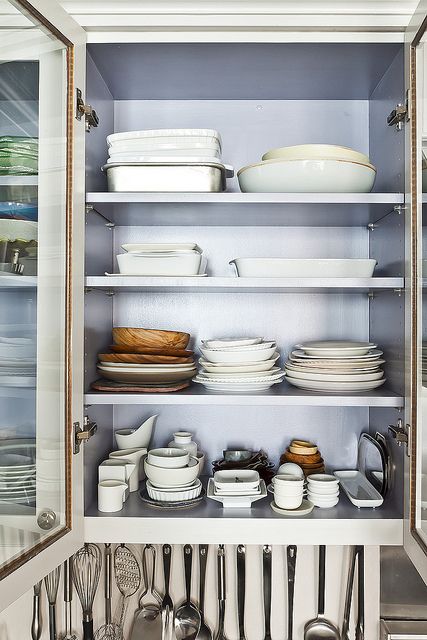
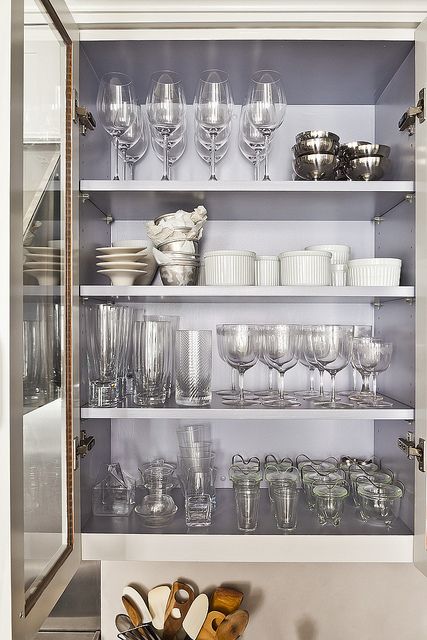
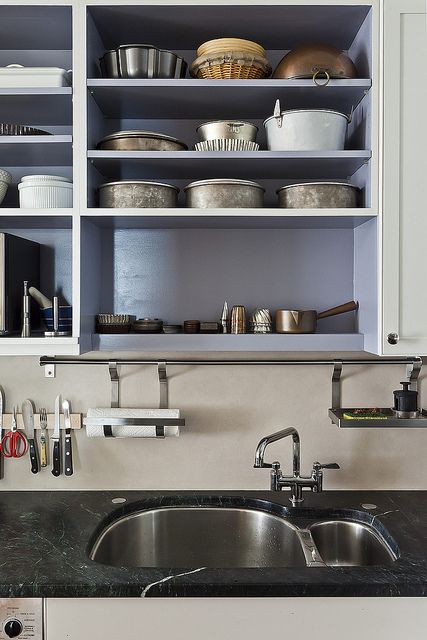
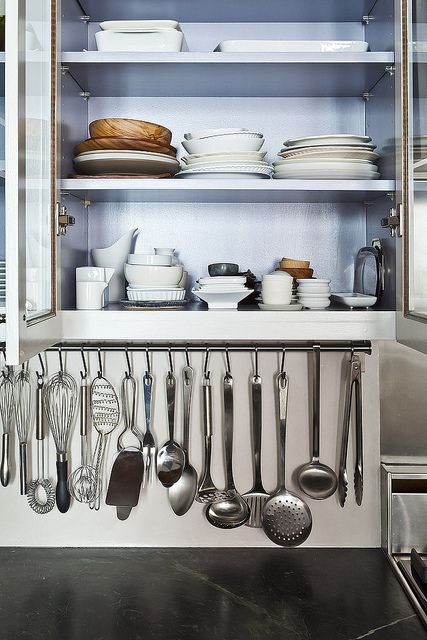
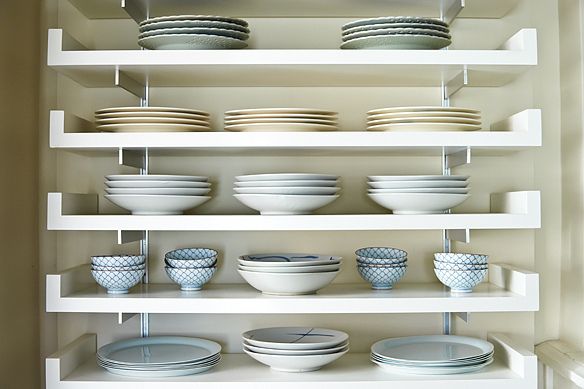
1. The bulk of the work was resurfacing, and the bulk of the expense was in painting and electrical work. Lithe and I removed the superfluous moldings on the cabinetry and painted it all pale grey. We also painted the interiors of the cabinets that had glass fronts a battleship grey so they’d appear like dioramas, perfect for highlighting glassware and all the little dishes we use at Food52 for props. And we removed some of the cabinet doors to expose my bakeware. I’m not one for fancy kitchens; my dream kitchen would feel very much like a workshop with open shelving and tools at the ready.

CabinetsCabinets

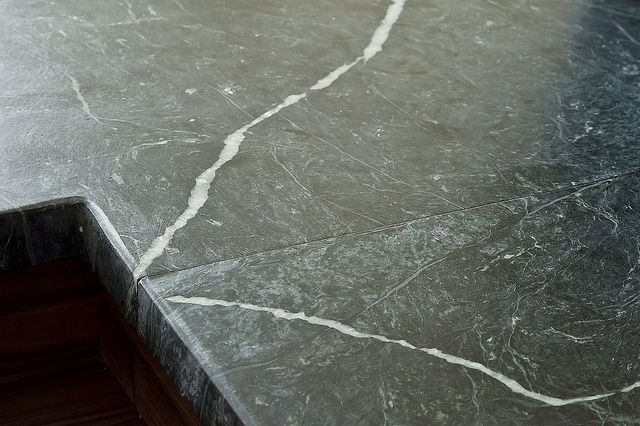
2. Replacing the marble countertop would have been onerous and expensive, so Lithe suggested we hone it to dull the shine and make it appear muted and lighter. Marble specialists do not want to hone marble without sealing it. The Israeli guy we hired tried to talk us out of it. He let us know we were in for a world of stains and suffering. But we heard none of it. I like neat paint jobs but I want marble to show its wear and tear. Bring on the oil spots and water rings!

Honed down countertop

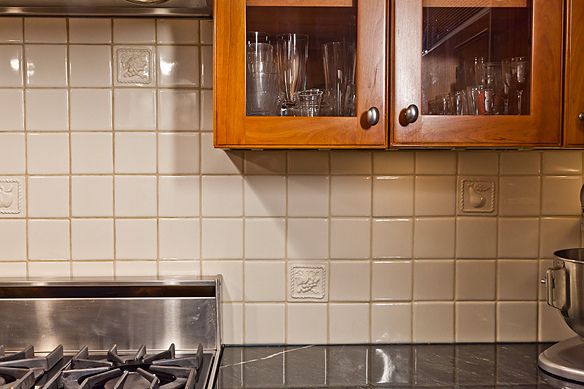
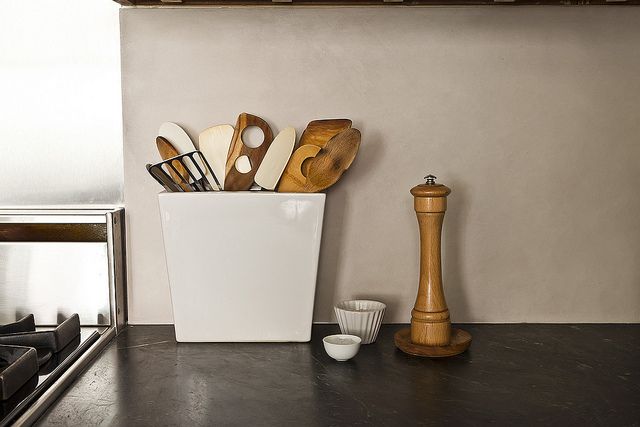
3. Replacing the tile backsplash would also have been prohibitive, so our contractor, Keith McAlpine Design, came up with an ingenious way to mask it with faux concrete-covered boards, which we matched to be in the same color family as the cabinets. Whoever guts the kitchen next will think we were cheapskates for just covering the tile, and we were!

 BacksplashSink area

New backsplash

4. We removed the recessed ceiling lights, whose light made everyone look like they had triangles for noses. In their place, Lithe found beautiful porcelain lights with glass bell shades, which were 40% off. We splurged on Edison bulbs.

Ceiling lights

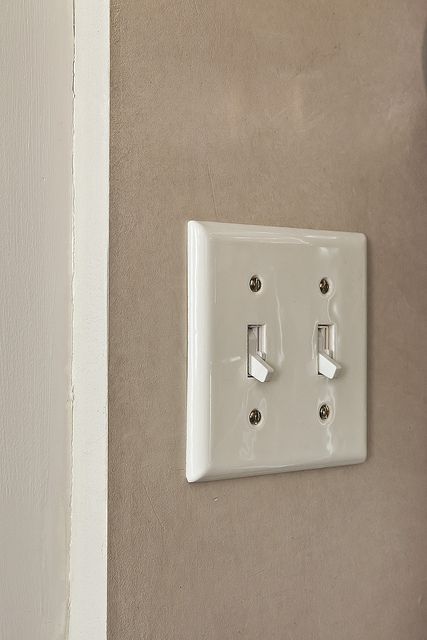
5. We bought the cabinetry hardware and ceramic switch plates at Rejuvenation and Schoolhouse Electric & Supply Co., which produce quality knobs and drawer pulls at Home Depot prices.

Switchplate

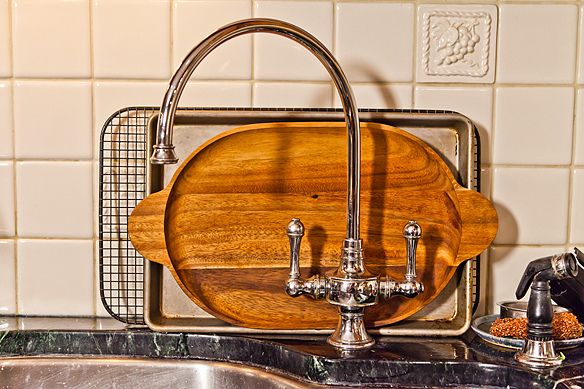
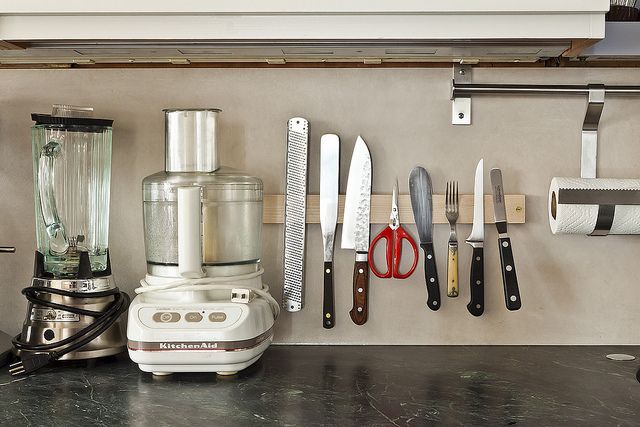
6. At IKEA, we rounded up a new faucet and utensil rails for over the sink and near the stove. Counters are for working, not for plopping your stuff; lifting up the paper towels, utensils and dish soap is key. And I ordered a magnetic knife strip from Michael Ruhlman (also available on OpenSky).

New sink area Utensil rack

Knife rack

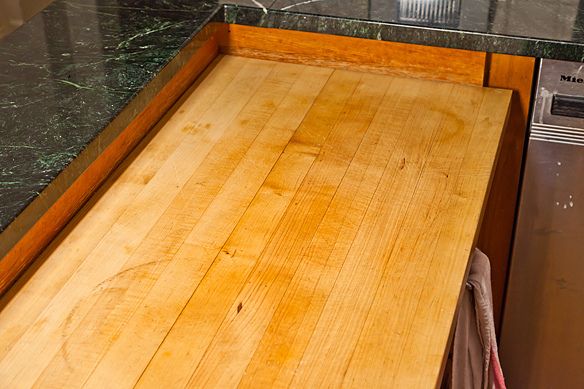
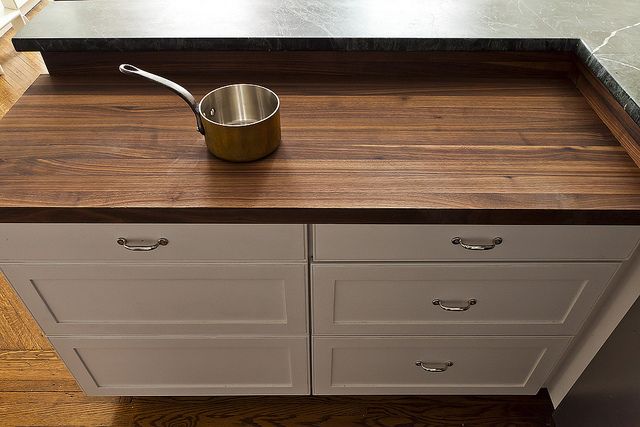
7. One of the design details I love most about the original kitchen is its low-height woodblock countertop. It’s perfect for chopping and has a pull-out garbage drawer beneath it so you can sweep vegetable trimmings and the like directly into the garbage. The old countertop was ash, which cast yellow light and took years off of our Food52 photographers’ lives. The new counter is American Black Walnut by John Boos, ordered online from Butcher Block Co., and installed by Blackbird Designs.

Old butcherblock countertop

Butcherblock

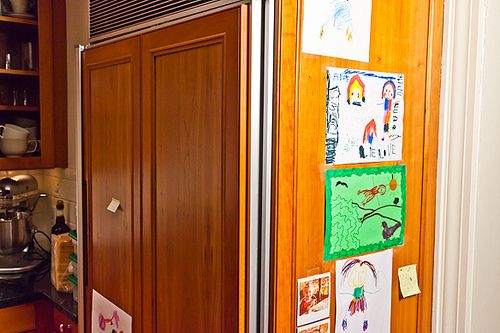
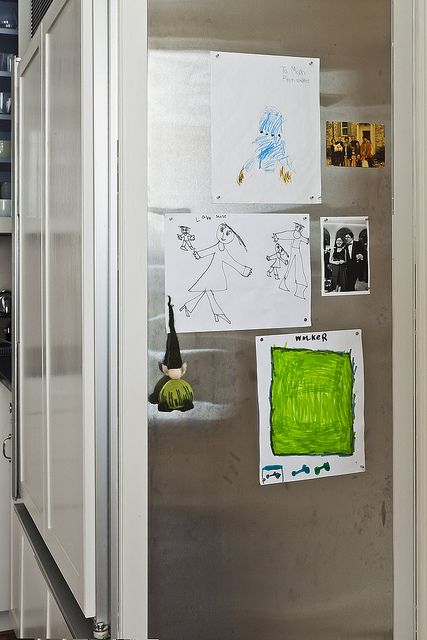
8. We painted our refrigerator’s wooden front and, at Lithe’s suggestion, added a steel strip on the side so there would be a place to pin our kids’ drawings and photos with magnets.

Fridge door New fridge door

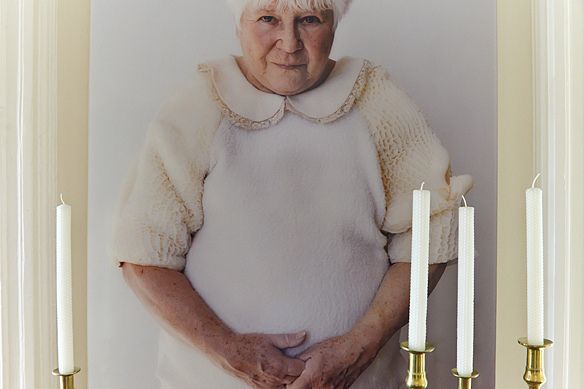
9. The only art in our dining room is a large photo of an old woman wearing a shirt made with tripe arms (yes, tripe; it’s a long story). Lithe spotted a lamp at Artecnica that echoed the tripe’s honeycomb pattern. The Grand Trianon lamp is made of Tyvek, so it was just $180.

Dining room

Cozy corner

Mantel -- a few of my favorite things

Plate shelves

Tripe Lady

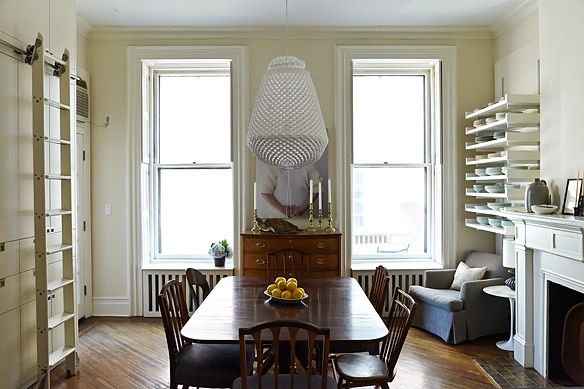
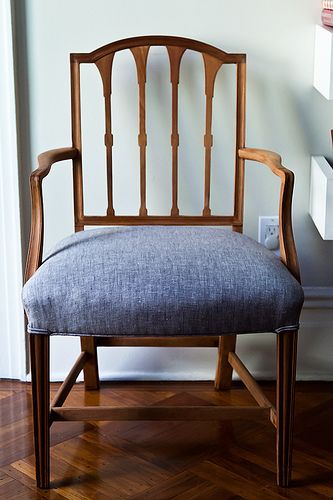
10. Our 100-year-old mahogany dining table and chairs were handed down from my husband’s grandparents. Lovely and charming as they were, they were also dark as night. We left the tabletop as is and had the chairs sanded down and recovered them with suiting fabric from Lithe’s secret source in the Garment District. Suddenly their Victorian look transformed to something more Scandinavian. Lithe then mixed the resurrected chairs with other worn wood chairs from around the apartment so the feel was less pre-fab dining set and more vintage ensemble.

Refurbished chair

11. In return for the mess and stress and fiscal peril of renovation, all my sweet husband asked for was a toaster. And so I got him this one made by Alessi.


Alessi toaste

Photos (except the toaster) by James Ransom

Order now

A New Way to Dinner, co-authored by Food52's founders Amanda Hesser and Merrill Stubbs, is an indispensable playbook for stress-free meal-planning (hint: cook foundational dishes on the weekend and mix and match ‘em through the week).

Order now

See what other Food52 readers are saying.

  • Yogita Singh
    Yogita Singh
  • Marian Camery
    Marian Camery
  • Sarag
    Sarag
  • felicita
    felicita
  • Kristen
    Kristen
Amanda Hesser

Written by: Amanda Hesser

Before starting Food52 with Merrill, I was a food writer and editor at the New York Times. I've written several books, including "Cooking for Mr. Latte" and "The Essential New York Times Cookbook." I played myself in "Julie & Julia" -- hope you didn't blink, or you may have missed the scene! I live in Brooklyn with my husband, Tad, and twins, Walker and Addison.

102 Comments

Yogita S. April 21, 2021
I love the kitchen and love that it was done on a budget. We follow you on instagram and by 'we', I mean my 12 & 10-year-old and I. I would love to put in a small butcher block counter and do away with the cutting boards i am constantly having to replace. my question is how do you keep it clean and bacteria-free?
 
Marian C. November 2, 2015
Thank you so very much!!!!
 
Marian C. October 31, 2015
could you send me contact for stone contrators that honed the countertops in place plz? I want to do the same
Thanks!
 
Amanda H. November 2, 2015
Here you go: http://www.stoneguardco.com/
 
Sarag May 22, 2014
Wondering hw the faux concrete boards for back splash are holding up? How has cleaning them been? They are very pretty in these pictures.
 
Amanda H. May 22, 2014
They've worked out well -- they wipe easily and look like new!
 
felicita May 22, 2014
Excellent job. Glad to see you were able to recycle the cabinets and add special touches here and there. Enjoy your new kitchen and happy cooking, :-)
 
Amanda H. May 22, 2014
Thank you!
 
Kristen March 23, 2014
Hi Amanda,
What an inspiring post... I know this is from a while ago, but I'm wondering what color you painted the dining room walls. I'm searching for the perfect just-barely-off white. The one in your dining room is warm, but not too yellow. If you can recall what it's called, please let me know!
 
Amanda H. March 23, 2014
They're Benjamin Moore Linen White with Dove White trim (although it may be the other way around!). Hope this helps!
 
kelly D. March 1, 2014
All you did was attractive and useful but the one thing I want to incorporate in my kitchen remodel is the woodblock counter with pull-out garbage drawer. Never heard of a pull-out kitchen drawer but I want one now! Seems like the perfect replacement for the prep sink I've been told I can't have. Can you give me any other info about the drawer – Is it lined with anything so the moisture from the veggies doesn't seep into the wood cabinet? Is there a garbage can under the drawer somehow? Can't imagine how it works but think it's gonna help me achieve a 2nd prep area in my kitchen. Thanks for your help.
 
Amanda H. March 2, 2014
Hi Kelly, the garbage drawer holds two standard size (30-gallon) rectangular rubber garbage cans. We use the one in the back for recycling, and the one in the front for regular garbage like vegetable trimmings, egg shells, etc. When I'm chopping on the wood block, I just keep the garbage drawer open a few inches so I can scrape things into it as needed. Because we change our garbage often (daily or once every other day), we haven't found any issue with moisture affecting the wood block. It's more that we need to oil the wood block on top because it dries out if wiped clean a lot. There's a great oil and wax product from Butcher Block Co that we use - and we apply it every couple of weeks, and the wood has remained in beautiful condition. Good luck!
 
linda @. September 16, 2013
This is by far the most amazing budget kitchen I have ever seen. Pinning this!
 
Amanda H. September 16, 2013
Thanks so much!
 
Beth September 16, 2013
So inspirational! I love everything you did; thank you for sharing all of the details - and enjoy!
 
Amanda H. September 16, 2013
Thank you!
 
smslaw September 16, 2013
Amanda-Do you have the source for the brackets holding up the shelves to the left of the fireplace?
Great kitchen!
 
Amanda H. September 16, 2013
I'm sorry, I don't. That's one are of the kitchen that we did a while ago, nearly 10 years ago!
 
monika September 16, 2013
Green with envy! So serene, yet organized and functional. I want to cook in that kitchen--and look though the collection of thing so prettily and accessibly displayed.
 
Amanda H. September 16, 2013
Thank you so much!
 
Miranda H. July 12, 2013
Hi Amanda - This is so inspiring. I'm an old friend of Tad's and stumbled upon this by chance, while looking for ideas to dig me out of a revolting 90s cherry kitchen... two questions: what is the pale gray used on the exterior cabinets? And did they have to spray to get the paint to stick, or did they use oil? I'm trying to figure out how to paint mine to look like yours. Thanks.
 
AntoniaJames July 12, 2013
I've been really curious about what the white "thing" on the glass cabinet face in the new kitchen photos is (or maybe it's just a reflection). Is it a long to-do list taped up? It's been driving me crazy since this was first posted.
 
Amanda H. July 12, 2013
AJ, that's just a reflection of one of the windows on the opposite side of the kitchen!
 
Amanda H. July 12, 2013
Hi Miranda, Great to meet you! Our contractor used a custom color that he mixed (and I'm now thinking that this wasn't such a good idea because how will I fix things beyond small chips, for which he gave me a spare can?) It's just a super pale grey. I don't think it's oil. And everything was sanded and painted. Spray would have been better but it wasn't possible. The paint chips a little but I've only had trouble with one area really. I knew this was part of the bargain and I was willing to deal with future chips because I was THAT desperate to get rid of the cherry wood!
 
AntoniaJames July 12, 2013
Thanks! Can you see how it might look like a long to-do list? (And I wouldn't have held it against you for having one in the photo . . . it would be proof of what we all know, which is that your kitchen is used, a lot!)
By the way, sfter nine months, do you still like the hooks for the utensils? When I've been in kitchens that have them, I've found myself fighting to lift the utensils off the hooks, or at least, it seems to require a different motion for every utensil, depending on its weight and length, so it's seemed inconvenient. I don't have enough clearance under the counters in the 1920's "maid's kitchen" to do that anyway, but I'm curious about your experience, for reference when I do my next kitchen. Thank you! ;o)
 
Amanda H. July 12, 2013
Yes, it does look like a long list! Also, I do like the utensil hooks, but I'd had them in my first NY kitchen so I'm used to them. I understand what you mean about lifting utensils off the hook not always being easy, but I've also found utensil jars frustrating in that they get jammed up -- although they work well for wood utensils -- and I always wonder what's lurking at the bottom of them!
 
AntoniaJames July 12, 2013
Amanda, you can usually take a can of paint to a good paint store - the Benjamin Moore dealer, Mark's Paint Mart, is the best for this out here - where they can reproduce colors quite accurately, for just the situation you describe. The technology has improved dramatically over the years. But the lesson is an important one . . . . for something that needs touch ups (and kitchen cabinets are one area in every home that need them, a lot), make sure that the "custom" is recorded in a formula that you can take to the paint store. In the meantime, save that spare can for the front facing dings in more obvious spots, and have a back up made for less-noticeable touch-ups, typically below counter level and near the floor. ;o)
 
PeterPatrick October 18, 2012
Pull out shelves are a lifesaver, great blog!
 
awbauer September 18, 2012
any news on inside cabinet color?
 
Amanda H. October 14, 2012
awbauer, I know we discussed this via message but in case anyone else wants to know, the inside paint color is Benjamin Moore BM 2118-50. Also, my contractor was Keith McAlpine. He can be reached at [email protected] and on his site: keithmcalpinedesign.com
 
awbauer September 2, 2012
Looks fab--just curious as to the cabinet interior paint color?
 
Amanda H. September 2, 2012
Will find out for you. Might take me a few days.
 
awbauer September 18, 2012
any news on the color?
 
aliriop August 24, 2012
Amanda! Love your take on this kitchen. Where did you get the open shelves?

Congrats!

Alirio Pirela
 
Amanda H. August 24, 2012
They were designed and built by PlattDana Architects http://plattdana.com/ -- in a renovation we did 10 years ago!
 
pattette August 22, 2012
Thanks for this! It's perfect inspiration as I move into my new place this weekend :)
 
Amanda H. September 17, 2012
Hope the move went well!
 
VIB August 21, 2012
this is so lovely. do you mind sharing the source for the rolling ladder? we are looking for something like this for our kitchen renovation. and also the recessed pulls on the pantry? thank you!
 
Lorenza August 24, 2012
I would bet that the ladder is a Putnam Rolling Ladder. We have one in our family room and it is a beautiful and functional element for our bookshelves that go up to the ridge of our vaulted ceiling. I say, Go for it!
 
Amanda H. August 24, 2012
Lorenza, you're right on the money -- was Putnam Rolling Latter. VIB, I believe they are the oldest ladder company in the US, and are located in SoHo: http://www.putnamrollingladder.com/
 
Irmavep August 21, 2012
Really beautiful renovation. When everyone (architects, contractors, stone guys) tried to dissuade me from honed carrerra counters 10 years ago, telling be that "no one has these for a reason" I would tell them that just about every kitchen in Greece, Turkey, and Italy did indeed have these counters, and that their accumulated patinas were lovely.

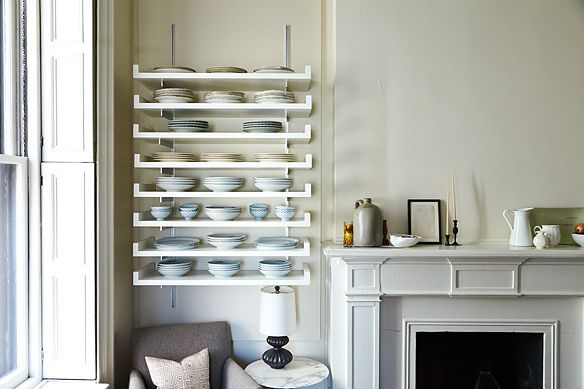
One burning question: where did you get the upturned shelves in your dining room (the ones on the Rakks standards, holding the plates?) Or are they custom? We have been desparately looking for a budget version of Atlas and are using Rakks standards too, but haven't been able to find the shelves themselves. Many thanks!
 
Amanda H. September 17, 2012
Sorry for the delay -- fell behind! The shelves were designed and made by Platt Dana Architects during a renovation we did 10 years ago: http://plattdana.com/ -- I don't remember the brand of shelf braces we used, but they're built so you can put the shelves at any height you want. You create the "slots" for each shelf.
 
phyllis S. August 20, 2012
Where to you put your pots, etc.? Do you have to bend down every time you need something? I find the rack with the hooks holding the utensils on the wall bothersome since every time I need something the hook comes with it. Are those hooks attached?