Learn how to make the perfect floral arrangement with Alexa Hotz, managing editor of Remodelista; she has a background in floral design and also contributes to Remodelista's sister site, Gardenista.
I've always thought that creating floral arrangements is similar to cooking. Both require fresh ingredients of a certain quality, and both are all about layering and balance. And while the sum of the whole might seem greater than its parts, the trick is to create an arrangement where the beauty of each flower has its own moment. Trust your intuition, and whatever you do, don't overthink it.
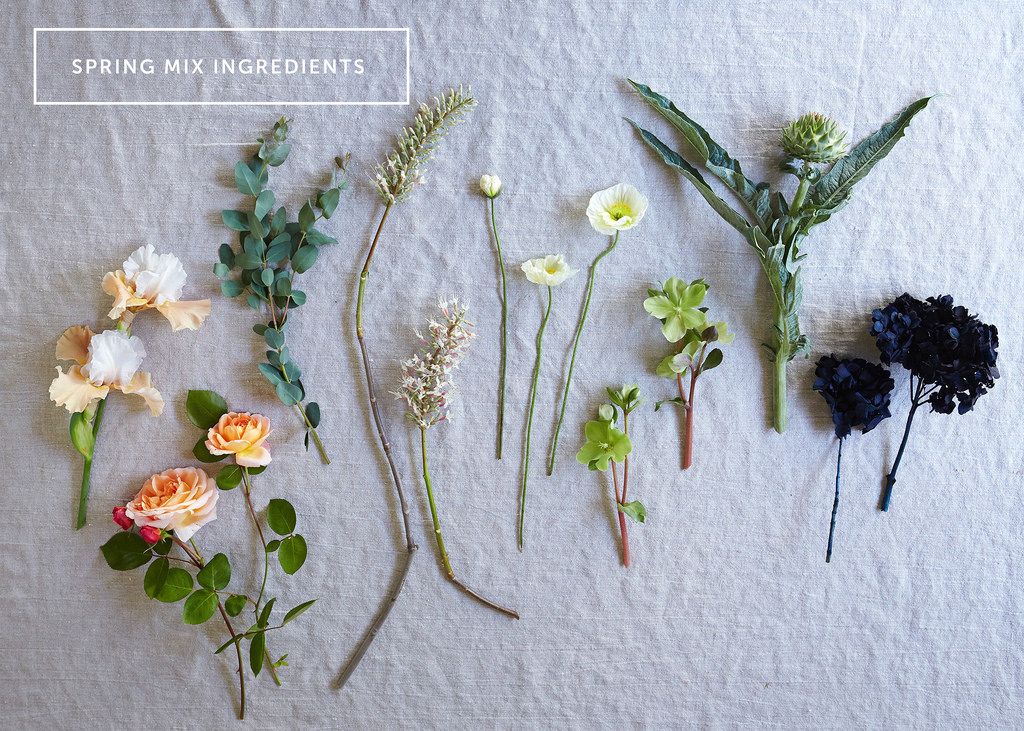
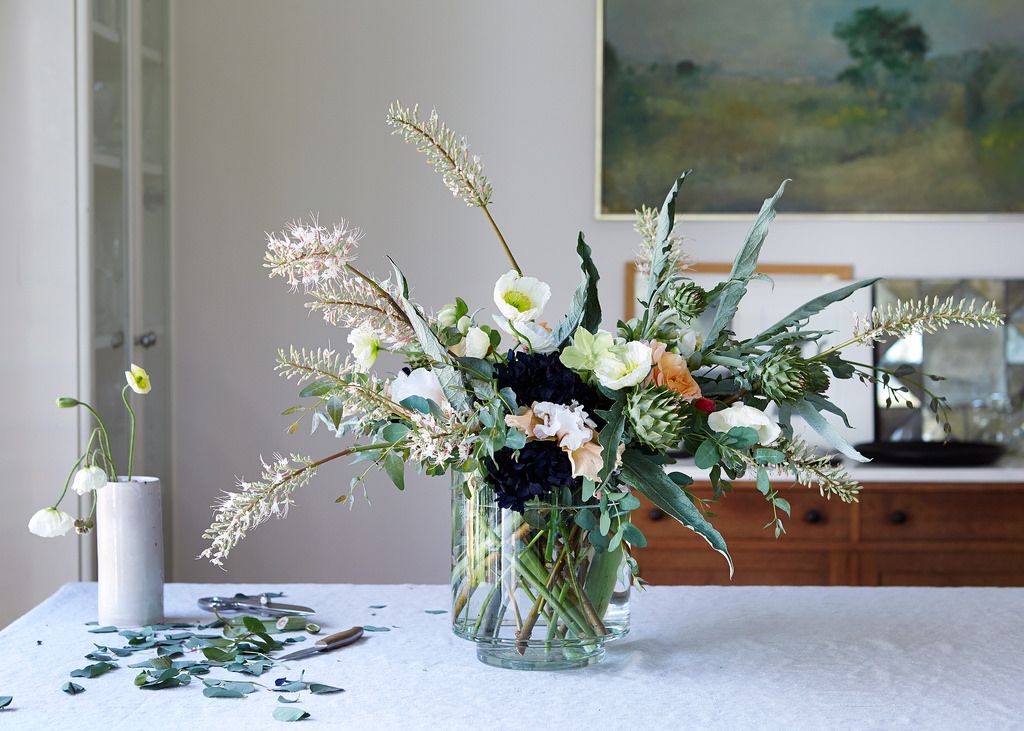
Flowers
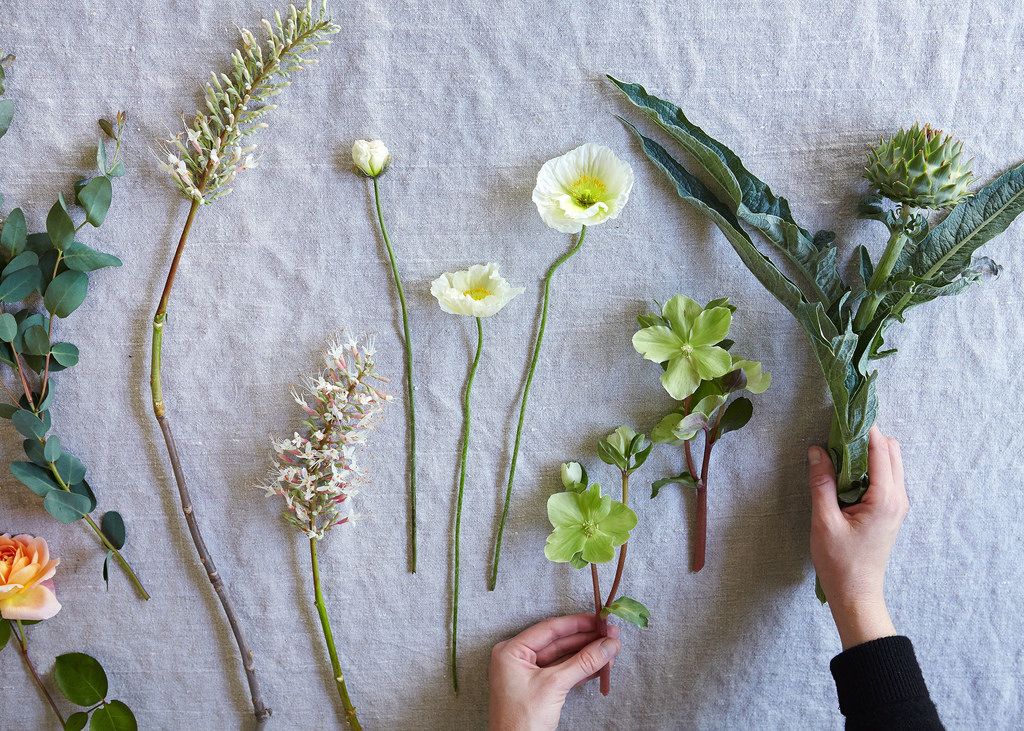
1 bearded iris stem
2 snips of apricot pink garden roses
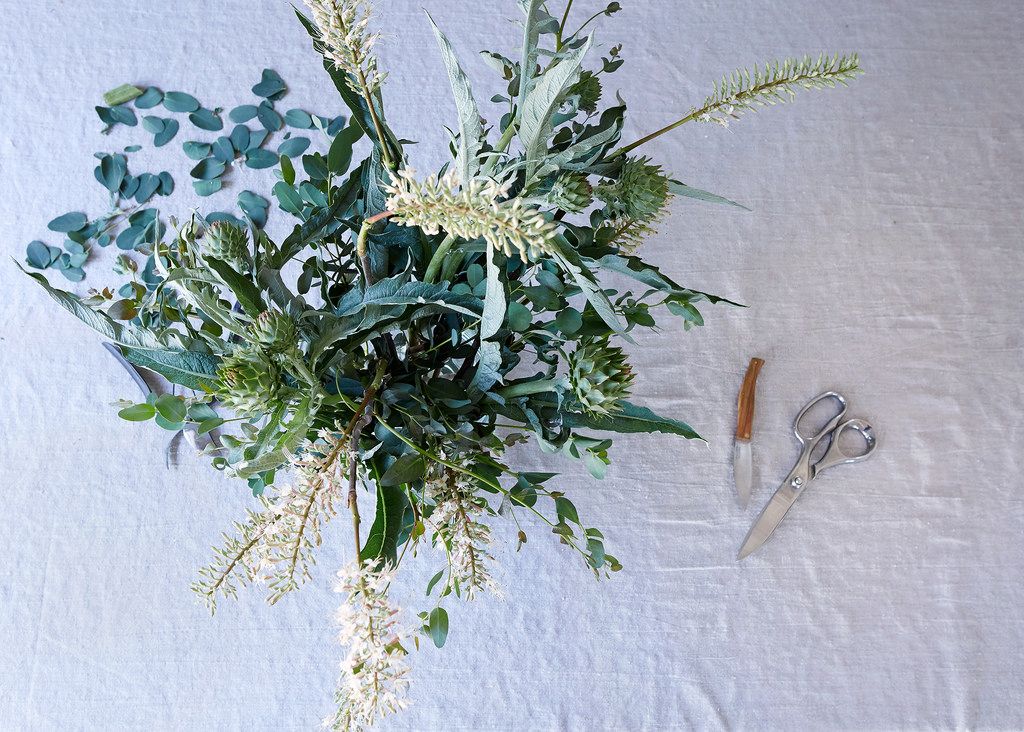
1 bunch of young eucalyptus branches, lower leaves removed
1 bunch of California Bay Area native flowers (this variety is unknown, but likely related to Asphodelus ramosus)
A handful of white poppies at their peak
A few green hellebores, cut just before arranging
1 bunch of young spring artichokes
A few stems of navy-tinted preserved hydrangea
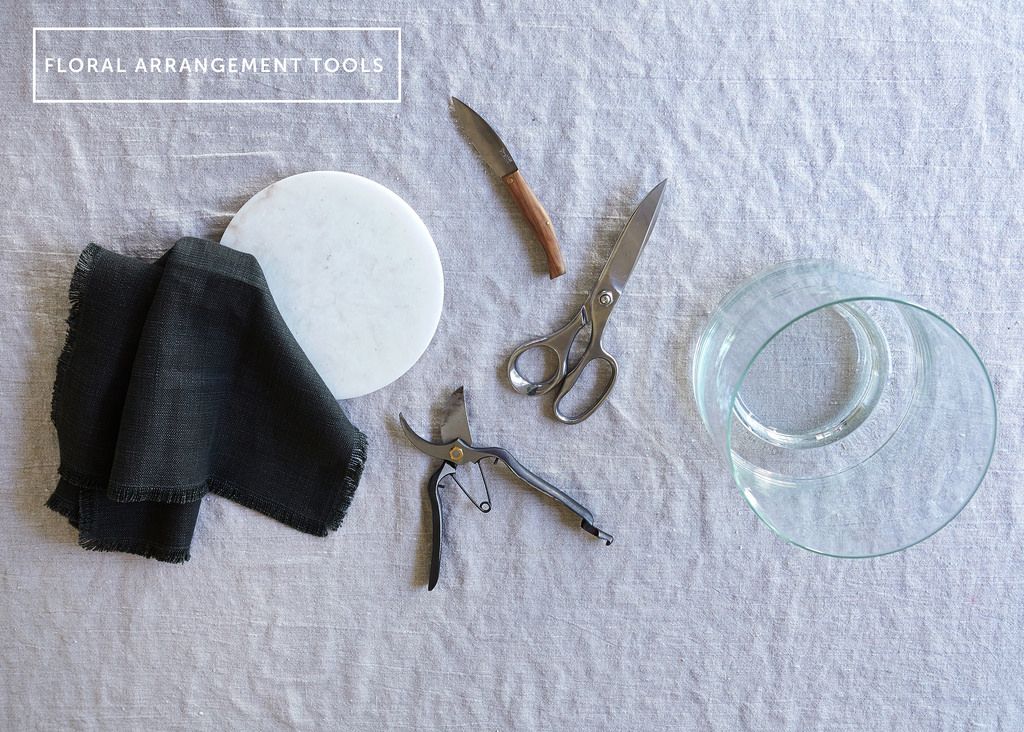
Tools
1 medium-sized round vase; this one measures 10-by-10 inches
1 pair of garden pruners to cut through woody stems
A knife or kitchen shears for softer stems
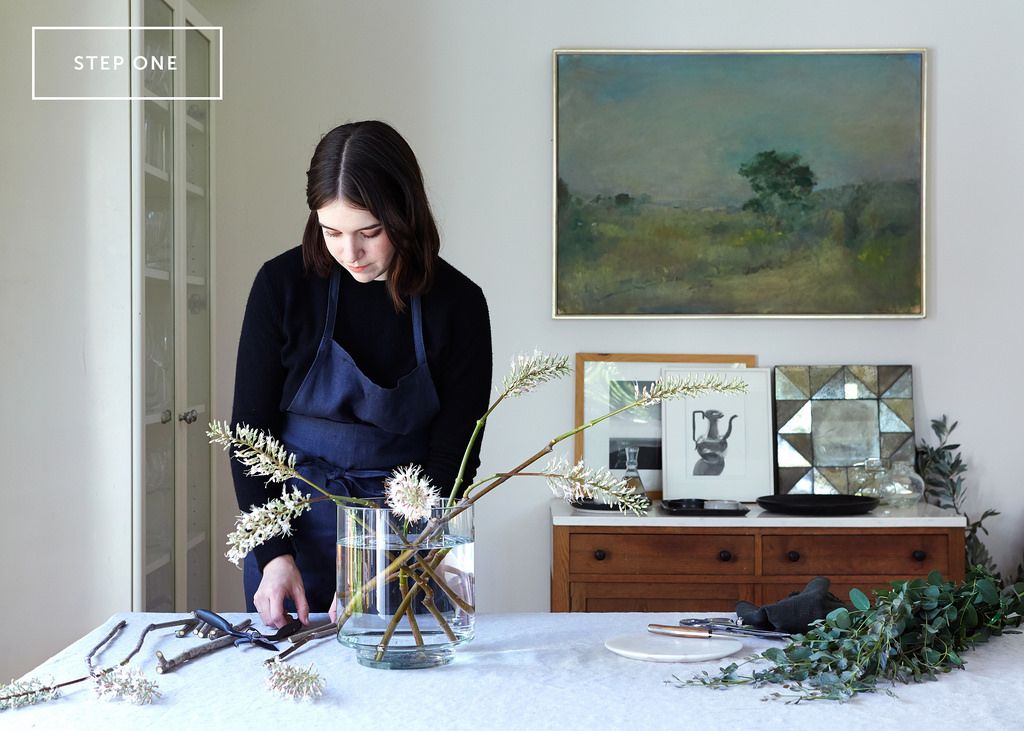
Cut each stem just before placing it in the water (some prefer to cut stems under water for immediate capillary action) and always at an angle to increase the surface area of the fresh cut. The most important thing in preserving the longevity of a flower is to remove the lower leaves from each stem. The portion of the stem that enters the water should be naked, otherwise bacteria has the opportunity to grow and quickly rot the flower from the inside.
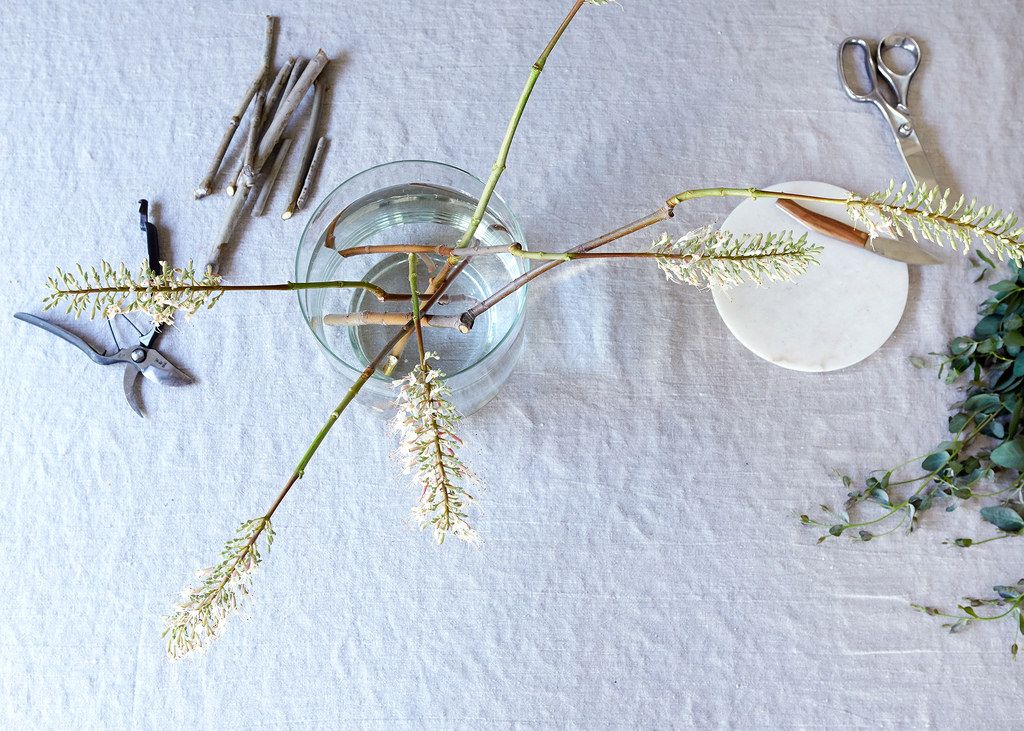
With most designs, I prefer to work without floral tape or frogs. Instead, I like to create a cage with the first ingredient, the woody stems, by placing them in a crisscross formation.
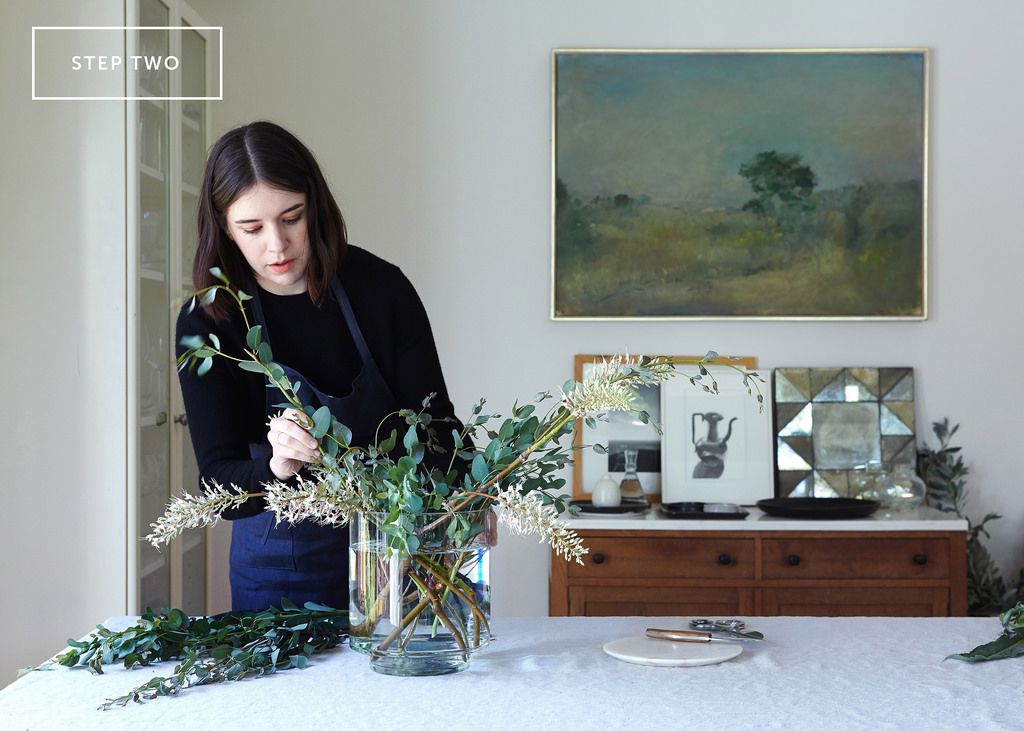
Next comes a layer of greenery -- the eucalyptus and young artichokes -- to build on your foundation of woody stems. This is the time to create the base shape of the arrangement; asymmetry is key. Think about triangles as you design the shape and, as with photography, consider the rule of thirds. Where is the peak of the arrangement going to go? And make sure you pivot a few stems so that everything isn't grouped right in the center.
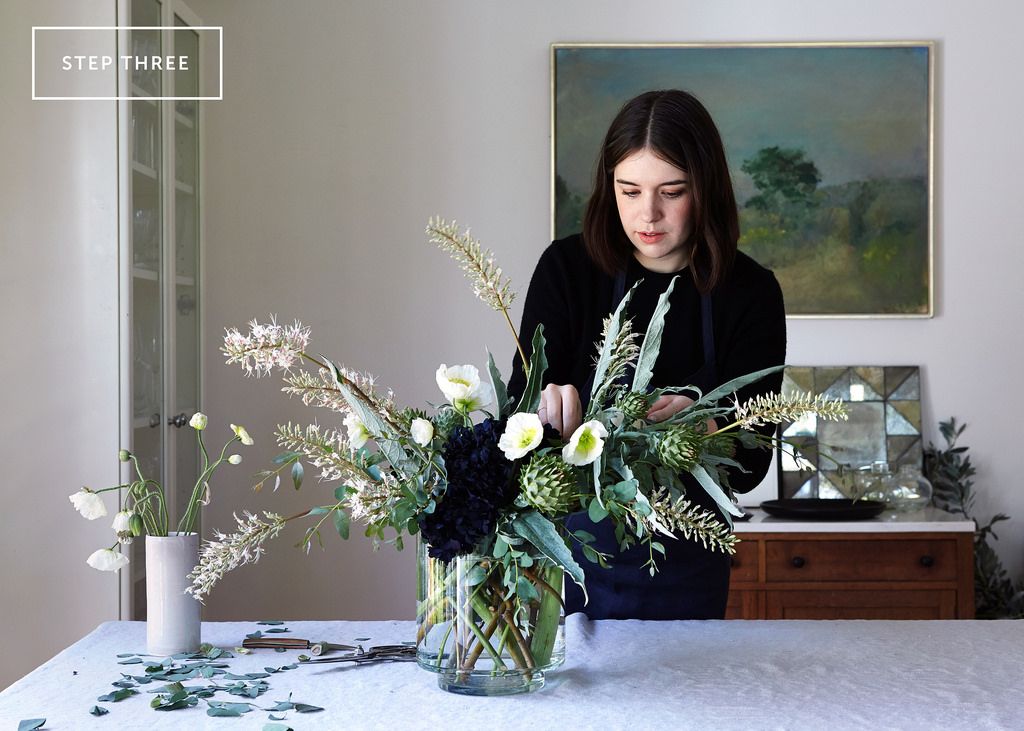
Now you'll add the final layer of face flowers (the showy, colorful blooms). I started with the Gothic-like preserved hydrangeas to create a river of blooms running from front to back of the arrangement.
Then, take three stems of each variety, and group them together at different levels: some tucked in lower at the base of the arrangement and others at mid-level. Use the longer stems to achieve a little height in the arrangement. Again, don't overthink it: This is the most creative moment of the design. Harmonize the arrangement to your liking, and don't be afraid to pull flowers out and move them around until you've got a look that appeals to you.
The result is a wild arrangement that will evolve over the course of about a week. The fragile flowers can be pulled out as they wither, and the whole design can be readjusted. The stems will drink up the water over time, so check to make sure water levels remain high. After a few days, grab the whole bunch like a bouquet and snip the stems before replacing them back in the water. These maintenance tips will allow you to enjoy the flowers that much longer.
Photography by Aya Brackett
See what other Food52 readers are saying.