We should all have a solid command of the ABCs of baking. Thankfully,Food52's Test Kitchen Manager Erin McDowell -- alongside photographer Sarah Stone, who both blog at The Shutter Oven -- is here, with tips and tricks to help you master the most essential desserts and the simplest breads.
Today: Get the low-down on baking enriched breads -- because there's nothing wrong with a little extra butter.
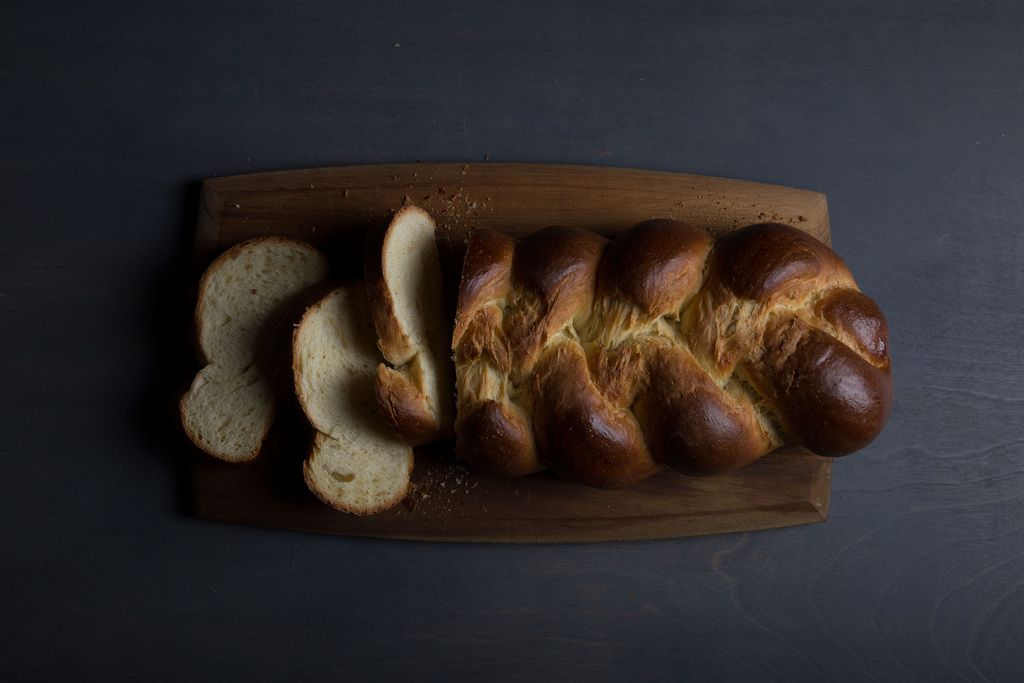
Enriched breads are some of the most beloved recipes in my baking arsenal -- I fell in love with the term enriched when I first heard it. It refers to breads that contain other ingredients aside from the basic four: flour, water, salt, and yeast. These additional components enrich the dough, providing fat, color, flavor, and a host of other benefits. Whether you add butter to a dinner roll dough, vanilla sugar to a sweet dough, or eggs to a fluffy challah dough, enrichments make for some delicious bread.
It is important to note that these tasty additions also play other very important roles, and -- just like in all baking -- careful scaling (a.k.a. measuring) is the key to success. Adding too many enrichments to a dough can create an array of issues: It can make a bread darken too quickly in the oven, prevent a strong crust from forming, or cause a bread to become overly dry, for example.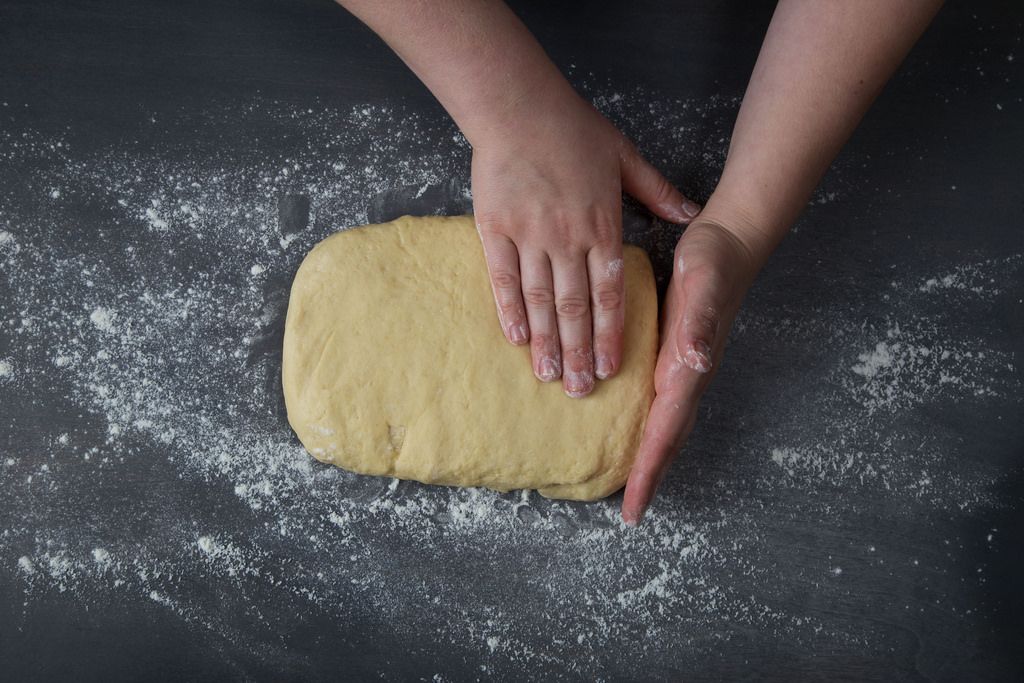
Another way that enriched doughs differ from their lean counterparts is their mixing method. Many enriched breads -- like the challah recipe I'm sharing today -- call for the "improved mixing method," which I will explain below. While the structure of these breads is the same as that of most basic breads, there are some important differences. Here’s what you need to know:
-
Pay attention to detail. The more ingredients there are in a bread recipe, the greater the chance that things will go awry. Take care when scaling your ingredients and note their proper temperatures. Fats, for example, should be mixed into dough at room temperature (unless otherwise specified) to encourage even incorporation. Garnishes, like herbs, cheese, nuts, fruit, or chocolate should be added thoughtfully and in reasonable quantities. It’s also important to consider shape before adding a garnish (adding nuts to a challah dough, for example, could potentially make it more difficult to braid).
-
Improve your method. The "improved method" refers to an intense period of mixing. Generally speaking, the mixing begins at low speed, to combine the ingredients and encourage the chains of gluten to begin forming. After about 3 to 5 minutes, the speed of the mixer is raised to medium and mixing continues until the dough has reached full gluten development.
At this stage, the dough can be pulled and stretched to create a “window” -- a piece of dough so thin that it becomes transparent. This level of elasticity can only be reached through intensive mixing -- at a high speed, for a long time. The result of this mixing method is a bread with a very tight crumb structure and a soft, slightly chewy crust (think brioche, Parker House rolls, or -- of course -- challah).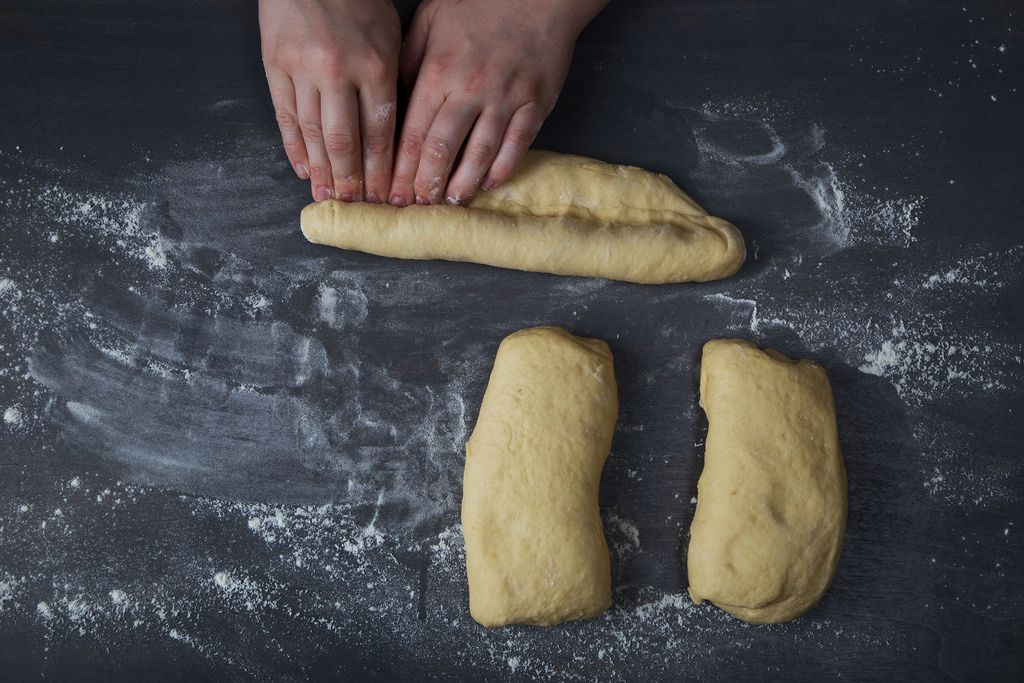
-
Be prepared for the rise. Enriched breads benefit from a lengthy fermentation time. This builds flavor and creates a fuller structure as the yeast increases the size of the dough. It’s best to plan to let the dough rise for at least 1 hour in a very warm place for the first round of fermentation. Once the bread is shaped, the proper amount of total fermentation can be easily determined by pressing your finger gently into the dough: If it pops back immediately, it needs more time. If it holds its place for a moment and then slowly begins to return to its original position, it is properly proofed and ready for the oven.
-
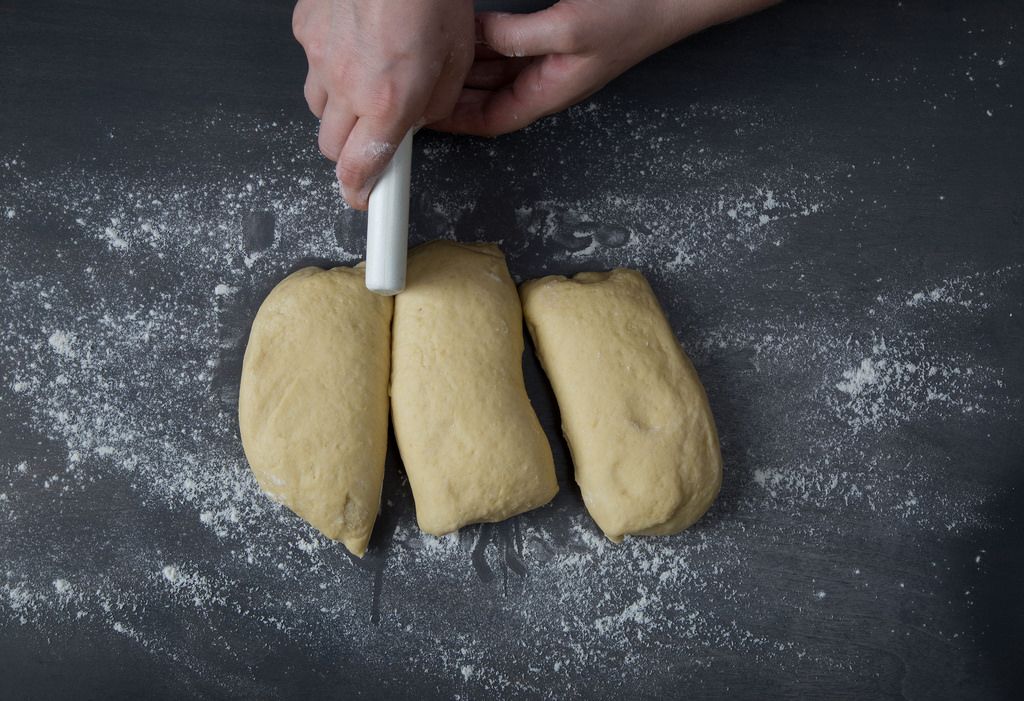
Be as intense about shaping as you were about mixing. Just as enriched breads require a more intense mixing method, they also require firm handling when shaping. To shape challah, divide the dough into three even pieces. Lightly flour your work surface -- the dough is firm enough that too much flour can actually make it harder to work with -- then fold one third of the first piece of dough over onto itself. Press firmly with your fingertips, or with the heel of your hand, to ‘seal’ the dough together.
More: Go a little crazy and make this Scallion Pancake Challah.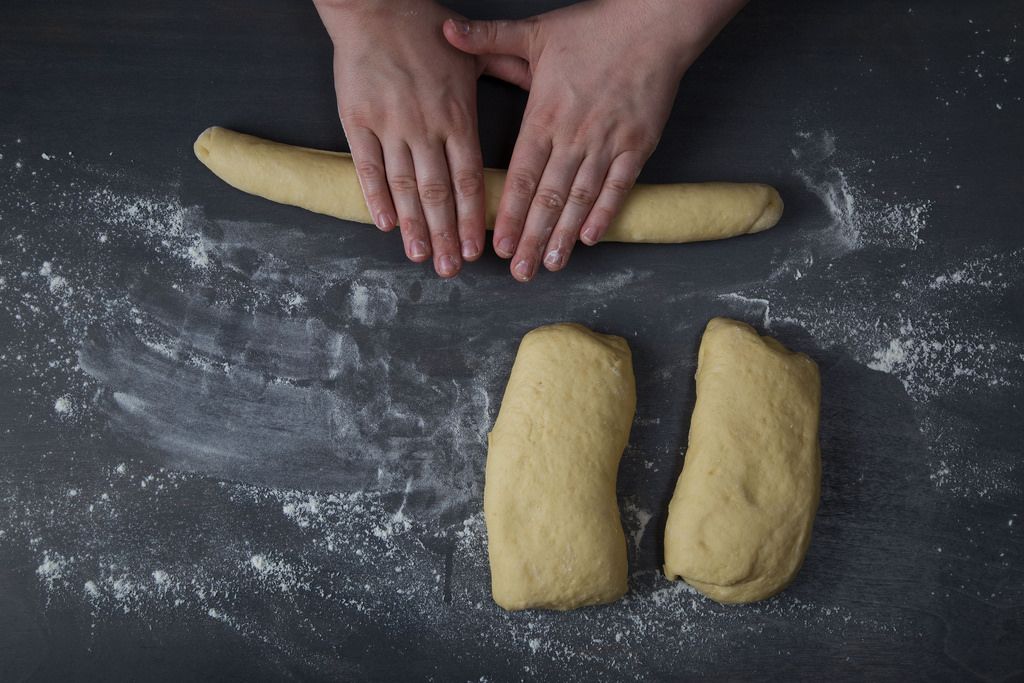
Continue to fold the dough over and press to seal until it has formed a log shape. With very light pressure on the center of the dough, roll it between your hands and the work surface, elongating the log. Roll until the dough is about 14 inches long. Repeat with the two remaining pieces of dough.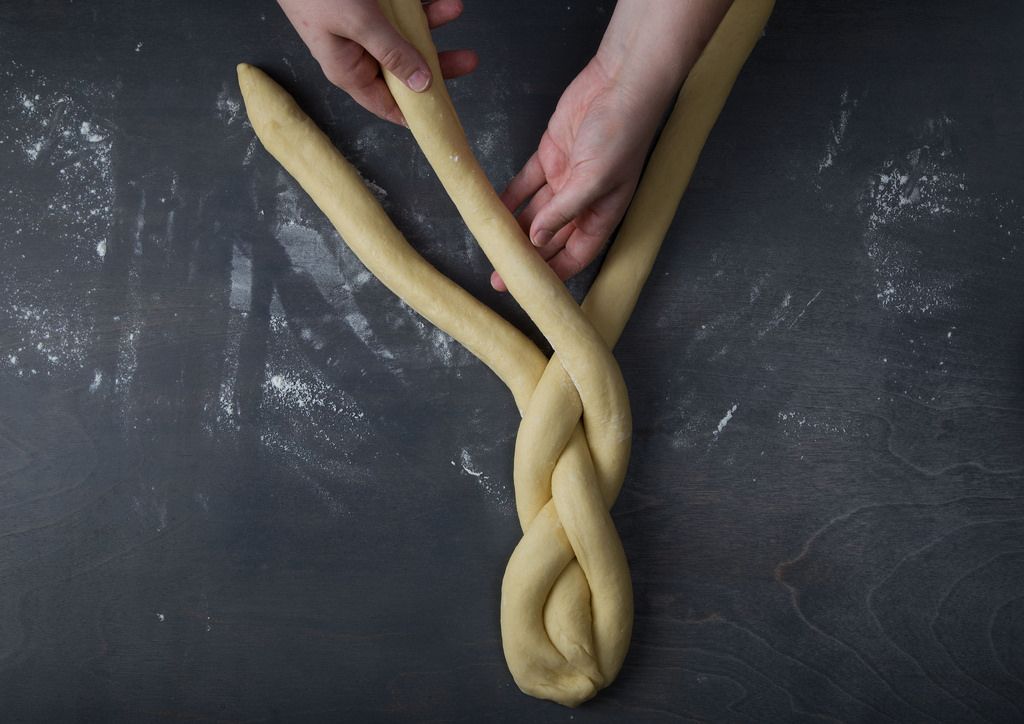
-
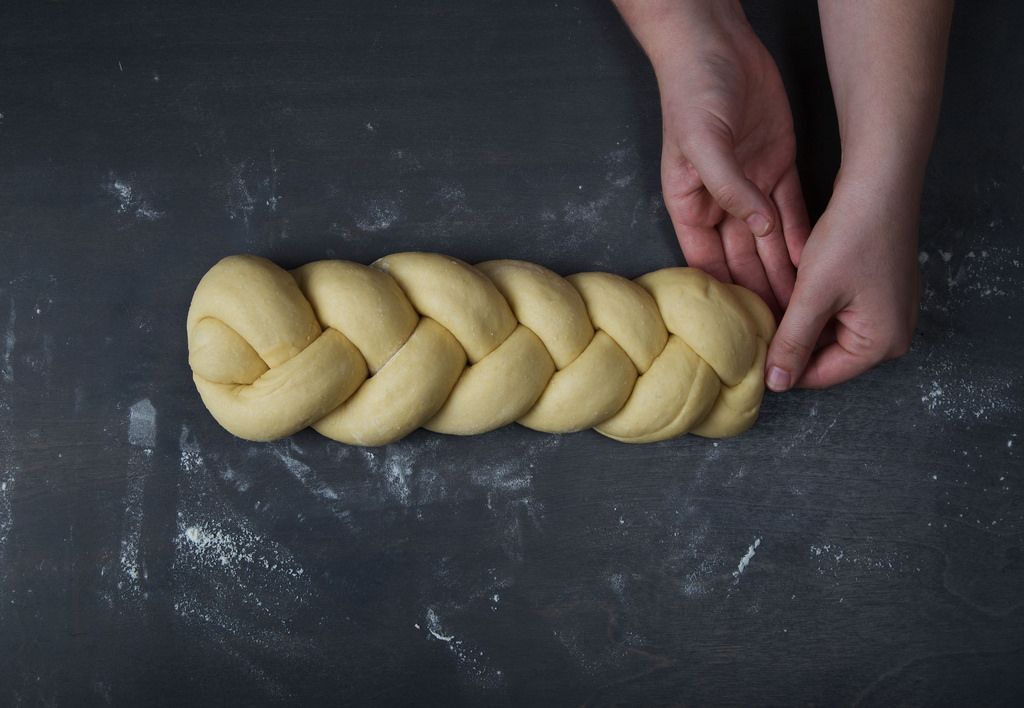
Don’t be afraid to braid. Place the three logs of dough parallel to each other on the work surface and pinch them together on one side. Braid the bread just as you would strands of hair: Move the right hand piece to the middle, then the left hand piece to the middle -- and so on and so forth until all of the dough is braided. Pinch the ends together to seal them, and tuck them under the finished braided loaf. If the ends are too bulky, you can always trim some of the dough and discard it. The most important thing is to make sure that both ends are properly sealed, or the dough could come a bit unraveled during proofing and baking.
-
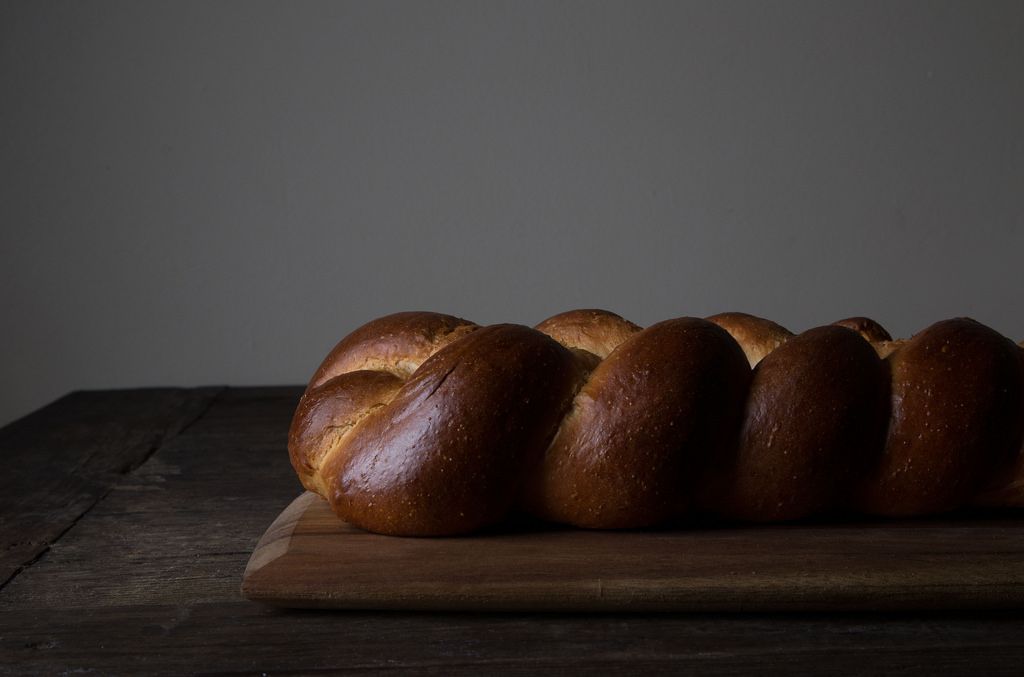
Always wash up. Enriched breads are often brushed with egg, milk, or cream before baking. Egg wash helps the crust brown better and more easily; it seals in moisture and creates a gorgeous sheen on the finished product. It’s important to remember to apply washes with care to ensure that they are evenly applied -- this is especially important with odd shapes (say, a challah braid), which can brown unevenly if the egg wash is not applied thoughtfully.

-
Lower the temp. Most breads bake at a high temperature (400 to 500° F), but enriched doughs can't handle that type of heat. Instead, they need to bake more slowly and at lower temperatures (between 300 and 400° F). This, in turn, means a longer baking time, which allows the bread to brown more slowly. Please note that, unlike most lean doughs, enriched doughs don’t usually benefit from the addition of steam in the oven.
- Don’t overbake! The intense mixing of these doughs can make them more prone to becoming dry as a result of overbaking. Enriched doughs are fully baked when they reach an internal temperature of about 185° F. Many enrichments allow the crumb to stay moist, but a proper baking time is still very important.
Makes 1 large loaf
4
cups bread flour
3
tablespoons sugar
1
tablespoon instant dry yeast
1 1/2 teaspoons salt
1/2
cup warm water (around 100° F)
1/2 cup milk, room temperature
1/4
cup honey
1/3
cup canola oil
2 eggs
Egg wash (1 egg plus 1 tablespoon water, beaten)
See the full recipe (and save and print it) here.
Photos by Sarah Stone
Written by: Erin Jeanne McDowell
Popular on Food52
9 Comments
I also use buttermilk for a more tender loaf.
I let my dough proof covered in a warm room for at least 4 to 5 hours depending on room temp. Time kneads the dough so you don't have to. Dough may be sticky after proofing but punch down and knead by hand until dough is more stiff then let rise after braiding.
Baker's secret: Add a bit of citric acid (I use 1/8 tsp. or 1 vit. C tablet crushed) to the yeast mixture along with the sugar to increase rising. : )
See what other Food52 readers are saying.