Inspired by conversations on the Food52 Hotline, we're sharing tips and tricks that make navigating all of our kitchens easier and more fun.
Today: An unexpected -- and infinitely easier -- way to dress up your cakes and cookies.
Recently, I was running around my kitchen at the last minute as usual, still needing to make frosting and slather it on my cake before leaving for a potluck. I needed a stick of butter, a block of cream cheese, a little vanilla, some milk, and a few cups of powdered sugar, which I always had on hand -- except for that day, when all I had left was a few sad tablespoons at the bottom of the powdered sugar box.
There would be no fluffy cream cheese frosting that day.
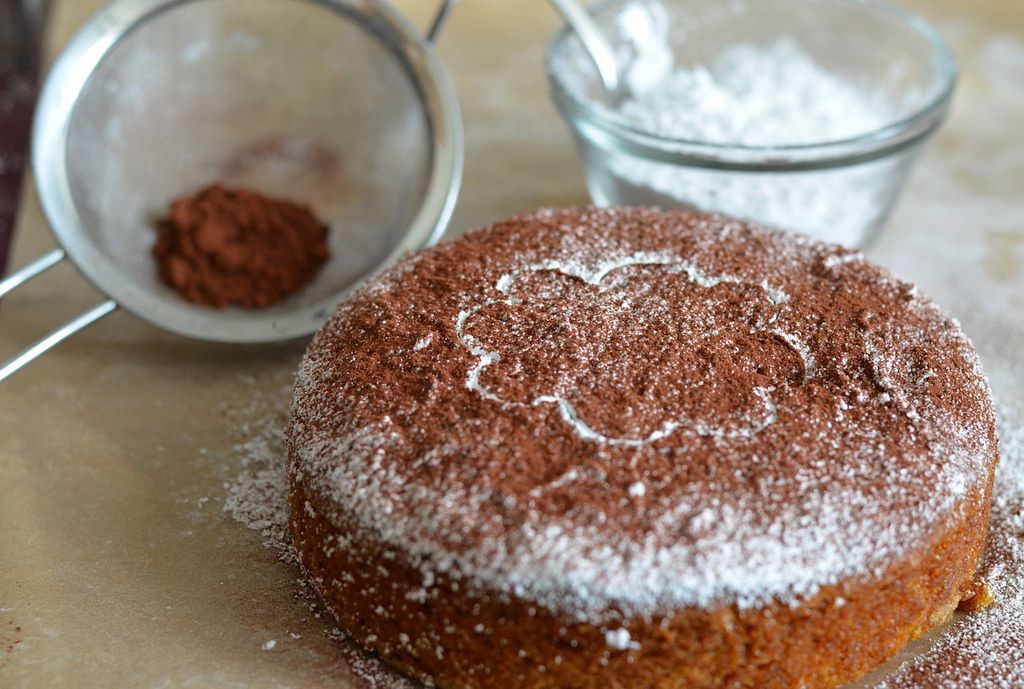
But I still needed something to dress that cake up, even just a little. I began scanning my kitchen for a solution. I had sprinkles, but no way for them to stick to the cake, and I didn't have a garden of edible flowers to raid. But suddenly, the answer popped up when I spied a flower-shaped cookie cutter I had decoratively propped up against the fruit bowl on the counter.
Bingo! A stencil!
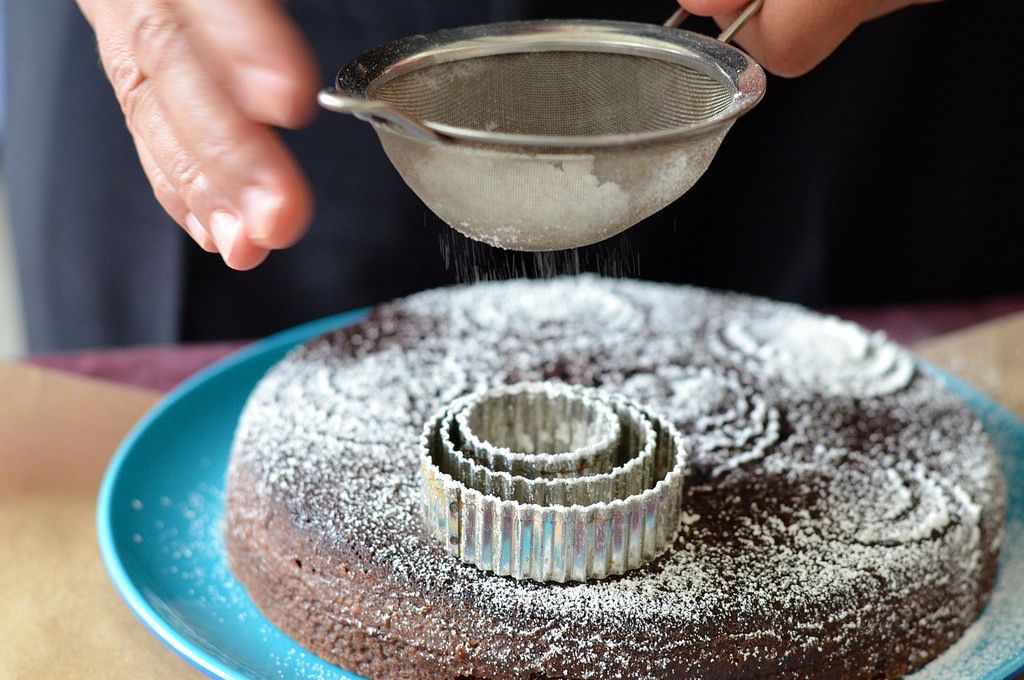
I set the cookie cutter right in the middle of the cake, spooned those last paltry dregs of powdered sugar into a fine sieve, and gently and generously showered the entire cake with the sugar. Five seconds later, I had a pretty cake to set on the buffet table.
More: Dig into one of these 11 cakes fit for a celebration.
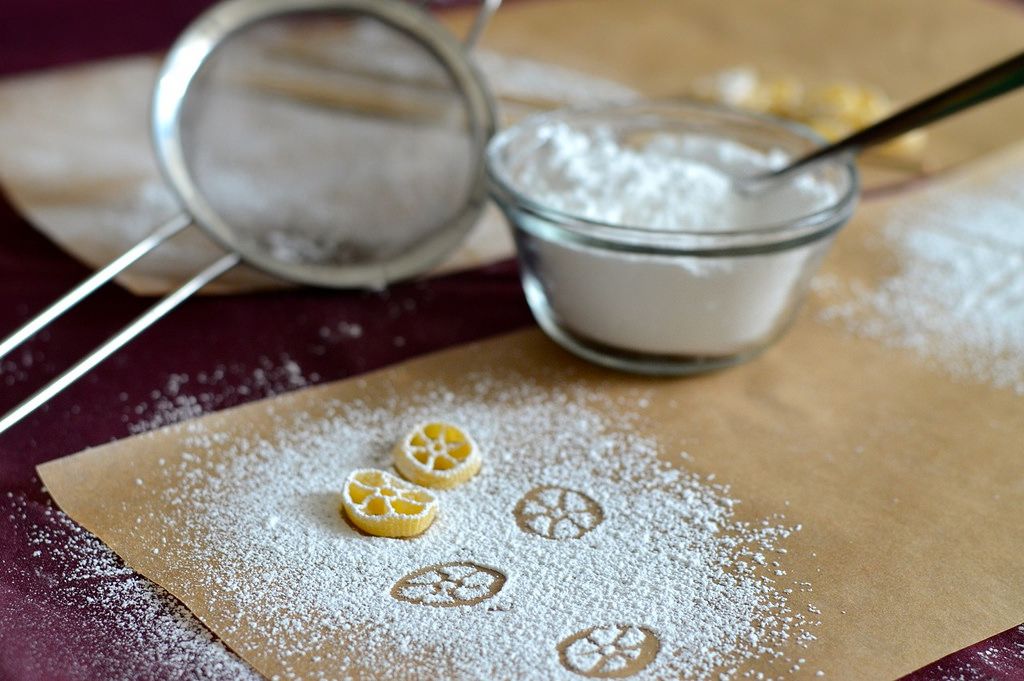
I've learned that lots of kitchen items will work as a stencil. Look through your utensil drawer for chopsticks you can lay at jaunty angles, or arrange dried bowtie pasta in a pattern around the perimeter of the cake; it's so easy and so fun that even when I do have a full box of powdered sugar to make frosting, I often use the stencil trick anyway. Who can argue with fast and fun?
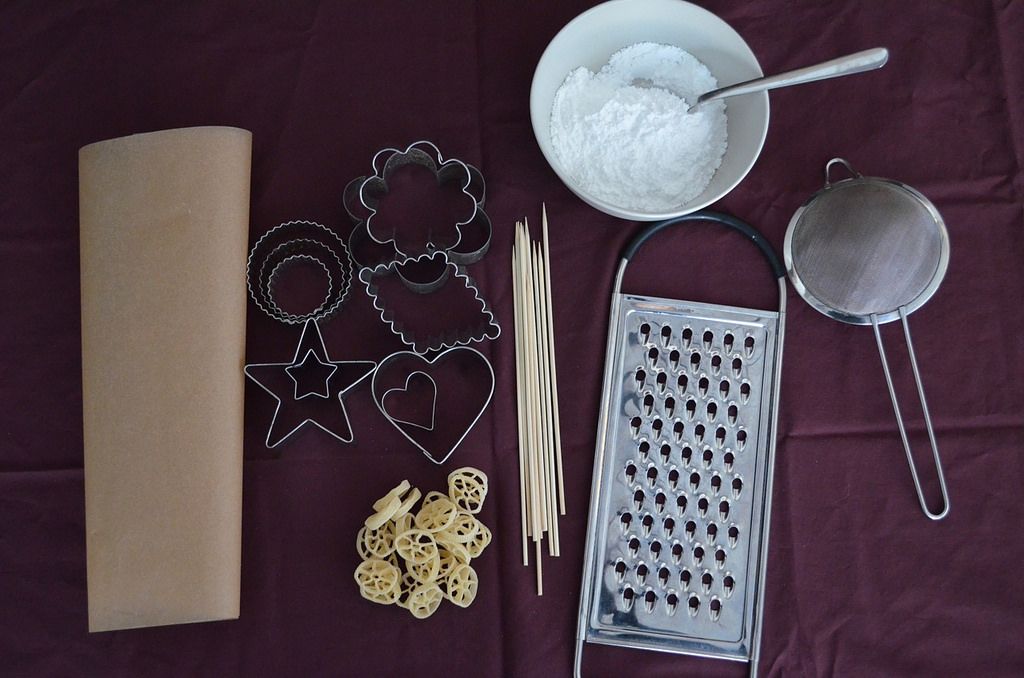
Here's what you'll need to stencil your cake or cookies:
- Powdered sugar
- A fine sieve or a powdered sugar shaker tin
- Wax or parchment paper
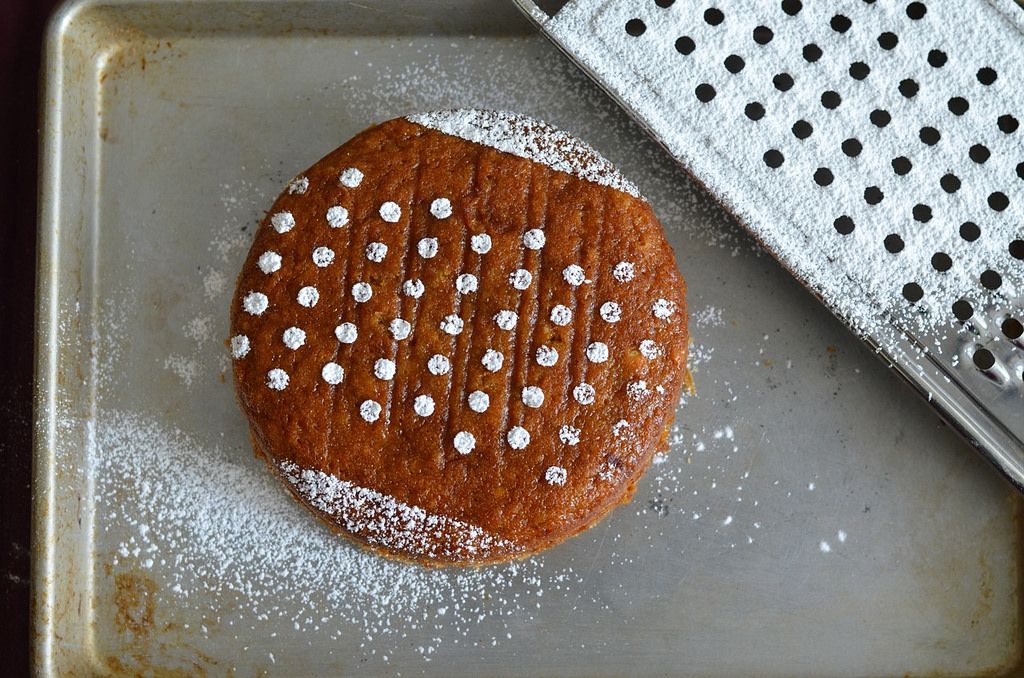
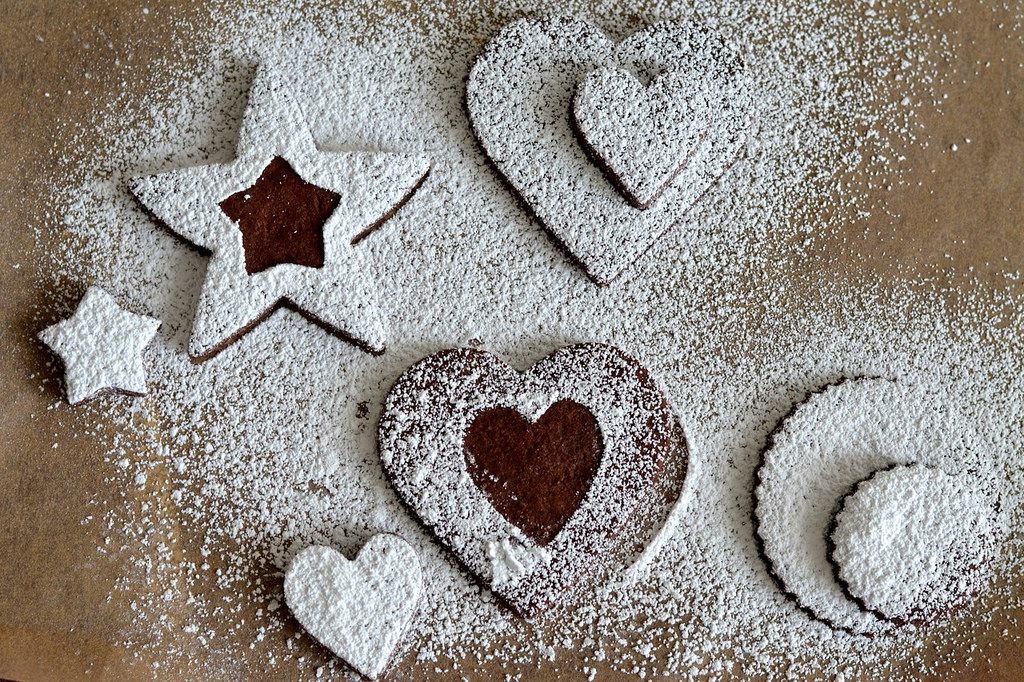
- Stencils: Look around the kitchen and try cookie cutters, wooden skewers, dried pasta (spaghetti, bow ties, wagon wheels), a cheese grater or even a fork or spoon
- A cake or cookies
Here's how to do it:
Use the improvised stencils to create designs on your cake or cookies. Set the stencil in place, add a few tablespoons of powdered sugar to the sieve, then gently tap the side of the sieve over the stencil, showering it with sugar. Carefully remove the stencil to reveal the design!
A few more tips before you get started:
-
Turn off all your fans! I didn't even think about the ceiling fan that runs in my apartment 24/7, and when I started sieving the powdered sugar, it blew sideways.
-
Practice! If you haven't tried this technique before, or you aren't sure how your design is going to look, do a trial run on piece of parchment or wax paper. You can tip the powdered sugar back into your bowl and reuse it so you don't waste any.

-
Pretend you are playing Operation. When you remove the stencil, pull it straight up, and try not to move it side-to-side at all. It's harder to remove stencils from paper, but easier if you're taking them off a cake, which has a stickier surface for the sugar to adhere to.
More: You'll meed a pretty cake stand to display your finished product.
-
Decorate your cake close to the time it will be displayed. The powdered sugar will dissolve more quickly if the top of the cake is quite moist, so it's helpful to wait until the last minute and use a generous amount of powdered sugar to create a thick layer.
-
You can also use a dusting of cocoa powder (or a well-sifted blend of cocoa powder and powdered sugar) for a different look.
- Experiment. If you have nesting cookie cutters, lay them inside of each other to make a design of concentric shapes. Or use a smaller cookie as a stencil for a larger cookie to decorate two cookies at once.
Photos by Vanessa Vichit-Vadakan
See what other Food52 readers are saying.