Elizabeth Millard wrote the book on indoor kitchen gardening (literally), and today is sharing her tips for growing microgreens, which are easy to maintain (and delicious).
Have you found yourself wishing for a bountiful indoor garden that grows vegetables, fruits, and the occasional herb for all your culinary needs? Yep, us too. Growing a garden, either in or outdoors, is not always an easy feat, so we asked Elizabeth Millard, author of Indoor Kitchen Gardening (Cool Springs Press, 2014), to share her tips for starting a manageable one. Specifically, we asked her advice on growing microgreens, which are the perfect project for a novice kitchen gardener.
Here's how to grow them in your own home:
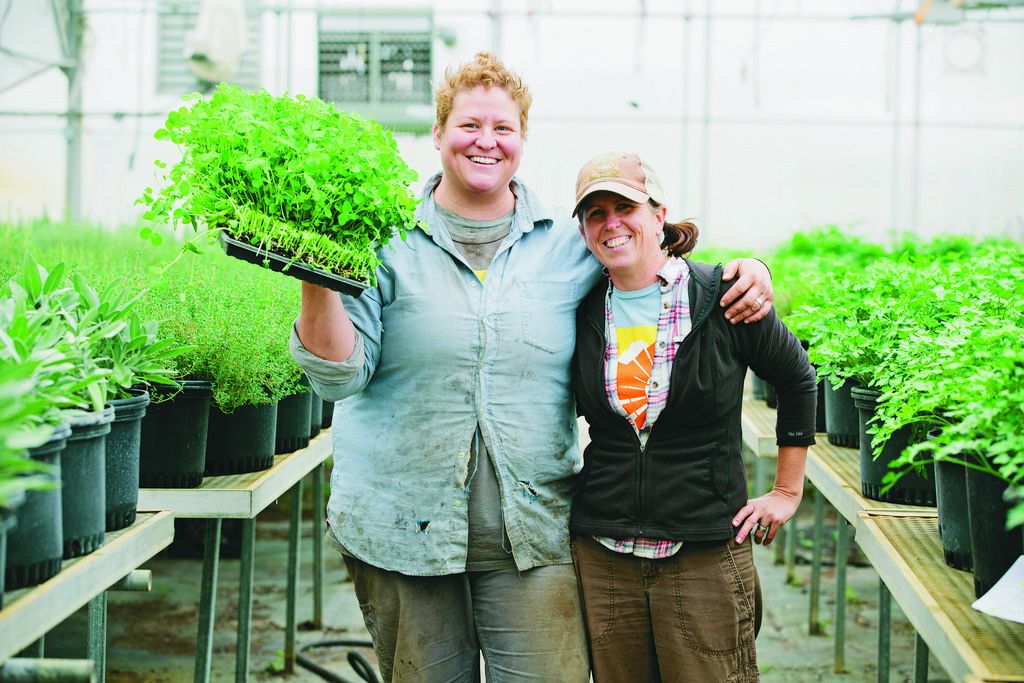
Elizabeth Millard (left) and her partner Karla Pankrow
1. Plan Ahead
Elizabeth says the key to any kind of indoor gardening is forethought: “Basically, it guarantees success or failure. It’s like a chef setting up her station before getting ready to cook. It helps you to be in sync with your garden.” Before you even think about setting up, consider what exactly you want to grow, your (honest) level of expertise, and how much time you (really) have to commit.
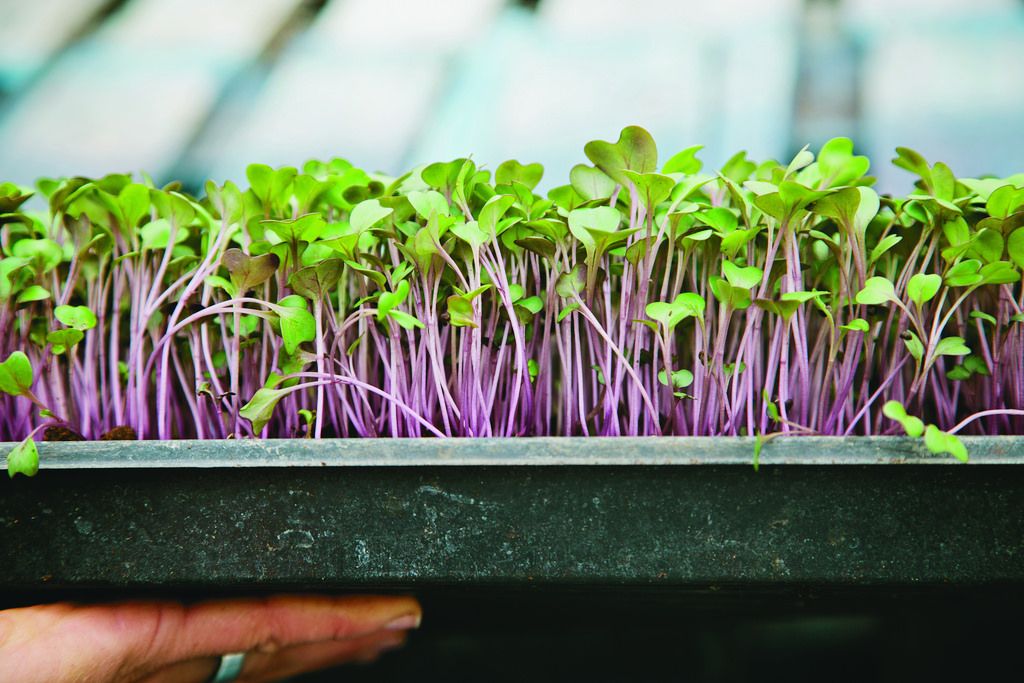
The beauty of starting with microgreens is that they're the first stage of growth in a sprouted seedling. That means they're fast-growing, great for people with only small spaces to dedicate to indoor garening, and a breeze to harvest and work into your meals (no catch!).
A pro-tip from Miller before getting started: “Have a sense of adventure. You have to see gardening as an enjoyable hobby rather than just another thing on your to-do list. If you keep a sense of play, it will be less disappointing if things don’t work out. Also, if you plant a variety of things then you’ll have a great chance of success.”
2. Map Out Your Garden
Once you've decided on what plant you'd like to grow, start strategizing about its future corner of your home.
- Choose a location: Make sure you have enough room that you don’t mind getting a bit dirty. In the case of microgreens, Millard says, “A small space works fine -- they have a super shallow root system.” A nook the size of a baking pan will do.
- Lighting: For microgreens and other indoor kitchen plants, Elizabeth recommends placing them by a south-facing window. Additional lights or a good full-spectrum fluorescent shop light will help keep them spry on cloudy days.
- Air Circulation: Having proper circulation will prevent bugs. If you can’t crack the window, a gentle fan will supply the breeze.
- Room Conditions: The air temperature, humidity, and yes, even the products you use in the room have an effect on your garden. It’s important to provide a humid and warm location for seeds that are germinating (have been planted, but not sprouted); however, once they sprout, bring them into a well-aerated spaced. Avoid using airborne chemicals, such as hairsprays and air fresheners, which can be absorbed into the soil and negatively affect your seeds.
3. Plant Your Seeds
First, select and test your seeds. "When planting microgreens, any vegetable seed will do," Elizabeth says. "I recommend growing different varieties of seeds together because you can see some really beautiful colors." To test them, Elizabeth recommends simply laying a few down on a damp paper towel to see if they sprout. If you see signs of life in a few days, the rest of the pack should be viable.
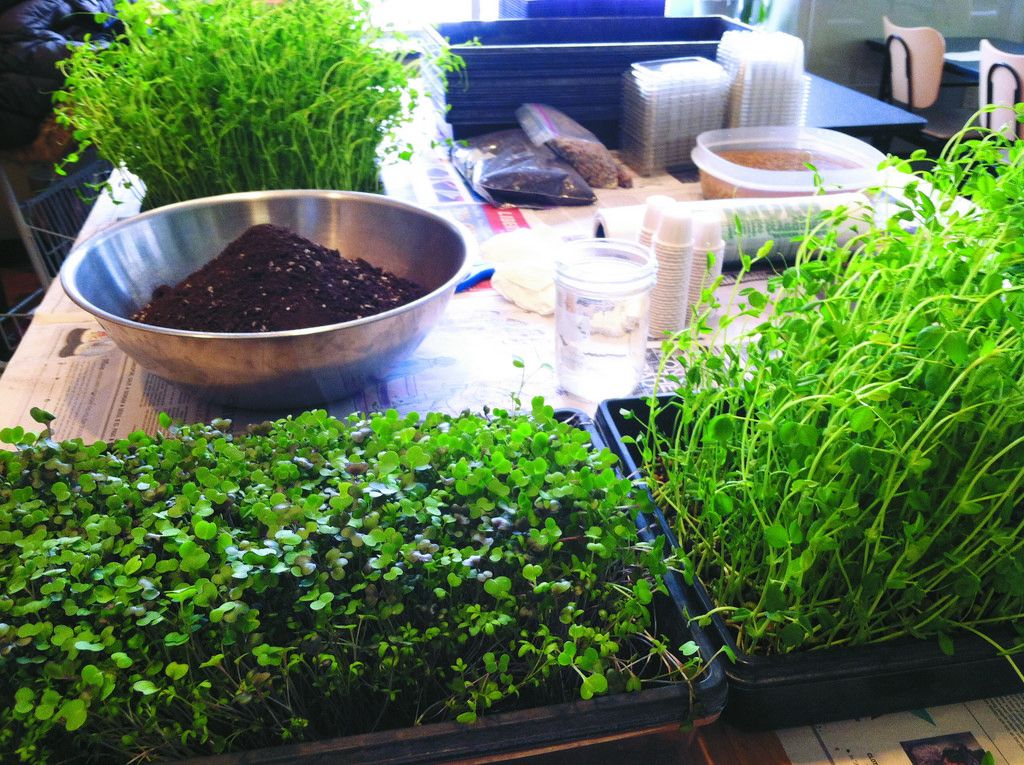
Next, choose a container (preferably not terra-cotta, as it will draw moisture away from the soil). Practically any food-safe container can be used for growing microgreens. Whether you opt for a brownie pan or a thin garden planter, Millard advises that the layer of dirt be “as shallow as possible, because they'll grow a root ball if they have the space.” Drainage isn't as important when growing microgreens as it is with other plants: "If you have rocks or pebbles at the bottom, or soil that is light and fluffy enough for circulation, any indoor soil works well.”
Simply add a layer of pebbles to a shallow pan, mix your seeds into loose soil on top, moisten with water, and place in the window. That's really it!

4. Care and Harvesting
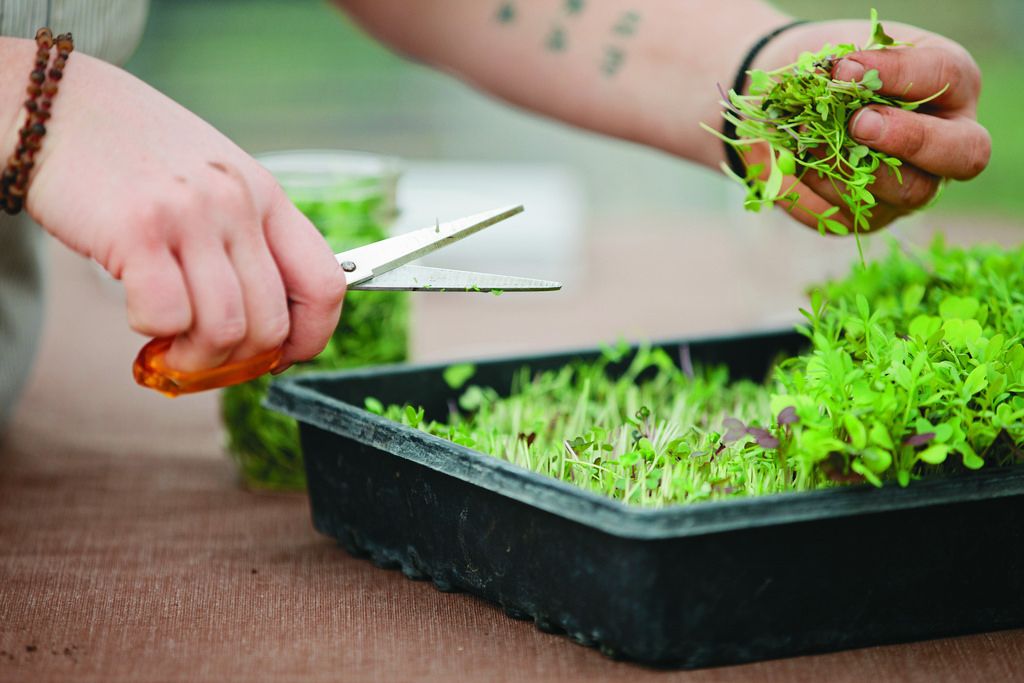
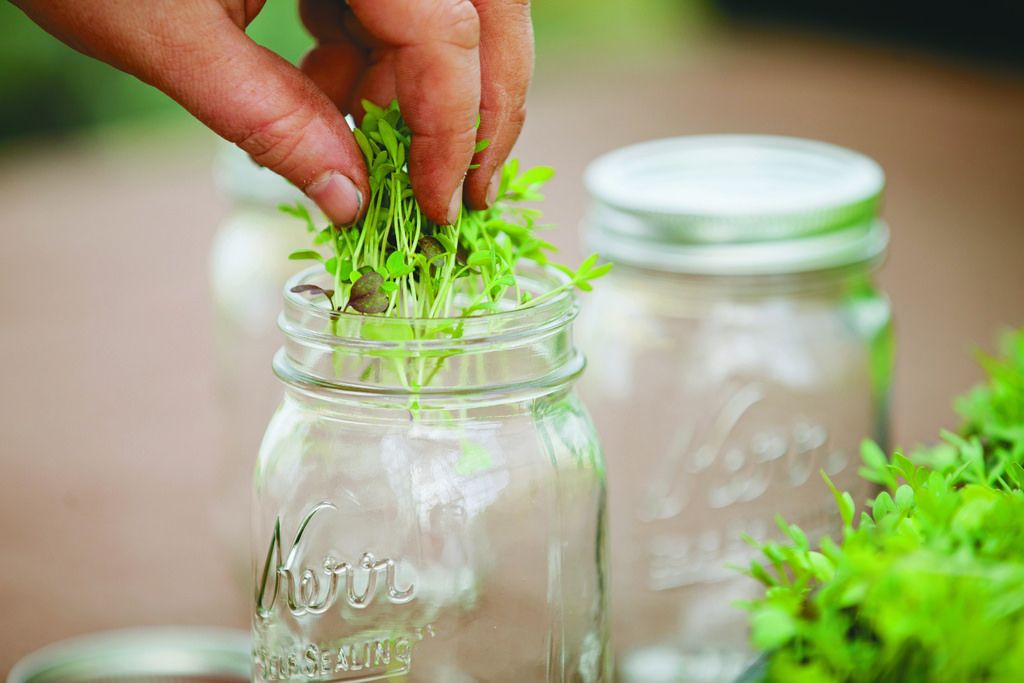
Microgreens, and many other indoor kitchen plants, are quite easy to maintain. “Mainteinance requires very little work. It's a matter of misting the sprouts once a day when they look dry. Be sure not to overwater, because that will create mold,” she warns. Looking for instant gratification? Most microgreens are sprouted and ready to eat in about a week! Just shear the top few inches off with a pair of clean scissors.
Amazingly, you can harvest your microgreens as often as you like. They will continue to sprout from the clipped stems over and over again, so make sure to cut off only as much as you need. Elizabeth advises to “eat them as soon as you harvest them,” since they quickly lose their nutrients and flavor. The best part? Once you lop of a batch, the next is on its way -- any seeds that didn't germinate will have a chance to grow in the next cycle.
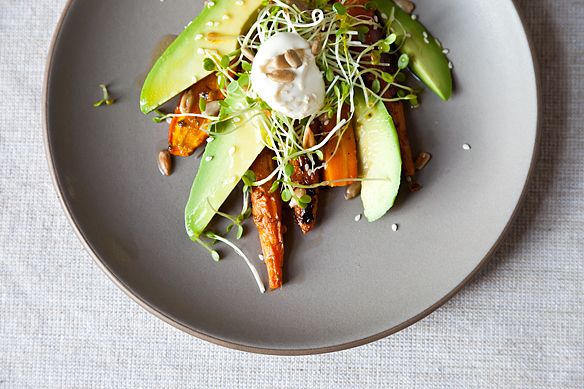
Are you wondering if these tiny plants have any nutritional value? The answer is a resounding yes. “The nutrient density and flavor is all concentrated in that microgreen, because it's so small,” says Elizabeth. This makes them a great garnish for any dish. Millard’s loves them on eggs and sandwiches, and, in the case of a spicy radish or mustard microgreen, as a replacement for red pepper flakes. “They easily pack a big punch,” she says.
5. Storage
Once harvested, microgreens keep well in a glass container with a lid. “Plastic will draw out moisture and ferment the plants, but glass will keep them fresh for up to two weeks,” she says. And an unexpected tip? “Don’t wash them once you harvest them -- they're clean already! It’s different from when you buy them at the store, because you know you aren’t spraying pesticides on your plants.”
If in the process of growing your microgreens you’ve also grown a green thumb, consider allowing the seeds to fully mature. “You need to have space for the plant to grow, and it will," she encourages. For example, "lettuce is a great plant to let grow out. You can harvest them as baby greens or as full-grown heads.” What are you waiting for?
Any experience growing microgreens? Share your indoor gardening success stories (and any tips) in the comments!
Materials image with bowl of soil by Bossy Acres; all other photos by Crystal Liepa
See what other Food52 readers are saying.