It's always more fun to DIY. Every week, we'll spare you a trip to the grocery store and show you how to make small batches of great foods at home.
Today: Mei Chin, intern at Food52 and pastry chef, creates the croissant of our dreams—and feeds the entire office.

I can thank two people for teaching me to love baking. The first is my mom, who made tiny Viennese crumb cakes—rich, crumbly, jammy, delightful cookies—every Christmas (along with textbook gingerbread ladies, killer banana bread, tiramisu, and bûche de Noël—I had it pretty good). These cookies, made in mini muffin cups and super fragile, were my favorite. I burned more than a few fingers trying to coax them out of the pan before they were ready, resulting in sad crumbs and sadder fingers. My other baking influence was one of my college roommates. (Hi, Sara!) Sara could bake, not like my mom with her precise, individual cookies, but generously for the masses. She fed the entire floor with biscuits and bread from our crummy, tiny dorm oven. I wanted to be like her; I wanted to bake, too.
It didn't take me long to get there. I studied French, then I studied French pastry. And when finally I did that, I was able to draw from both my mom and Sara, which is how I ended up with Chocolate-Almond Croissants.
But first a question that something I've spent a lot of time thinking about: What is the quintessential French pastry? Mille-feuilles, perhaps, with their decadent cream layered between crisp puff pastry. Or the éclair, formed from a perfect tube of pâte à choux filled with cream and topped with a layer of icing. Then there's brioche, that shining, glorious specimen of bread, notoriously attributed to Marie Antoinette when she declaired, "Qu’ils mangent de la brioche!"
And, of course, there are croissants.
In truth, none of these originated in France. All of these pastries fall into the category of viennoisseries, meaning “things of Vienna.” Yes that Vienna—in Austria (the home of my favorite crumb cakes!). What makes viennoisserie
More: Take your brioche to the next level with blueberries.
Legend has it that croissants can be traced back to the Battle of Vienna in 1683. At the time, Vienna was under siege by the Turks who dug tunnels under the city in the dead of night. The only people awake at that hour were the bakers, hard at work. In order to warn the population, they created a pastry shaped like the Turkish crescent symbol on their flag and distributed them throughout the city to warn the citizens of the attack. The bakers were heroes, and the croissant was born. It should be noted that this is the same story that is told about kipfel, another Viennese specialty of the same shape.
As the story goes, our pastry-loving friend, Marie Antoinette, brought croissants with her when she came from Austria to live in Versailles in 1770. She was so homesick that she demanded that the court bakers recreate the pastry for her. It is more likely, however that croissants came to France in 1838 when August Zang, an Austrian artillery officer living in Paris, opened the first boulangerie-

I have yet to meet anyone who would willingly turn down a croissant, whether hot from the oven or fresh from the boulangerie. As a baker, there are so many kinds to draw on: plain, chocolate, almond, ham and cheese croissants. To add to our choices, or to our confusion, there are butter-only croissants (croissants au beurre) that are folded into rectangles, and croissants made with a mixture of butter and margarine (simply called un croissant), which are curved into the highly-recognizable crescent shape. Go figure.
So let's do some logic. If a chocolate croissant is better than a plain one, and an almond croissant is better than a chocolate croissant (in my humble opinon), then a chocolate-almond croissant should be heaven in a mouthful. That's exactly what I was after when I started to study pastry: a precise creation that appeals to everyone.
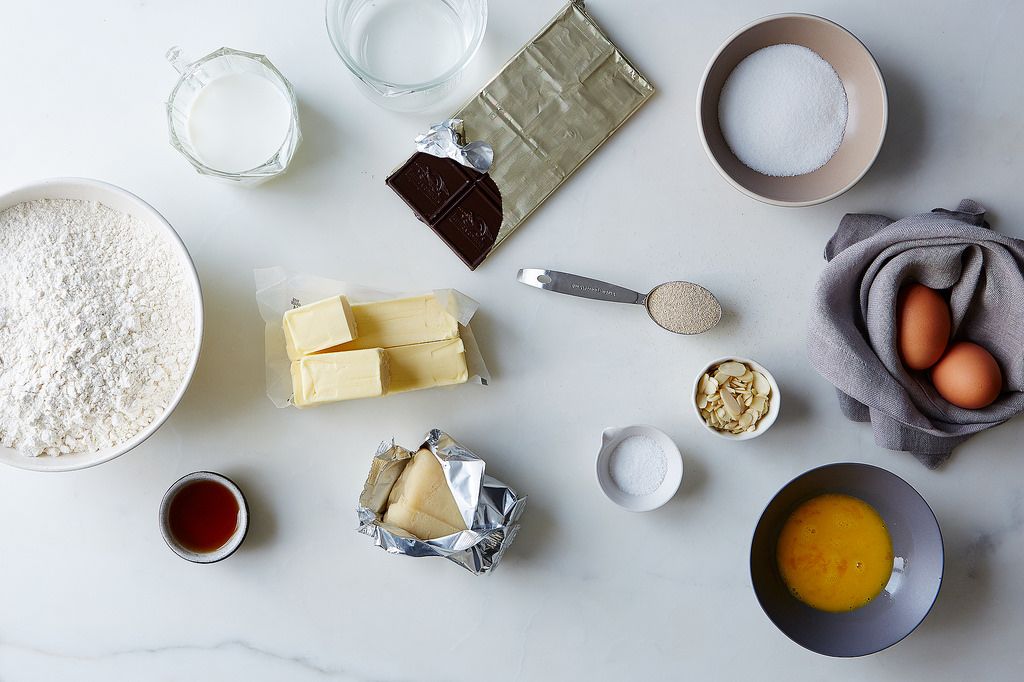
Makes 14 croissants
For the croissants:
115 grams whole milk, hand temperature
115 grams water, hand temperature
1 tablespoon active dry yeast
500 grams all-purpose flour
14 grams kosher salt
65 grams sugar
320 grams unsalted, room-temperature butter, divided
1 bar dark chocolate, roughly chopped
Egg wash
Almond cream (see ingredient list below)
Slivered or sliced almonds, for garnish
For the almond cream:
125 grams room temperature butter
250 grams almond paste, crumbled
1 egg plus 1 yolk
7 1/2 grams corn starch
15 grams rum (optional)
Begin by preparing the almond cream. In a stand mixer with a paddle attachment, mix all of the almond cream ingredients together on low speed for 1 minute. Scrape down the sides, then mix on high speed until well combined, about 1 more minute. Remove the almond cream from the stand mixer and set it aside as you prepare the croissants. This can be made up to 3 days in advance if you want to make it ahead—just be sure to bring it to room temperature before using it on the croissants.
In a small bowl, combine the milk and water. Make sure the milk and water are the same temperature as your hand (around 90º F). (Any warmer than this, and the yeast will get too hot and die.) Stir in the yeast, and let it sit for 5 minutes, or until foamy and bubbly.
In the bowl of a stand mixer, combine the flour, salt, and sugar. When the yeast mixture is nice and foamy, add it into the flour mix and start to combine it with a dough hook on low speed. While the dough hook mixes, add in 20 grams of the butter. Mix this until elastic and smooth.
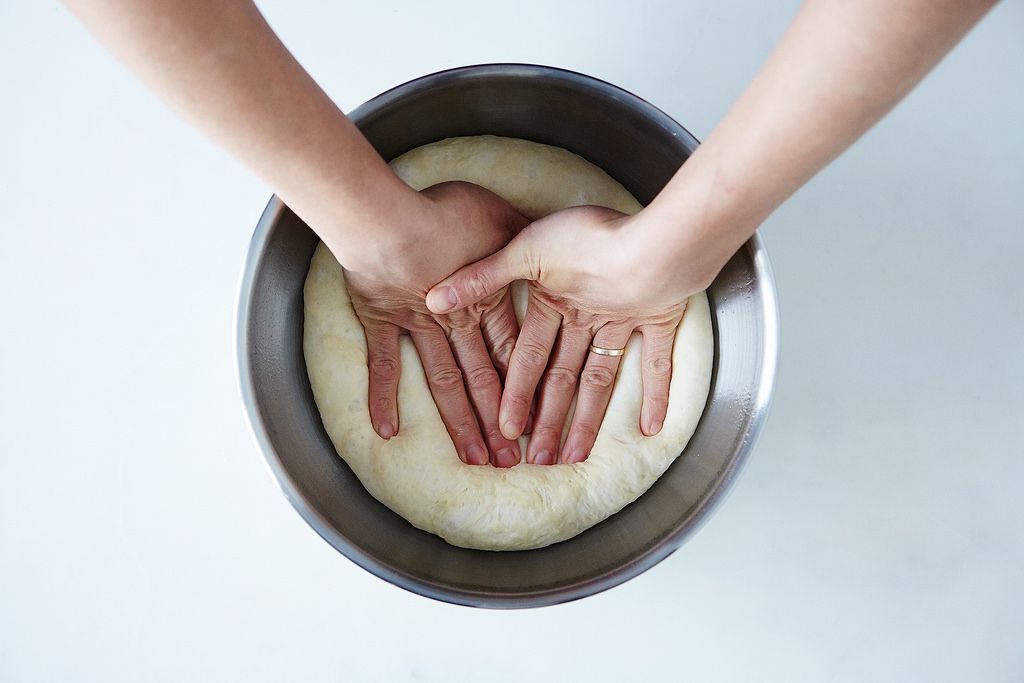
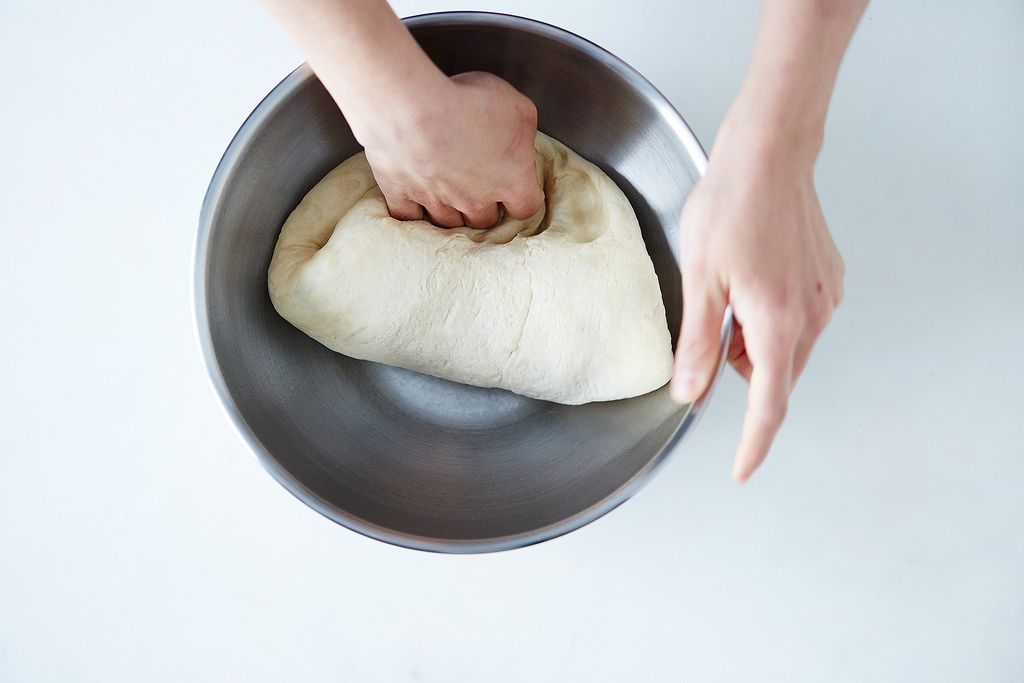
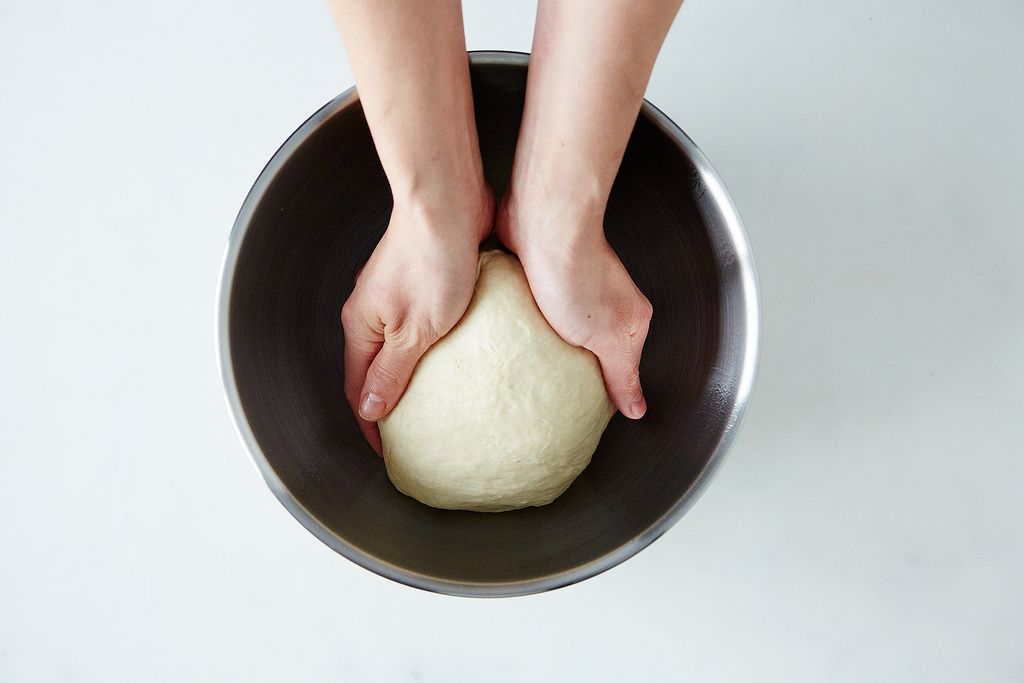
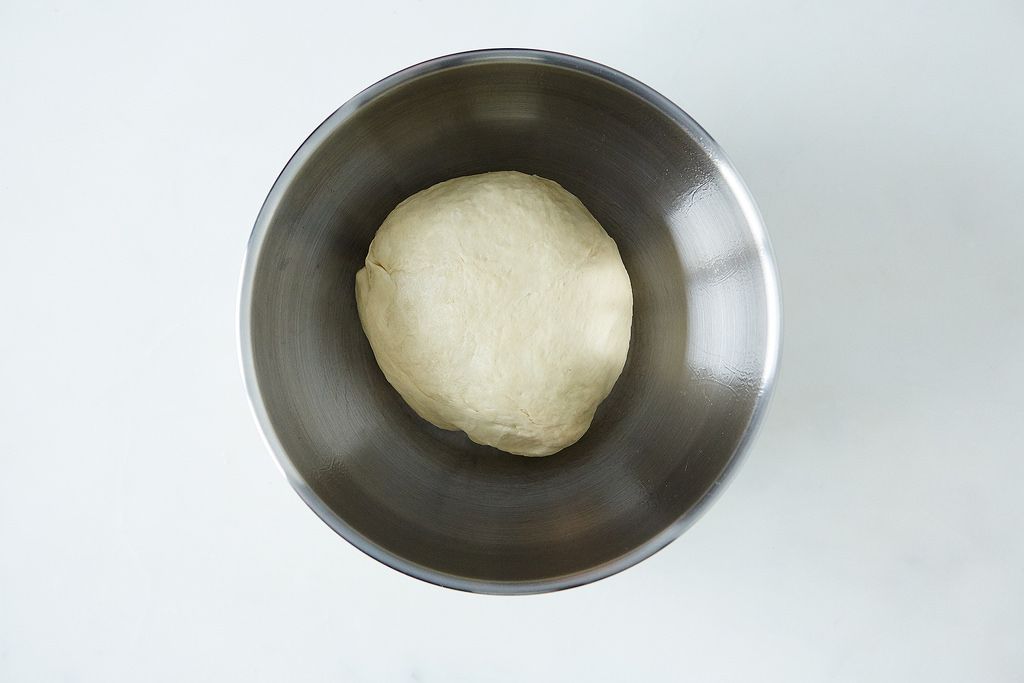
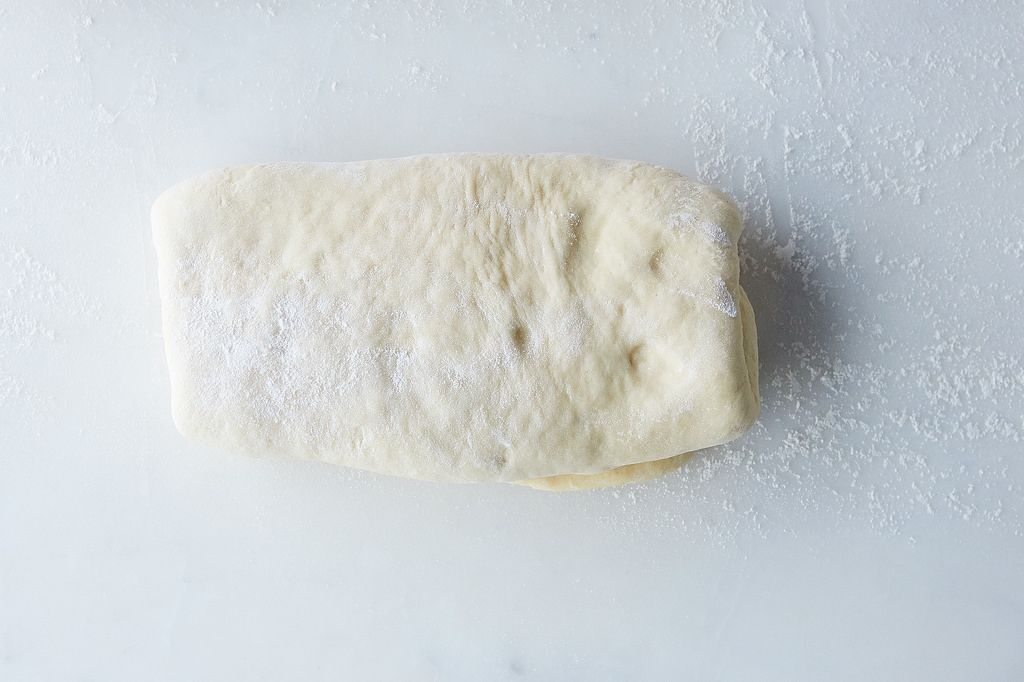
Transfer the dough to a lightly oiled bowl, cover it with plastic wrap, and let it proof at room temperature for 1 1/2 hours, or until it has doubled in size. Let it proof at room temperature for 45 minutes. Gently punch down the dough and fold it onto itself (see pictures above), then continue to let it rise for another 45 minutes, or until the dough has doubled in size from the original.
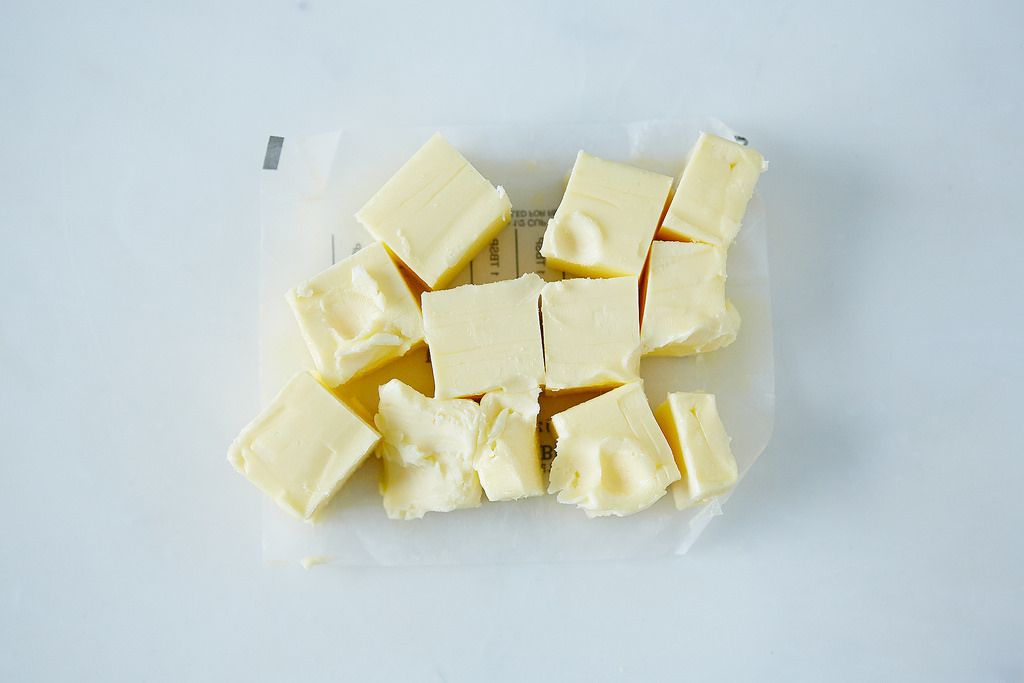
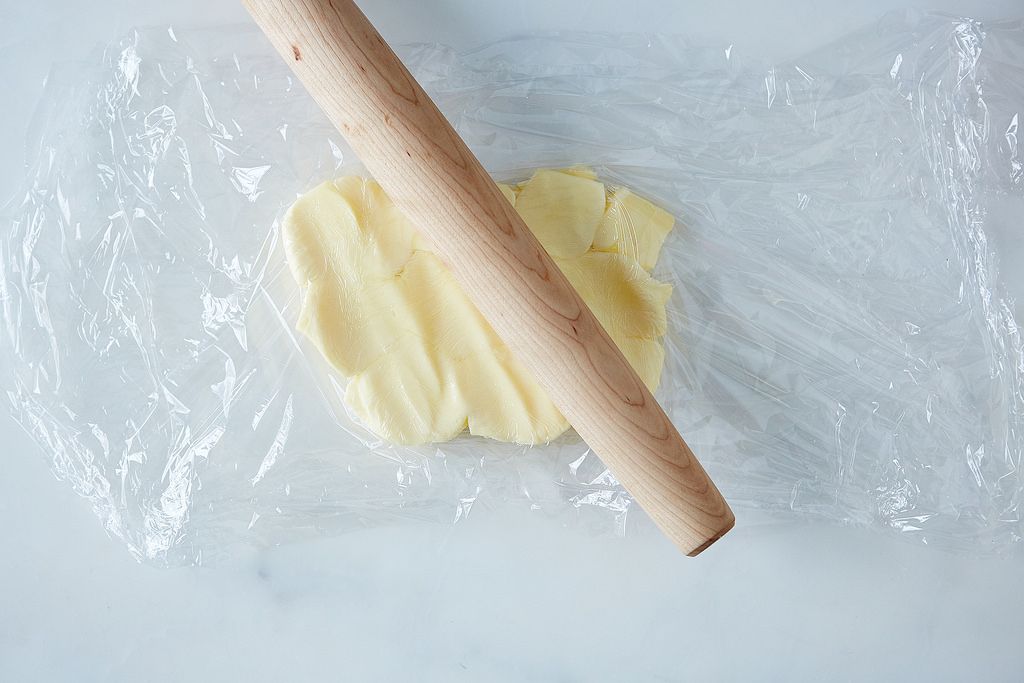
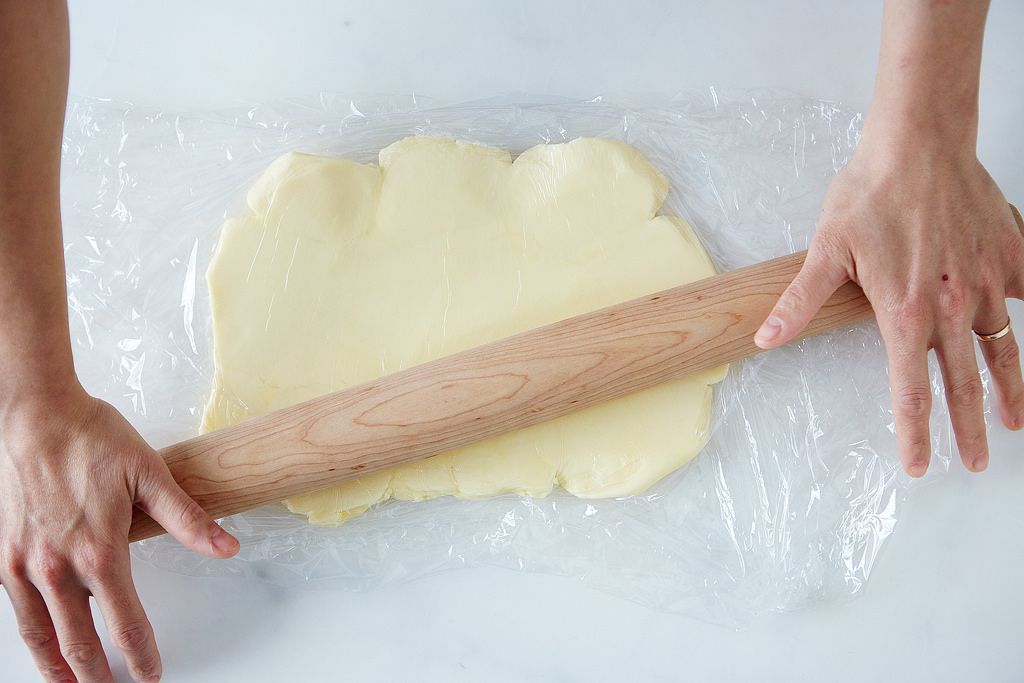
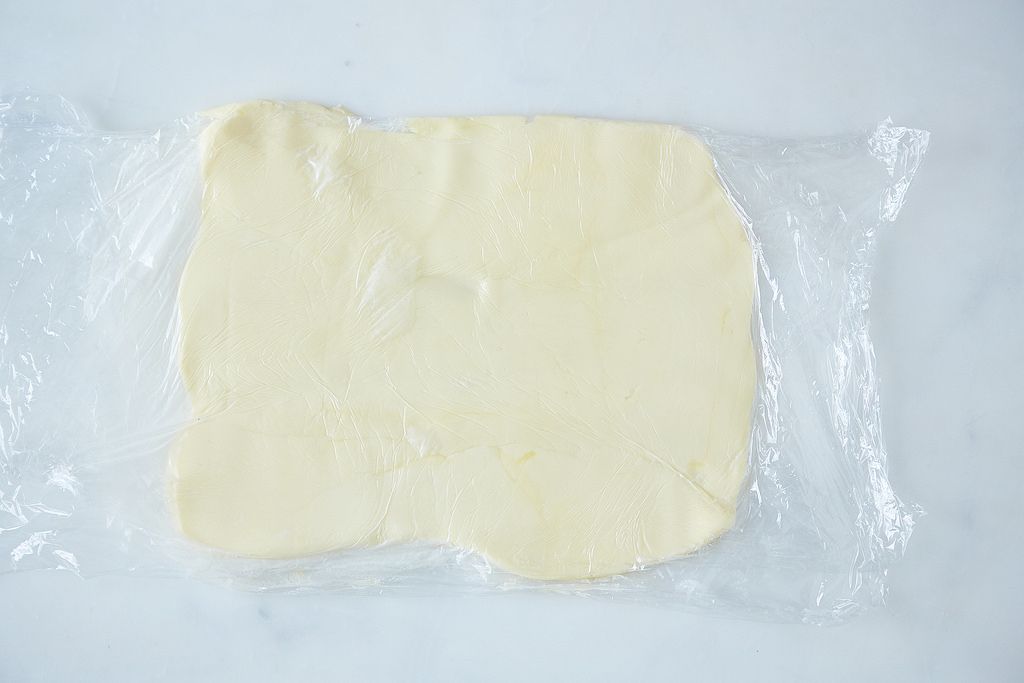
While the dough is rising, roll out the remaining 300 grams of butter: Cut it into 1-inch pieces and place it between between two large pieces of plastic wrap. Pound it (gently!) with a rolling pin until it all comes together into a thin, pliable block. Don't worry if the butter gets too thin (transluscent) in places; if this happens, gently peel back the plastic wrap, refold the butter onto itself, re-cover it with the wrap, and roll or pound it out with the rolling pin. Repeat as necessary until you have a smooth, pliable block of butter. Roll this block—still between the plastic wrap—to a size of 10 - x 8-inches, about 1/8- to 1/4-inch thick. Place it in the refrigerator to chill. Remove it from the refrigerator 5 minutes before you are ready to use it.
Return to the proofed dough and roll it out into a large rectangle on a floured surface. Fold it into thirds (with the long ends overlapping like a letter). Cover it lightly with plastic wrap and let it rest for 20 more minutes in the fridge.
Once it's rested, roll out the dough to 21- x 10-inches. This will look like a long, horizontal strip. Place your butter block over the left two-thirds of the dough, leaving a 1-inch border around it and an uncovered portion to the right. (The butter will cover both the middle and the left end of the dough, leaving the right side uncovered.) Fold the unbuttered, right side of the dough into the middle, two-thirds of the way up. Fold the buttered, left end over top of it into a letter fold. Gently press the edges together to seal the butter in. Rotate the dough 90 degrees and re-roll it out into a long rectangle. Fold the dough again like a letter, wrap it in plastic, and place it in the refrigerator to chill for 30 minutes. Repeat this process (rolling and folding it into a letter) 2 more times. After the final turn, let it rest in the refrigerator at least 3 hours, or overnight.
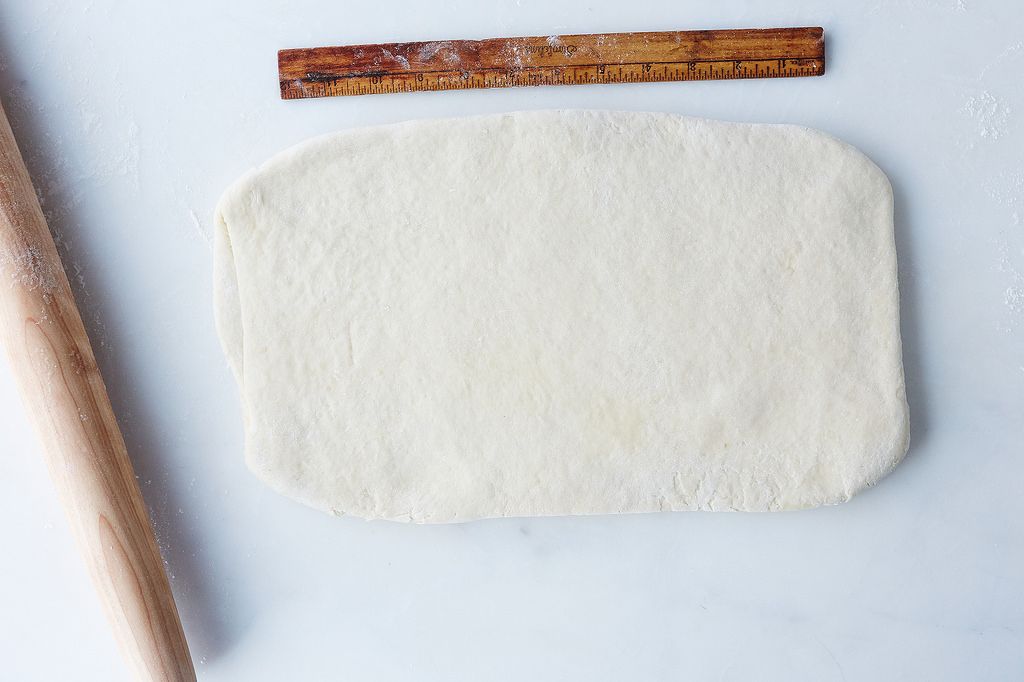
Once the dough has chilled completely, roll it on a floured surface into a long rectangle, about 21- x 10-inches. Using your hands, square the sides so that the corners are angular. It should be about 1/4-inch thick.
More: If you want to make regular croissants, stop here and read on.
Cut the dough horizontally into two even, long strips 5-inches wide (so that each strip is 21- x 5-inches wide). On each long piece of dough, make a cut every 3 inches so that you have seven 3- x 5-inch rectangles per long strip (for 14 total). Place a rectangle in front of you horizontally, then push out the rectangle slightly with your fingers. Place a line of chopped chocolate across the width from the top edge to the bottom edge and roughly 1/2 inch away from the left edge.
Brush the left edge with your egg wash, then fold it over the line of chocolate to seal it. Place another line of chocolate directly to the right of this roll, then seal it with an egg wash in the same way. The croissant should be rolled like a little scroll. Place the croissant on a parchment-lined sheet tray, making sure the sealed edge is on the bottom. Repeat for each rectangle, leaving 3 inches between each croissant on the baking tray. (You should be able to line up 7 to 8 per tray.)
When you're finished shaping each croissant, cover the entire tray lightly with plastic wrap and and allow to proof in a warm place until they're light and airy, about 20 to 40 minutes. To check if the dough has risen enough, poke one. If it retains its poke indent, it's ready to be baked.
Preheat the oven to 450º F. Carefully brush the tops of the croissants with egg wash, taking care not to deflate them. Bake them for 20 minutes, rotating at 10 minutes, then reduce the heat to 400º F and continue baking until the croissants are golden brown, 15 to 20 minutes more. While they bake, remove the almond paste from the refrigerator to bring it to room temperature.
At this point, you have completed chocolate croissants. Eat one to celebrate, then make the rest into chocolate-almond croissants. I know the chocolate croissants look good enough to stop here, but you won't regret it, I promise.

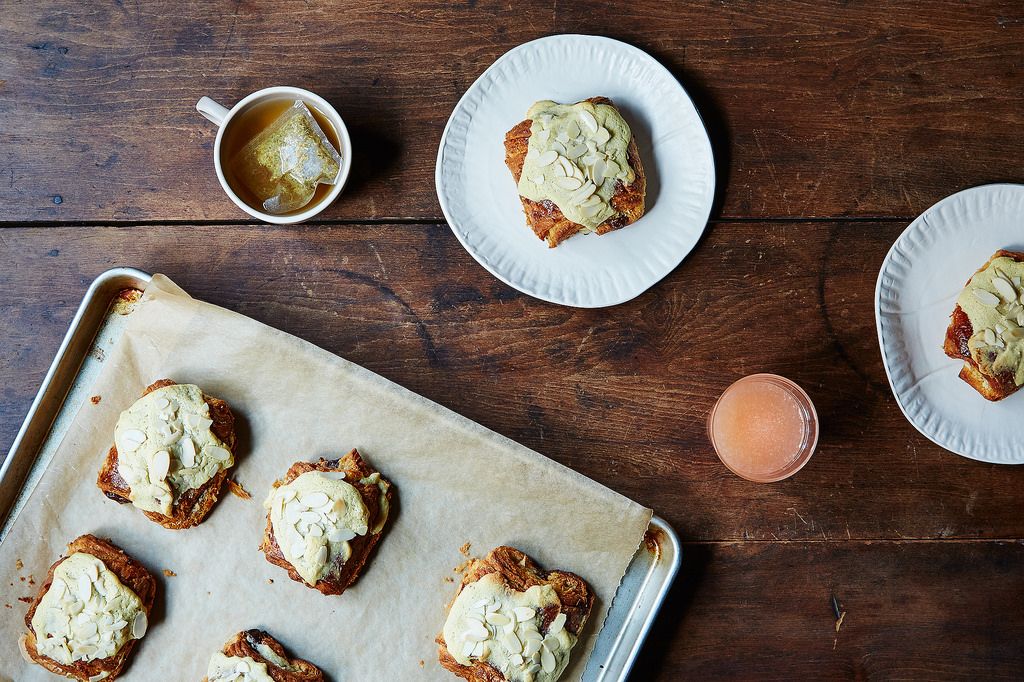
Turn the oven down to 350º F. Cut the chocolate croissants in half horizontally, as though you are making a sandwich. Spread 1 to 2 tablespoons of the almond cream over the bottom half and place the top half back on top. Spread another tablespoon of the almond cream over the top, sprinkle with sliced or slivered almonds, and bake in a 350º F oven for 15 minutes, or until the almond mixture has cooked through and is golden brown around the edges. Remove them from the oven, pour yourself a cup of tea, and have one or two. To save some for breakfast, store them in airtight container for up to 3 days.
See the full recipe (and save and print it) here.
What's your favorite type of croissant? Tell us in the comments below!
Photos by Mark Weinberg
Written by: Mei Chin
Popular on Food52
9 Comments
These were time consuming, but not nearly as difficult as I thought! Thank you! (I wish I could figure out how to show you a picture!)
See what other Food52 readers are saying.