Crafter Laura Kaesshaefer shows us how to make pretty stamps out of vegetable scraps. Attention: Members of our Burnt Toast Dinner Brigade (sign up here!)—try these out for custom dinner party menus.
A clever new use for fruits and vegetables past their prime: Turn them into stamps! Certain produce, like okra and citrus, will make graphic stamps when sliced in half—and better yet if they're dried out and gnarly like that lemon wedge wasting away in your fridge. The knobby, textured surface of corn will create a dappled effect when rolled on a flat surface, and it's a great way to use a leftover cob that's gotten a little to hard to grill and slather with basil butter. Enter the easiest way to make the most of your excess summer bounty.
This project is incredibly versatile and great for kids. I chose to stamp produce onto paper in order to create menus, but you could use fabric paint on a tablecloth, or the same technique on place cards and stationery. Simply lay down Kraft paper, spill some paint onto paper plates, dab your scraps, and stamp away.
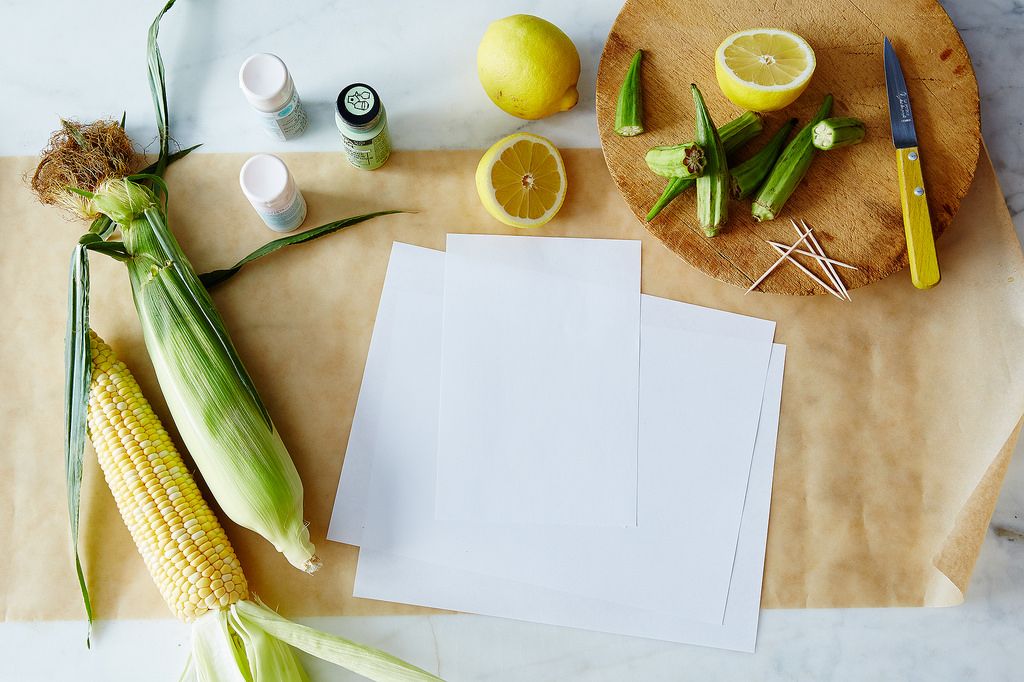
What You'll Need:
Corn, okra, and lemons, or whatever food scraps you have in the crisper that will make a pretty stamp
Paper (I like using something with a bit of texture, but plain printer paper will do the trick.)
Craft paint (Lighter colors work best beneath printed type.)
Paper plate or Kraft paper, for using as a palette
How to Use Fruit and Vegetable Scraps to Make Menus:
1. Prep. Squeeze desired paint colors onto large paper plates or a tear of parchment. Prep your fruits and vegetables by slicing them in half if the good design is on the inside, and use a toothpick to create a little handle if you need it.
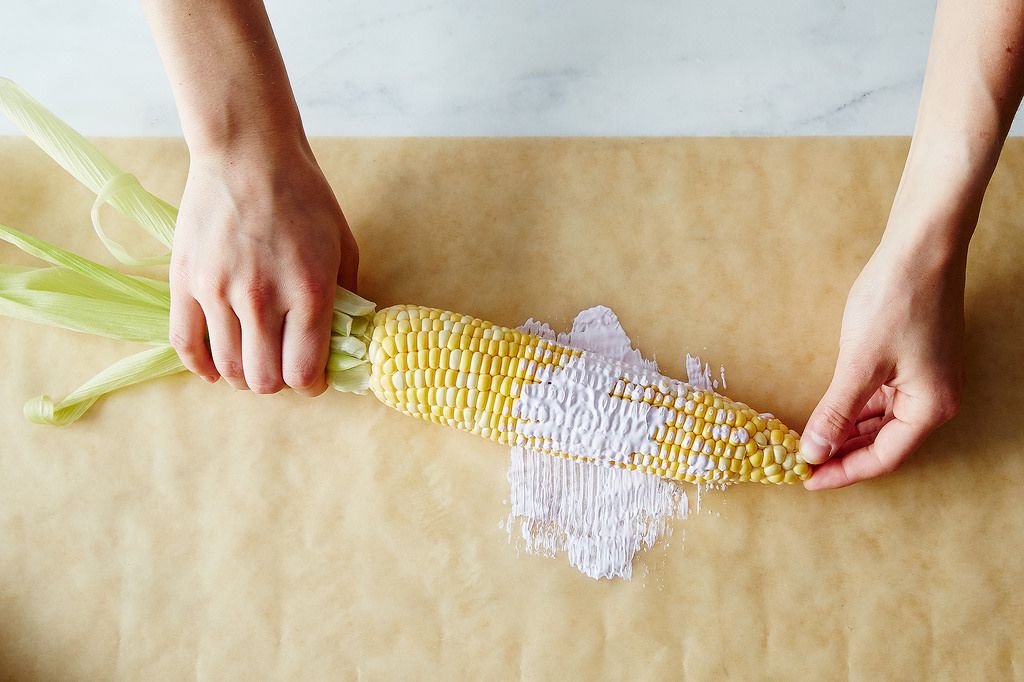
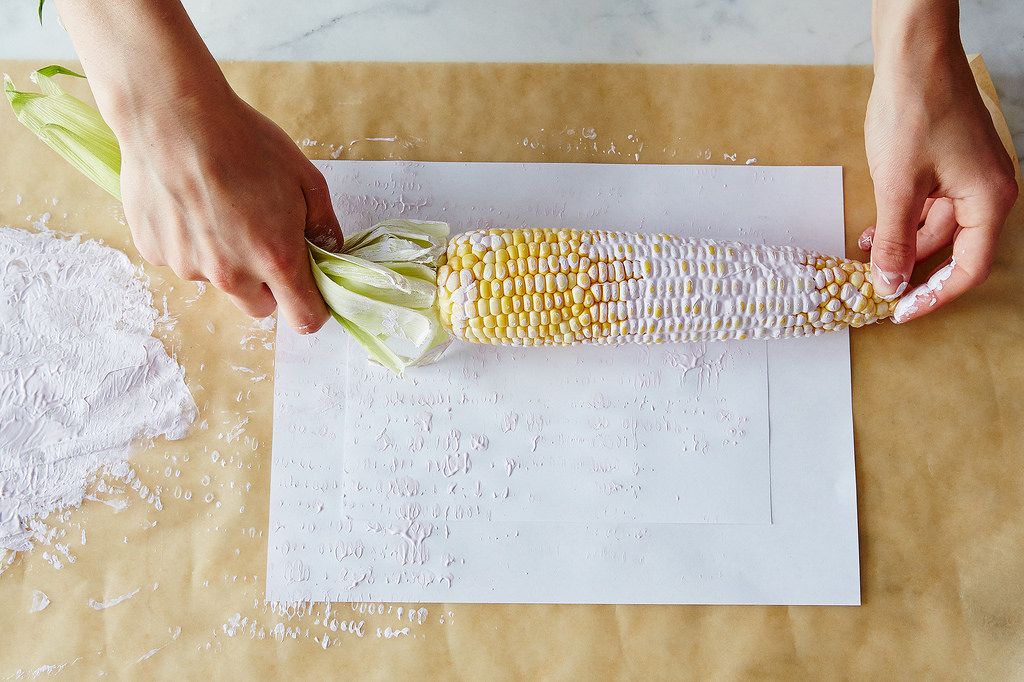
2. Stamp. Lay several sheets of menu paper on a protected flat surface. For the corn print, roll the cob through the paint so all sides are lightly covered, and then across a piece of scrap paper to remove any globs. Roll the cob onto the menu paper, moving in a single direction and not back and forth to create a pattern. You can also press it like a stamp instead of rolling it along.
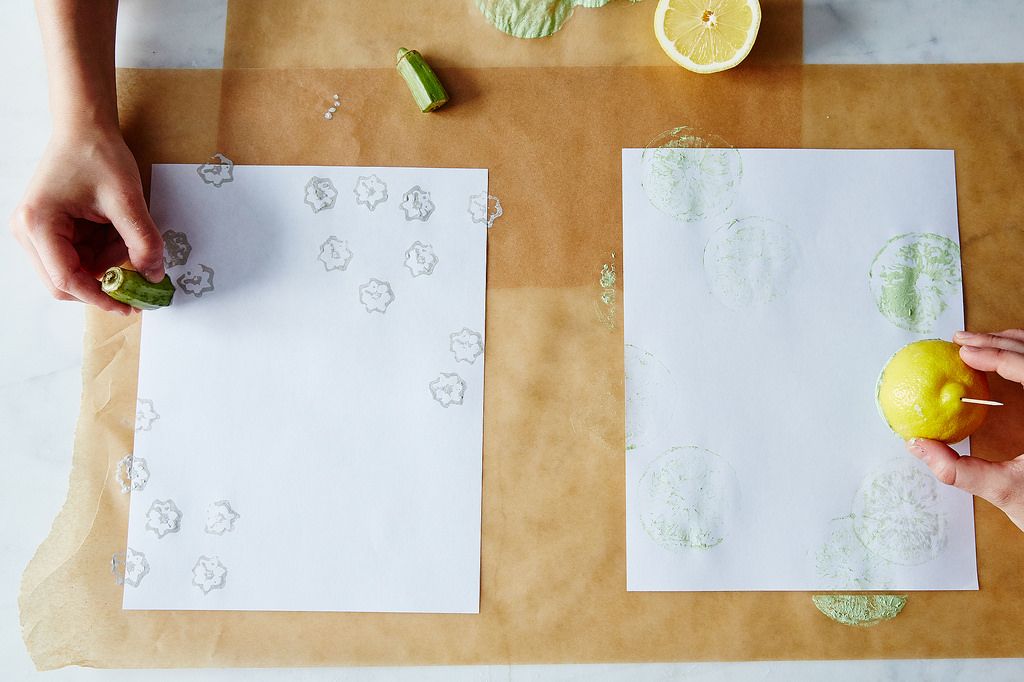
For cut stamps like okra and lemon, dip the exposed flesh lightly in paint and dab on scrap paper to remove any excess. Stamp the menu paper over and over (or just a few times!) to achieve desired pattern. If using juicier fruits and vegetables, let them dry out in the crisper for a few days before stamping.
3. Dry. Let stamped paper dry for one hour, and then stack heavy books on top for another to ensure flatness.
4. Add the menu. There are 3 ways to turn your paper into menus—so take your pick!
If you have good handwriting: Decide what you're having for dinner and write it on each menu. It will take some time and you're likely to mess up a few, but the result will be rustic and lovely. This is also the easiest option if you're just having a few guests or a few dishes.
If your printer is a beast: Some printers jam at the slightest irregularity (and if that's yours, skip to the next option). If yours can handle a few bumps of paint and the paper you chose to stamp on, stack your stamped paper in the printer tray, draft a menu on a word processer, and print as many copies as you need.
If you'd like to save the design for future dinners, too: For this, you'll need access to a scanner and a color printer. Make a digital image of your favorite piece of stamped paper and print as many color copies as you have guests (more, if you want some to use for future parties!). Draft the menu in a word processer, put the menus back in the paper tray, and then print however many you need.
That's it! Use these to grace each place setting at your next dinner party or special celebration.
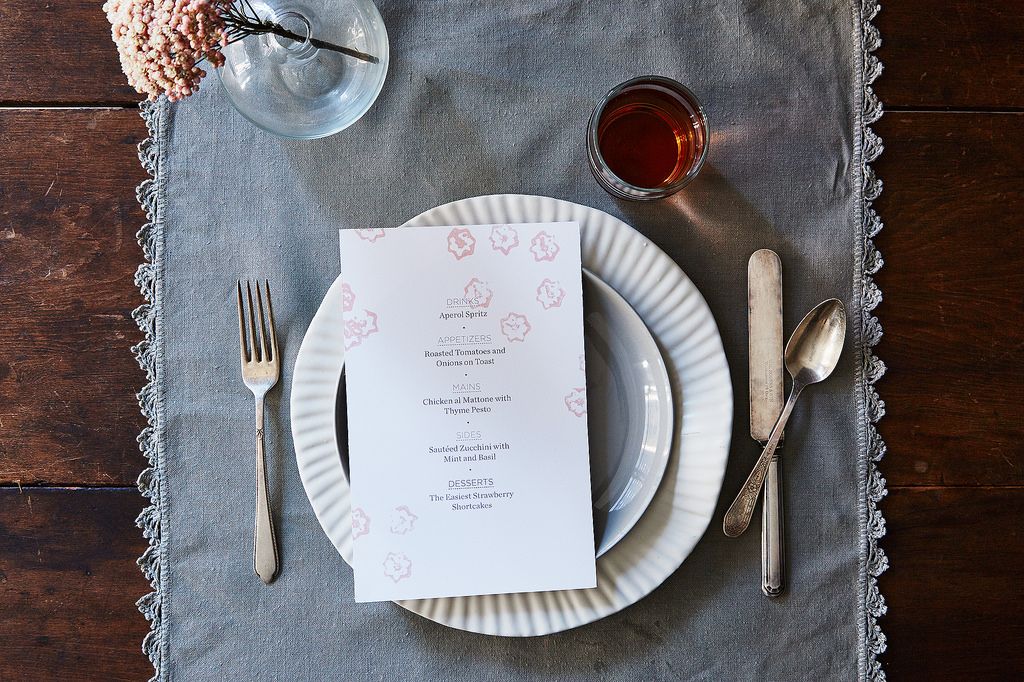
First four images by James Ransom; plated menu by Armando Rafael.
See what other Food52 readers are saying.