Yogurt

The Beginner's Guide to Making Impossibly Creamy Yogurt

May  9, 2016

The White Moustache’s Homa Dashtaki told me that making yogurt is magical to her. Magic. And I agree, because you are the catalyst in transformation—with heat and a bit of culture, milk becomes creamy and tangy and thick and sustaining.

And simply: If you’re looking to make more of your food from scratch, yogurt is a very easy and rewarding place to begin.

Caroline Lange
Caroline Lange
42
best batch of yogurt yet! boil milk, let cool to baby-bath warm, stir in yogurt, keep cozy 8 hours. refrigerate after that.
7 comments

Besides the magic part, there are reasons for making yogurt, even when you can buy it fairly cheaply nearly anywhere you go:

  • It’s less expensive. A gallon of milk will make just slightly less than a gallon of yogurt for about half of what you'd buy the same amount of yogurt for. If you strain your yogurt, you'll get a bit less yogurt—but you’ll also get a whole lot of electric-looking white-yellow whey, which you can either drink au natural, like I do, or use in any number of other ways (including adding it to smoothies, cocktails, breads, and brines). Two products for the price of one!
  • You control everything, from the milk itself to how tangy or mild and thick or loose your finished product is.
  • You don’t need any special equipment—no yogurt machine or thermometer or even recipe—to make it.

But you will need:

  • A heavy pot with a lid
  • A blanket
  • Whole milk
  • Pre-made yogurt (either your own or a store brand you like). This is your “culture.”
  • A vessel for your finished yogurt, like quart jars (or individual serving-size jars)
  • Cheesecloth (optional)

Here's how to do it:

1. Heat the milk, cool the milk.

For sake of explanation, let’s say you’re using half a gallon of whole milk. (This is easily halved or tripled or doctored to whatever amount of yogurt you want to make.) Why whole? The more fat in your milk, the creamier your yogurt will be, and the more it will set up. Homa, of White Moustache, advises that using organic milk, which typically has to be ultra-pasteurized, may not set up well. Others (including myself) haven’t had a problem with it. Up to you! If you can get your hands on raw milk (lucky dog!), by all means, use it.

Join The Conversation

Top Comment:
“I always freeze my starter in a small Mason jar right after making a fresh batch as I'm not always consistent in making more yogurt every few days. I bring it out to thaw as I'm warming and cooling milk for a new yogurt batch. I've never had a bad batch using this method and at times I've used starter that has been frozen for a couple months. ”
— Jenna
Comment

Pour the half-gallon of milk into a heavy pot set over medium heat and slowly bring the milk up to a boil. Don’t be shy here; it needs to be a full rolling boil. Doing this kills any bacteria that could contend with the bacteria in your yogurt starter, but since most milk sold commercially is already pasteurized, you likely don’t have to worry about any bacteria. But heating the milk does change the structure of the milk protein casein, which is what will give you a creamy yogurt.

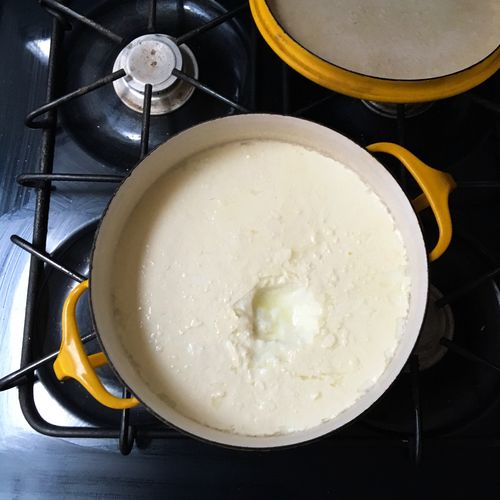
When the milk comes to a boil, remove the pot from the heat and let it cool. You’re looking for it to be baby-bath warm, and you’ll know you’ve hit the right temp when you can put your pinky finger in the warm milk and leave it there comfortably for 3 seconds.

More: Homa's tips and best practices for making yogurt at home.

Adding starter (AKA yogurt you already have, whether store-bought or homemade from a previous batch) to the warm milk. Photo by James Ransom

2. Add the starter.

That’s your yogurt sample, either from your previous batch of yogurt or from a store-bought yogurt. (Homa recommends Fage.) Add two tablespoons directly to your pot of milk, stir gently (or not at all, as Alana Chernila recommends as a way of preventing grainy-textured yogurt), then put the lid on your pot.

This is also a good time to add a splash of vanilla extract for a vanilla-flavored yogurt. Alana has also written about letting a vanilla bean steep in this warm milk while it sits.

A cozy environment allows the bacteria to multiply, which is what really turns the milk into yogurt. Photo by James Ransom

3. Bundle up!

Put your yogurt in a warm place for between 4 hours and 12 hours (overnight). The longer you let it sit out, the tangier it will be; I like a moderate 8-hour rest.

The yogurt needs to stay really warm during this rest; otherwise, the bacteria you added via the yogurt culture won’t multiply and your yogurt won’t set up! Folks like to do this in a couple of ways: Some will place the pot in the oven with the oven light turned on; others line a cooler with a towel and set the pot inside.

I have neither an oven with a working light nor a cooler, so my preferred tactic is to wrap my pot in a blanket (spreading the blanket on my kitchen table, setting the pot in the middle, and bundling the blanket up around the pot). Then I put the bundle on top of my refrigerator, which tends to be a warm, out-of-the-way spot in my kitchen.

After a 8-hour ferment, the warm milk-starter combo has transformed (!) into yogurt. Photo by James Ransom

4. Refrigerate.

While your yogurt rests, get the vessels you’re planning on storing the yogurt in very clean by washing in hot, soapy water or running through the dishwasher.

After your yogurt has sat for your desired number of hours, it will have set up: Unbundle the pot, remove the lid, and take a peek. It should look firm and gelled, and, depending on the milk you used, may have a layer of cream on top (!). Scoop out a spoonful; whey will rush into the divot your spoon makes.

If you want your yogurt at this consistency (fairly loose but very creamy), you’re all done! Portion the yogurt into the clean vessels and refrigerate for at least an hour before serving.

Straining with a dishtowel, which has a tighter weave than a cheesecloth, will yield the purest whey. Photo by James Ransom

5. Strain for a thicker yogurt.

If you want a thicker yogurt, you’ll have to strain it. (Some like to add powdered milk as a way to thicken yogurt; I prefer not to add anything and to just strain it, in part because I like the whey so much and in part because I don’t want to buy something additional.)

Line a colander with a very, very clean dishtowel, and set that colander inside a large bowl or pot. Pour the yogurt into the lined colander, cover with plastic wrap (or a pot lid) and set the whole thing in the refrigerator. Even a couple of hours will make a big difference, but the longer you leave it straining, the thicker the yogurt will be (and the more whey you’ll have—more than 2 cups’ worth).

Strained yogurt on the left, whey on the right. Photo by James Ransom

Portion into jars and refrigerate.

Both yogurt and whey will keep for at least a week in the refrigerator. (What to do with the whey? Drink it straight, add it to cocktails, bake bread with it, and more.)

Tell us about your own yogurt-making experiences and aspirations and tips and tricks in the comments.

See what other Food52 readers are saying.

  • Neva Moten
    Neva Moten
  • vs317
    vs317
  • Pamela Guevara
    Pamela Guevara
  • witloof
    witloof
  • Emily Rosen
    Emily Rosen
Writing and cooking in Brooklyn.

76 Comments

Neva M. January 4, 2019
I have been making nonfat yogurt for at least 20 years, usining nonfat dried milk. tangy and easy...6 hours perfect..no milk fat or sugar!!!
 
vs317 May 10, 2018
Tried this and could not get the yogurt to set. I guess my oven light produces less heat than other people's or something. That method wasn't close to warm enough for me. Going to try it again with the "keep warm" function. If that doesn't work, I'll explore some of the great-sounding recipes here in the comments.
 
Neva M. January 4, 2019
try turning on to 150-200. then turn off when you put the yogurt in. do not open..until time is up..put a sticky on the door...to remind you not to turn on the oven or open the door!
 
Pamela G. April 30, 2018
I heat the milk to a boil, shut it off and let it cool down to 110 degrees. I then pour it into a clean mixing bowl and whisk in the starter. Then it goes into warmed Corning Ware casserole dishes with the lids on. I place the casseroles on a heating pad turned on warm, throw several old bath towels over the set up and let 'er rip for however long I want. I sometimes leave it go 12 to 24 hours. Then I set the casseroles in the fridge until it is cold, whisk it and pour the yogurt into containers for later consumption. Works great.
 
witloof March 25, 2018
Agree with the author about not using powdered milk, mostly because it tastes awful.
 
Emily R. March 7, 2018
I prefer yogurt for probiotics and greek yogurt full of probiotics.
I have blog on Probiotics and yogurt, you can read all the information.
thanks
 
Emily R. March 7, 2018
I prefer Greek Yogurt, it's a good diet food as well.
 
Louise March 5, 2018
I've started making my yogurt for the past 6 months and recently have had a string of batches that taste carbonated. Not sure what is causing it. I have noticed it's usually when I've used a culture from previous batch, though the batch was not fizzy. How do I fix this? Don't want to have to keep buying new cultures!
 
Pamela G. April 30, 2018
I have found if you use starter from a previous batch it doesn't work as well. By the 3rd time around you get really scuzzy results. I always use fresh, plain store yogurt. Works much better.
 
Jenna December 28, 2021
I always freeze my starter in a small Mason jar right after making a fresh batch as I'm not always consistent in making more yogurt every few days. I bring it out to thaw as I'm warming and cooling milk for a new yogurt batch. I've never had a bad batch using this method and at times I've used starter that has been frozen for a couple months.
 
Bob R. January 25, 2018
I just made a batch of yogurt using Ultra Pasteurized Half and Half milk, it came out indescribably thick and delicious. Fermented for 10 hours; it was medium tart. If you make yogurt, you have to try a batch with half and half !!
 
Robbie L. January 11, 2018
My latest method was gleaned from other websites. I slowly heat a half gallon of whole milk in a stainless pan (rinsed with cold water before pouring in the milk) to 180, checking with my instant read thermometer. Cool to 105-110 (takes about 45 minutes; I set my timer). Then I whisk 1/2 cup of room-temperature yogurt reserved from my previous batch with 1/2 cup of the warm milk and gently stir into the pan of milk. Using a canning funnel, I ladle the milk into 2 sterilized Ball jars, plus 1 sterilized 1/2 pint jar (this is part of my starter for the next batch), and screw on plastic lids. Last of all, I put all 3 jars in a very small cooler and add the hottest my tap water can get to the entire cooler until the water reaches halfway up the quart jars. (I do have to set the half pint jar on top of a small upside-down bowl so it doesn't float away!) If I do this after dinner, the yogurt will be well set and taste delicious by breakfast the next day. It's been a foolproof method for me, and I've tried many methods over the last 45 years!
 
Margaret K. January 5, 2018
Using sterile utensils is to avoid cross-contamination by other molds that might be hanging around your kitchen (cheeses, fruit, vinegars, etc.) that could interfere with proper yog'ing. Heating to 180 degrees is not to further sterilize pasteurized milk, it is to make the proteins coagulate better. You need to heat to 180 even if you're using reconstituted powdered milk.
 
E M. January 5, 2018
"since most milk sold commercially is already pasteurized, you likely don’t have to worry about any bacteria...get the vessels you’re planning on storing the yogurt in very clean by washing in hot, soapy water or running through the dishwasher...Line a colander with a very, very clean dishtowel..."
All this emphasis on cleanliness is great from a food safety standpoint, but then you illustrate the article with a picture of someone's finger in the starter.
That is really not a good sanitary practice.
 
Marianne B. November 29, 2017
The BEST thing to do with whey? ! ! Use it for starter. It has all the bacteria your yogurt has. Works like a charm.
 
Merrick M. November 29, 2017
This is a great way of making yogurt when you have the time. For all the other times try the EZYogurtMaker dot com to prep up to 32 servings with only 1 minute of your time. Best invention ever. Saves us time and money and no more washing dishes/pots/individual containers...
 
Ann October 17, 2017
Over 160 degrees for more than a few minutes (doesn't need to boil, but does need to stay above temperature for more than an instant). Cool to at least 110. Add starter, and put in Instant Pot or "proof" setting of oven at 90 degrees.
 
betsy September 15, 2017
can someone help me? I put my yogurt and milk in the yogurt machine and forgot to turn machine on. It sat in there for 12 hours. Should I throw away or can I use it
 
Andie P. September 15, 2017
It should be okay. Just turn the machine on and let it go for another 12 hours. Because it has been so warm here for the past few weeks, I have just left the milk with the culture on the kitchen counter and it has progressed just fine. You can tell at the end of the process - if the milk is thick, it has converted. Did you heat it to 180° and then cool it to 115° before adding your yogurt culture? That is always necessary for the milk to "convert" the beneficial bacteria.
 
Andie P. August 24, 2017
I have posted several times in the past. I have an entire treatise about yogurt on my blog. NEVER BOIL THE MILK! Bring the temp up to 180-200 degrees (186 is optimal) then cool to 115°F. and then add the powdered cultures or the culture from a previous batch. There are certain ways to manipulate the yogurt. Less butterfat means IT WILL HAVE MOR OF A "TANGY" FLAVOR. More butterfat with produce a thicker yogurt and LESS TANG! You can use half and half and even heavy cream, which gives a product that when strained - produces very little whey - that is a good substitute for clotted cream, without all the work. I make kefir, does not require heating. I make sour cream and creme fraiche and cream cheese with CULTURES from the New England Cheesemaking company. I use probe thermometers that are sterilized and you need the temperature deep in the liquid. An infrared thermometer reads ONLY THE SURFACE temp and is not accurate.
 
Scribbles February 4, 2018
Totally agree Andie! And, a quick way to cool down the milk is to set the pot in a sink of cool water - again watching the thermometer till it reaches 115. I make yogurt every week and it always turns our perfect with Andie's method - I have used all milk, part half and half and even part whole cream - it's all good.
 
Marianne B. August 24, 2017
oops! For my last note - use the yogurt in place of sour cream to make sour cream cake. Sorry.
 
Marianne B. August 24, 2017
I love my mother in laws sour cream cake. I use my yogurt instead of cream cheese - there is NO difference.
 
Marianne B. August 24, 2017
One helper: use whey as starter for next batch. It has the same bacteria as the yogurt. Another helper, strain yogurt for up to 20hours..what you get is yogurt CREAM CHEESE!
 
Damian July 4, 2017
If you have a good thermometer gun (this prevents introducing non-culture bacteria into the mix), you can measure and document the differences in how your yogurt is prepared and establish an optimal recipe for the kind of yogurt that you find most appealing. The documentation is important as in ever kind of research. Make it a sort of good tasting introduction to real science for your children.
 
Robin April 22, 2017
I basically use this method although I don't let the milk boil...once it's cooled I add the starter and pour it into a large mason jar, wrap it in a tea towel and put it in a cooler bag with a couple of other mason jars filled with boiling water. I then leave it for 12-18 hours, then put it in the frig and it's always turned out creamy.
 
Leigh M. February 12, 2017
Good recipe! I like the raw milk comment and the blanket idea as well. I typically make about 3 gallons of yogurt a week and yes mine is raw as I have two milk cows outback. I only heat to 130 degrees and its always great. I roll my drained yogurt in black pepper for a bit of spice or I add cranberry and black currents and keep with me to drink throughout the day. I package this cheese when I travel and find it keeps for about six weeks. Thanks for the article.
 
catharina February 5, 2017
please, could someone explain why I get slimy yoghurt pretty much every time? I tried this method, I made it in my Thermomix on autopilot, I tried different brands of starter yoghurt etc, same story always, so I've given up unfortunately...if you know where I'm going wrong let me know, any help is greatly appreciated!!
 
Brandon February 5, 2017
I had to Google Thermomix to see what it is. My guess is it is either not hot enough or too hot. Here is a copy/paste of my previous post that explains my simple method that has not failed me yet. It always comes out firm with some liquid on top that I pour off or stir in:

I've been making yogurt at home for years and it is simple. I have to say though, I would _never_ boil my milk. It is not necessary and only has the potential to add burned taste or get 'skin' mixed in. I heat slowly to about 180 - 190 and as soon as it hits temperature I remove from heat and let cool to about 110. Sometimes I put the pot over ice to speed up the cooling process if I am in a hurry. Then I add the culture, stir a bit and leave in oven with light on for about 10 hours. BTW, I have used nonfat milk with no issue and always use a good, natural yogurt I like for the starter or a scoop from my last batch.
 
catharina February 5, 2017
thanks, Brandon, I did do it the conventional way (no Thermomix) as is described in the article. I wonder whether it has to do with the starter? I tried several, all organic, I tried raw milk, pasteurised milk and UHT, all kind of worked except for the slimy texture. I still ate it, the taste was absolutely fine...anyway, thanks for taking the time to reply, I'll try again and see whether the temperature is to blame (although the Thermomix is very accurate...)
 
Laura415 February 5, 2017
I tried this method and once it worked great and once it came out slimy. The only difference was that the batch got too cool overnight. That one came out slimy. I usually heat my milk to 160º for 20 minutes and then cool to 115º before adding my starter. Then I put the jars in my cooler with jars of hot water that I change at least every 8 hours. That method works great. I think slimy comes from temps too cool or too inconsistent. I used the slimy yogurt in recipes that call for buttermilk or yogurt. I was also going to try using the last jar in a yogurt panna cotta with gelatin added to fix up the texture.
 
catharina February 5, 2017
thanks so much, Laura, I will try and watch the temperatures more closely (it does, however, not explain why the thermomix yoghurt turns out slimy, too, as it keeps the programmed temperature consistent for 8 hours...)
 
Laura415 February 7, 2017
Yes that is troubling. I would also pay close attention to the age of the milk being used. I would make sure to pasteurize the milk for the full length of time and don't try to make it shorter. In addition check your milk to be sure it isn't ultra pasteurized or homogenized which can cause problems with yogurt setting up. It's all in the details. Makes it hard to figure out what the problem is.
 
Margaret K. January 1, 2017
This is a big production! I used to do all that and my yogurt would never solidify. I even bought a bread proofer to keep the temperature level, but nothing was really satisfactory. When Cuisinart came out with an automatic yogurt incubator, I thought I'd died and gone to heaven. But it's even easier than that now: Just get an Instant Pot Pressure Cooker. It has a yogurt feature that boils the milk to 180 degrees without worrying about boilover, and you can incubate the yogurt right in it, so no transferring hot milk from one container to another. Let the hot milk cool to 110 in the container. You could probably speed the cooling process by putting it in a cold water bath in the sink, but I don't bother. When it's down to 110, just mix in your starter, put the lid on and set the number of hours (degree of tartness). Come back at the end of the time or thereabouts, and put the covered container in the fridge for a few hours until you're ready to strain or bottle it. I strain my yogurt in a muslin bag hung inside my Filtron Cold Brew Coffee body, set in a bowl (Pyrex 8-cup pitcher), in the fridge. It's easy to pour out the whey from the pitcher into a mason jar, and you can control how thick you want the final product to be. I like my Greek yogurt nearly as thick as cream cheese for versatility. The bag has to hang -- if you support it in a strainer, not enough whey wiill drip out. PS When you buy that Instant Pot, also get an extra container, a silicone lid and a glass lid, because it will quickly become one of your go-to kitchen appliances -- and no, I don't work for the Instant Pot people!
 
Marie N. November 9, 2016
Our new recipe for the homemade yogurt can be found at http://homemadeyogurt.net/
 
Donna August 12, 2016
All milk, regardless of whether or not it's organic, that comes from a grocery store is likely to be ultra pasteurized.
 
Sarah J. August 12, 2016
We've got an article about how pasteurization differs between conventional and organic milk! https://food52.com/blog/17046-your-organic-milk-may-be-3-times-as-old-as-the-conventional-gallon
 
Laura415 August 12, 2016
That isn't true where I live. We have low heat pasteurized milk from St Benoit, Raw milk from Caravale, Ultra pasteurized milks from Organic Valley, and mostly regular higher heat pasteurized milks from many brands. All milks state the processes and ingredients so if it doesn't say Ultra Pasteurized it probably isn't.
 
Linda B. July 13, 2016
I never comment, but really wanted to check in on this one. One person mentioned heating the milk in a glass bowl in the microwave. I've been doing this for years, testing the temp with a thermometer to just over 180 degrees. If I bring it to very hot, then let it cool slowly, then add culture and let it incubate in the microwave, it turns out perfectly every time. I have a microwave that lets you do time at level 1 setting (10% power?) which I do for a minute, every now and then throughout the day to keep the yogurt warm. If I want to use the microwave for something else, I just remove the bowl and put it back when I'm done. I've been using skim milk, and straining it in a colander lined with a basket type paper coffee filter, which works beautifully, and releases the yogurt almost completely.
 
al W. July 12, 2016
Another use for the whey - let the dog have it. She'll never have such a lovely, shiny coat. And her tail will be wagging all the while she's drinking.
 
nanvy July 9, 2016
Nancy T
I started making yogurt when I got married twenty odd years ago. My Armenian mother in law showed me how. She gave it to her children with a drizzle of dark Karo syrup as a snack after school as well as for the traditional uses. Her method, which of course was her mother's, is exactly what was written here - down to the pinky! The only difference is that she has a yogurt sweater instead of a blanket. I tried to find better more modern ways to make my yogurt. Some worked and some didn't. Amy just keeps making it the same way. She will be happy to know her method was printed on a modern and trusted website! She doesn't have a computer but I'll show her. Thanks.
 
Theresia A. July 9, 2016
It is very important to use a starter yoghurt with active bacterial culture. Not every commercial yoghurt is suitable for making one's own yoghurt. I have been making my own yoghurt for a long time and I prefer draining the yoghurt and turning it into an Icelandic skyr which is thick and creamy. By rinsing the pot with cold water and heating the milk slowly on low heat there will not be any burned bottoms. I mostly use full fat goat milk as goat milk is closest to human milk in its chemical composition and therefore more easily digestible.
 
Karina G. July 8, 2016
I have a question if you could help me. I live in an extremely hot place. Should I still leave my yogurt outside for step number 3?
 
Caroline L. July 8, 2016
Great question, Karina! I think it will probably be okay—the milk and culture do need to stay quite warm! You might consider a shorter ferment, though. Let me know how it goes!
 
Laura415 May 22, 2016
Organic milk where I live is almost never ultra pasteurized. Avoid ultra pasturized anything if you can. It doesn't make it any safer to eat just makes it taste cooked and kills anything good in the milk, which makes it spoil more easily once opened. I also wouldn't bother using raw milk unless you don't heat it first. Heat kills everything good in raw milk and usually creates a loose yogurt that just doesn't firm up like pasteurized milk. Drink your raw milk and use organic pasteurized milk for yogurt making. I'm really into milk kefir these days. Made with half and half or cream it easily has the taste and texture of sour cream or creme fraiche
 
Jo C. May 20, 2016
If you’ve gone to all the trouble of sterilising the milk, DON’T use your finger to scrape in the starter culture, as show in the photo above. Germs!
 
TheOriginalWalrus May 18, 2016
Hey guys, try doing the same thing with heavy cream (a quart of cream and a tablespoon of yogurt), let it sit for 4ish hours and boom, creme fraiche. You can also add a little buttermilk to cream. Enjoy!
 
Caroline L. May 18, 2016
I've been meaning to try making creme fraiche! Thanks for the tip!
 
RW May 16, 2016
I've been making yogurt for about two years. I bring whole milk to a full boil, pour it into quart mason jars(I make a gallon at a time.) and whisk in yogurt when it is barely warm to the touch. I use a seedling heating mat, which gives a very gentle warmth, and cover the jars with a box and flannel sheet. I leave the yogurt overnight.

For a starter, I buy a quart of Stoneyfield, since we like the flavor, and divvy it up into 8-10 silicon baking cups to freeze. I peel of the cups and drop the frozen blobs into a ziploc. Once I found a lost one that had been frozen for six months and it still made perfect yogurt. I do use my own yogurt as a starter once or twice at a time, but then go back to new starter since the idea of ruining a gallon of milk is not something I want to risk.

The most popular variation has been vanilla yogurt. I steep vanilla beans in the milk as it comes to a boil and add 3 tablespoons of turbinado sugar per quart while the milk is still hot. This makes a richly flavored but mildly sweet yogurt. It sets up perfectly.

 
Lea May 15, 2016
Another easy thing to get your yogurt to jell a bit more, eslecially of you dont want to use whole milk or there is not much cream, is to add <>1 Tablespoon of gelatin. There are some brands that only use clean, grass fed animals to make their gelatin, and gelatin is so good for your skin! I just dissolve it in the milk before heating it, and then heat, although I get raw milk (lucky me, I know) from a local farm, and I only scald the milk before cooling. Has worked beautifully for 14 years now!
 
Lea May 15, 2016
Please excuse the typos....especially if you don't. ....
 
Lea May 15, 2016
One more thing....on top of the water heater is also a swell place to put it to culture. ...
 
Joan -. May 15, 2016
That's a grew spot! Thanks!
 
Stephanie H. May 15, 2016
I made my own yogurt for the first time this year, following this method almost exactly. (I did use a thermometer for the temps though). It was so cool to go to bed and wake up to a fresh pot of yogurt! I strained it for more of a Greek yogurt consistency but then was stumped for what to do with the whey. Turns out Harold McGee has a recipe that solves this problem--you can make a caramel sauce with the whey, and blend it back in for a caramel yogurt! Or, keep it separate and drizzle over servings as needed, which is what I did.
 
Andie P. May 15, 2016
I save the whey and use it in baking. It gives a boost to leaveners - makes quick breads - banana, pumpkin, zucchini, etc., lighter. And also in yeast doughs - especially ryes and whole wheat, heavy on seeds. Yeast LOVES whey and will develop more lift when it is subbed for some of the liquid. I bake a lot of bread, sweet rolls, etc.
 
Laura415 May 22, 2016
I add a little honey and chill it or use ice. It's very refreshing. Or use it in homemade bread. The dog likes it on his food as well.
 
Avon L. May 15, 2016
I make yogurt the same as most: Heat milk to 180 then cool to 110, add a bit of starter (one spoonful per quart.) Then pour into wide mouth quart jars and place in a stock pot. Go to sink and fill with very warm, not hot, water. Set the pot on the stove with a lid and should be ready in a few hours, depending on temp in your kitchen.
 
Daisy May 15, 2016
I have been making my own yogurt for almost a year now. I tell you, what a great relieved. the store bought yogurt this side of the globe is soooo expensive, so making my own was a God sent. The first time I started I followed some recipe I found on youtube. Instruction was long, but worth the wait. I decided to compiled some more recipes and come up with a very easy solution, so I did. After I boil my milk and let it cool. I prep my cooler. I filled two half gallon jars with hot water and by the time my milk is cool down, I stir the culture in and put them in mason jars, put them in the cooler and leave them for more than eight hours. I have not been disappointed. Thank you all for the great recipes!!
 
Mickey0627 May 14, 2016
I never boil the milk, just heat to 180. Also, after I add the culture, I pour the milk into glass ball jars. After 8 hours, I just put them in the frig.
 
Alan May 9, 2016
I started making my own yogurt last year and I've had mixed results. It seems like no matter what I do, the first batch is always fantastic, but each subsequent batch (using a bit of the previous batch as a culture) is worse and worse. After 2-3 batches, I need a new commercially bought culture.

I'm slowly zeroing in on some problems. I decided to get a yogurt machine for the sake of consistency, as the temperature and draftiness of my apartment depends on the time of year. When I first started, I didn't heat the milk, I simply let it come to room temperature, added the culture, and put it in the machine. Some people seem to think that you're destroying some of the nutritional benefits of the milk by heating it to pasteurization temperatures, but it seemed to me that I just ended up with lots of other bacteria competing with the "good" bacteria -- a problem I've learned to recognize from other fermentation projects.

Now I heat the milk to 180F and get better results and manage more batches before everything goes off the rails. I read somewhere that the culture used to start the next batch should be pretty fresh, so I started freezing a couple of tablespoons as soon as the yogurt was done. So far this has seemed pretty promising -- my last batch was inedible, basically large chunks of soft fat floating in whey, but I forgot to freeze the starter until 4-5 days after it had been made.

Does anybody else freeze their starter? Or have any success stories for overcoming this problem? Or am I just being unrealistic in thinking that I should be able to keep a yogurt culture going essentially indefinitely, like a sourdough starter? Considering how long people have been eating yogurt it seems like it would have to be doable or, well, we wouldn't have any yogurt....
 
Andie P. May 9, 2016
The heating in yogurt culturing is important and here are the reasons.
Following is a quote from the California Milk Board:
"Yogurt is formed by the growth of two bacterial organisms in milk; Streptococcus thermophilus and Lactobacillus bulgaricus which turn the milk sugars into lactic acid. These are two separate bacteria that are active at different times during processing. Some times you will also find yogurt that contains other ""Probiotic"" cultures such as Lactobacillus acidophilus, Bifidobacterium longum, and Bifidobacterium infantis which are bacterium normally found in your intestines. Together these bacteria aid in digestion and the synthesis of vitamins. Here are the required steps. Heat milk to between 180 and 200 °F. Heating the milk is done for a few reasons. First, to sterilize/pasteurize the milk so that the yogurt bacteria/culture has a hospitable place to grow in. It is not desirable to incubate contaminating bacteria that might be present in the unsterilized milk. Heating should be done even with pasteurized milk to help make a smooth thick yogurt. Heating the milk also helps stop the whey from separating out quite as much. You must then cool milk to 115 °F and add yogurt culture. (If the milk is too hot it will kill the yogurt bacteria.) Stir in yogurt culture gently until dissolved. Hold temperature at 105 to 110 °F for approximately 8-10 hours. This allows your ""good"" bacteria to grow. Finally, you must refrigerate the processed yogurt for at least two hours. Refrigeration help slow the continued bacterial growth. If yogurt is not refrigerated it will become sour."

I also make Kefir and there is no need for heating, adding cold milk to the kefir "grains" is okay - it just cultures itself at room temp and will even grow, but much slower, in the fridge.
 
Daisy May 15, 2016
Just bring your whole milk to boil and turn the heat off(no it won't taste burned). Let it cool till you can stick your finger in there as the instruction on this page advised. You don't need your machine. I did a bunch of experiments with different type of container for storage. I have used pottery, plastic and mason jars. They all work, but I am sticking with the mason jars! The majority of recipes say we must cook the milk in stainless steel pots, not just any pots. Not sure why, I just followed their experiences. I have also tried leaving my yogurt in my living room to developed. this takes time as my living room is not as hot or warm. so that is why I used the cooler. this method never fails to produced fantastic results. I make mine before I go to bed. when I wake up in the morning, its all ready to be eaten!

I have tried to freeze my seed too. it still works, but now I just make yogurt before I run out. You just need 1 tsp. of culture seed for one cup of milk. let me know if it works out for you.
 
Andie P. May 15, 2016
I heat the milk in the microwave - no danger of scorching. In my 1200 watt MW it take 8 minutes to bring it to 180. I have a 900 watt also and it takes 13 minutes to bring to temp. And you can heat it in the same container you culture it in. I do half-gallon at a time and have the large extra-wide-mouth jars with plastic lids but you can do it in 1-quart Mason jars - you can buy the plastic lids both regular and wide-mouth from Amazon. It is best not to use metal lids.
 
Brandon May 9, 2016
I've been making yogurt at home for years and it is simple. I have to say though, I would _never_ boil my milk. It is not necessary and only has the potential to add burned taste or get 'skin' mixed in. I heat slowly to about 180 - 190 and as soon as it hits temperature I remove from heat and let cool to about 110. Sometimes I put the pot over ice to speed up the cooling process if I am in a hurry. Then I add the culture, stir a bit and leave in oven with light on for about 10 hours. BTW, I have used nonfat milk with no issue and always use a good, natural yogurt I like for the starter or a scoop from my last batch.
 
Lisette B. May 9, 2016
I'm so excited to try this. If I wanted to add fruit to my yogurt would you suggest adding at after its all set up? Cherries are so in season over here and I think a cherry sheeps milk yogurt would be delicious.
 
Andie P. May 9, 2016
Any fruit or flavoring has to be added AFTER the yogurt has finished incubating. Take out a small amount (1/4 cup is sufficient) put it in a small glass jar and refrigerate it. Save this for your next batch as your "starter" then add whatever you wish to the bulk of the batch.
Sugars in a "working" yogurt culture will grow unwanted bacteria and fruits, unless they are well cooked, will contribute other baceria and mold spores that will spoil the yogurt, often causing fermentation in the warm incubating temperature.
 
EL May 16, 2016
One of the bacterial species in most yogurt is Bifidobacterium lactis which is an anaerobic bacterium. To maintain it in relatively good condition, it should not be exposed to oxygen (air). So I keep one of my jars untouched until I am ready to make more yogurt and I get at least one spoonful of culture from the bottom of the jar. That was I am maintaining all the bacteria in the mix that I like. Every now and then I'll refresh using store yogurt (generally fage for me). I use the O organic fruit spreads to flavor as they are cheap and good quality. I tend to do it after making the yogurt, but I bet you could put some fruit puree in the bottom of a jar and pour the yogurt mix over it. I just think it mixes better when the puree is put in on top.


I generally mix my yogurt and immediately pour into the jars I use for serving. Most of the jars are small jam jars that are about 10 oz (for those of you that live out West, these are the jars that contain the O organic fruit spreads (Safeway/Albertsons)) and are about 10 oz apiece. That way I never need to remove the "culture" ahead of time and I have individual servings ready that have lids tight enough to travel (to work for instance). If you don't quite fill to the shoulder, you have enough room for muesli and/or other flavorings.

 
Andie P. May 9, 2016
I use commercial cultures because so many commercial yogurts have ADDITIVES that I do not trust in my food. I prefer the cultures from the New England Cheesemaking Supply, they are superior and you can re-culture them several times. http://www.cheesemaking.com
Currently I have the Y3 and the Bulgarian, which I use most and still have a couple of packets of the Y5, which is a "sweet" yogurt.
With the latter, I culture heavy cream (I use a product sold as Manufacturing Cream, which is not ultra pasteurized. Costco and Smart & Final carry it in my area.) The end result with this culture using cream is very thick and is an excellent substitute for clotted cream, which I happen to love.
I have documented my yogurt-making on my blog with photos showing each step of the process - and with a section from the California Milk Board which explains why the milk has to be heated and then cooled. http://www.asenjigalblogs.com/resurrected-recipes-from-long-ago/homemade-yogurt-start-to-finish/

I also make my own Kefir, which is a superior product to the commercial stuff.
Let me add that there are some "tricks" for making yogurt that is thicker, although it it higher in butterfat, it is also less "tangy" and can be substituted for sour cream. Use half & half instead of milk.
You can also
 
Mickey0627 May 14, 2016
I also use cheesemaking.com cultures and love them too. Their website says that you can't reculture them. That's not true?!
 
Andie P. May 14, 2016
You can reculture the Y-3 and the Y-5 at least three times - that's the most I have done and they have worked just fine. The Bulgarian culture, which I like best I have recultured several more times. What I do is from the first batch a pint, keep it in the coldest part of the fridge (meat compartment) and then use 1/4 cup of that for subsequent batches - I do half a gallon at a time. I am very careful to make sure all of the milk being processed is not warmer than 115° F., because the "daughter" cultures are more sensitive to heat than the dry culture.
 
Laura415 May 22, 2016
You do what I do. I love my cream based yogurts. Thick and creamy without straining. I strain almost all commercial yogurt as I find the resulting "greek" yogurt to be a great ingredient in many dishes.
 
rlsalvati May 9, 2016
I've used many different store bought yogurts for the culture over the years, never really noticed a difference in taste. My best yogurt developer was my old gas stove with an always-on pilot, the oven interior stayed at about 100 degrees (F). Newer ovens don't have this "feature" and my new stove with the light on is a bit cooler than I'd like.
 
Sarah J. May 9, 2016
Caroline, You have completely transformed my weekday breakfasts!! My 8 A.M.s will never be the same again.
 
Patricia R. May 9, 2016
How exciting! Will the yogurt have a similar taste to the yogurt you use for the culture (aside from letting it sit for a variable amount of time for desired tanginess)? Or are all cultures pretty much the same?
 
Caroline L. May 9, 2016
I've found that the factor that most affects the flavor is how long the yogurt sits, since most commercial yogurt makers essentially use the same (often powdered) cultures! The culture will affect the flavor a little (as will the freshness of the yogurt!), so choosing one you like will get you closer in that respect. But I always find that the second batch of yogurt—the batch you make using a culture from yogurt you've made yourself—is always even better than the batch you make with the store-bought yogurt, so the primary purpose of that store-bought yogurt is just to get your first batch going.
 
EL May 16, 2016
I have used some yogurt for starter culture that has ended up tasting different. For instance, Nancy's, has Lactobacillus rhamnosus. While it is supposed to be a great probiotic. I have found that it has a taste that I don't particularly like. And it definitely gets propagated. So I don't use that one any more. Also, should you use a fruity yogurt rather than a plain yogurt as starter, you'll find that the sweet fruit taste may get propagated. As I use my yogurt for salad dressing and spreads, I don't like that so I avoid it. Otherwise it does have quite a bit to do with how long it is allowed to set.