This is the thirteenth in our biweekly series from Amy Pennington – urban farmer, founder of GoGo Green Garden, and author of Urban Pantry and Apartment Gardening – on how to start growing your own food, no matter how tiny your garden-to-be is.
Today: No backyard? No problem! Amy saves the day with easy DIY garden projects from things you already own -- spoons, wine boxes, milk crates, and more.
— Amy
By now all your summer crops are planted, but it's a bit too early for sowing fall crops just yet (not to mention there is likely no room!). For gardeners, the height of summer provides a bit of downtime -- your main focus shifts to daily watering and tending for anything already planted.
This means that now is a great time to busy yourself with other garden projects. These DIY projects -- plant markers, milk crate planters, wine box planters, and more -- will both tide you over AND make your life easier during busier times. A little preparation now can have you in an organized and lovely-looking garden all year long.
Plant Markers
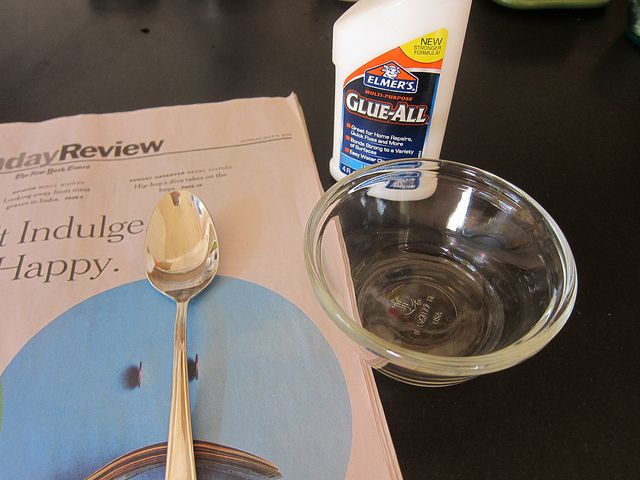
Spoons: Readymade plant markers are plentiful, but often unsuccessful -- the names wear off, and they tend to bleach out over time. The solution? Make your own by using aged silverware and some creative glue work.
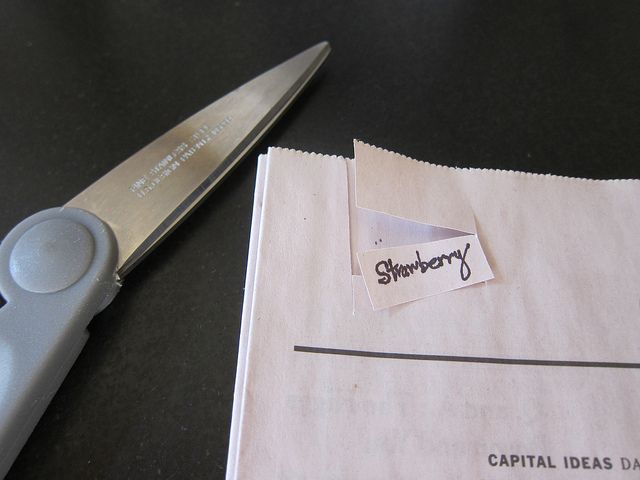
• Make a label from plain white paper that is small enough to fit along either the length of the handle or in the bowl of the spoon.
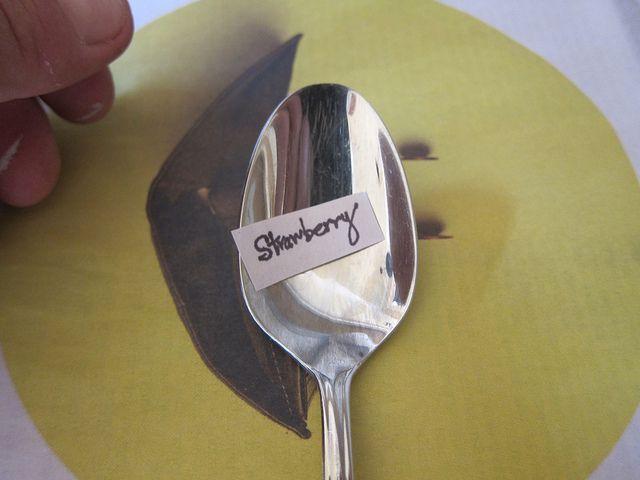
• Write the plant name on this label, attach it to the handle or spoon bowl with white glue, and let it dry completely.
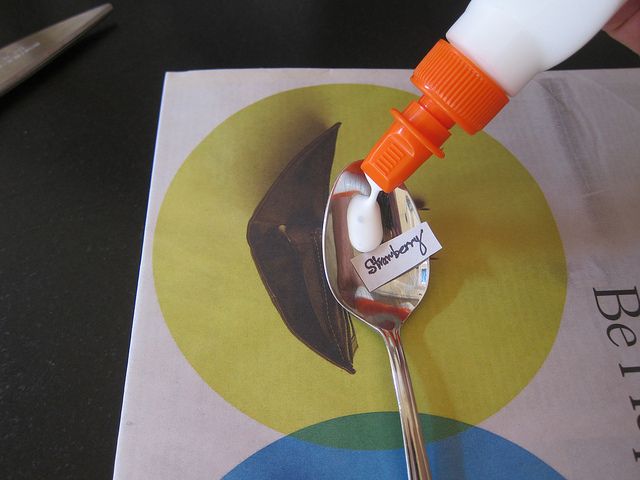
• Make a glue wash by mixing two parts white glue to about one part water -- it should be thin, but tacky. Using a small paintbrush, brush over the label, being sure to cover it completely but lightly, so you don't have any lines. Let dry slightly and apply a new coat. Repeat for a third and final coat. (A final spray with a clear UV- and water-resistant product, sold at houseware and hardware stores, will help the labels last even longer.)
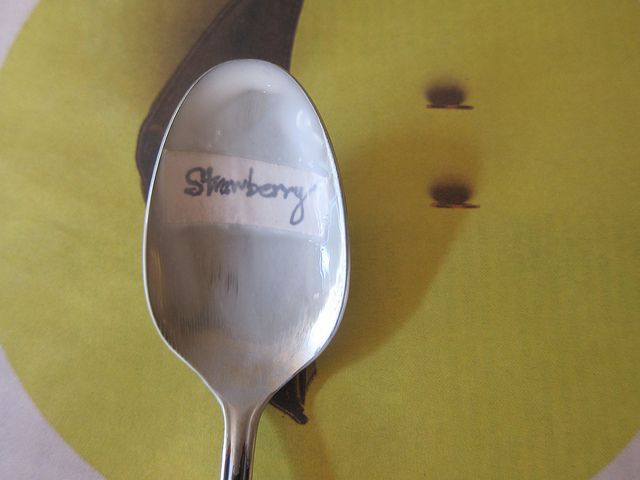
• When fully dry, stick the handle of the silverware in your soil as a plant marker.
Shrinky Dinks: Another plant marker that stands the test of time (and weather) is inspired by a favorite childhood project -- the Shrinky Dink. Remember those plastic sheets you color, cut, and bake? The only challenge is making a big enough label, pre-baking, that results in large enough print to read.
• Typically, I cut the plastic for a plant label into a 5" x 2" label. This will bake down to about a 2" x 1" sign. I like the simplicity of black ink on the white background, but you can get creative and add color. As with the silverware labels, use a thin sharp marker or colored pencil for this project -- it allows for precise lettering.
• Punch a small hole in the top of your label before baking. You can thread garden string through the hole and tie it to the base of your plant.
• Alternatively, make a small hole (using a small hole punch) on each side of the label. After the label is baked, unfold two paper clips and bend the wire in half through the holes - this creates a tent post that you can pierce your soil with, in order to hold the label in place.
Container Materials
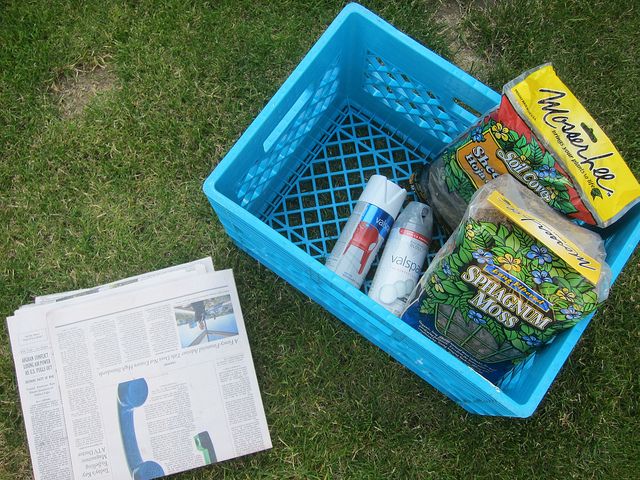
Plastic milk crates - Plastic milk crates make easy, cheap, durable planters.
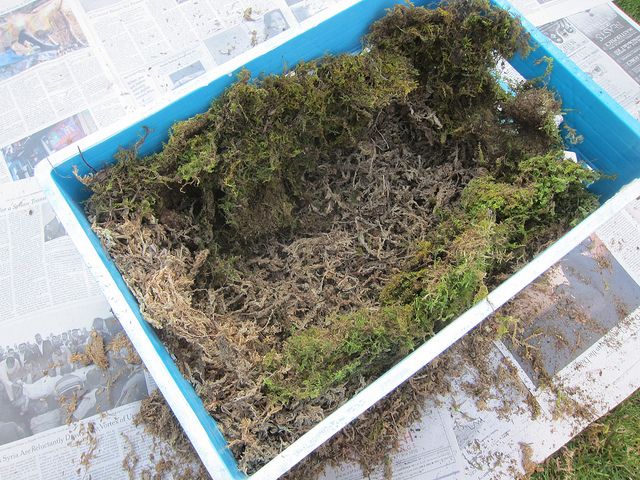
• Fill the gaps with either a liner (like a gently used plastic shower liner with drain holes), Spanish moss, or some sort of fiber -- coconut fiber or even hay. This prevents soil from falling through.
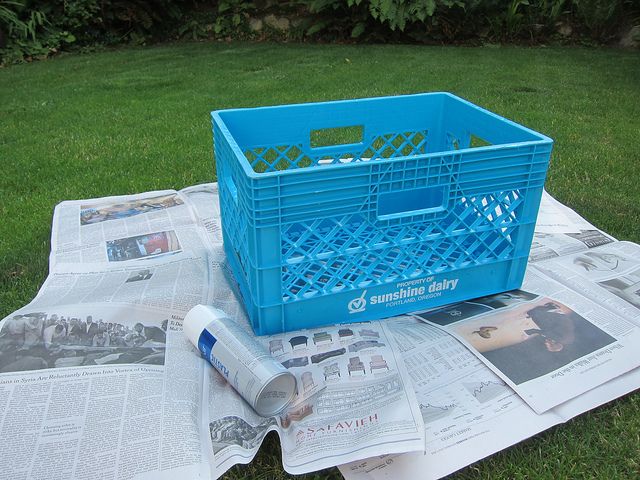
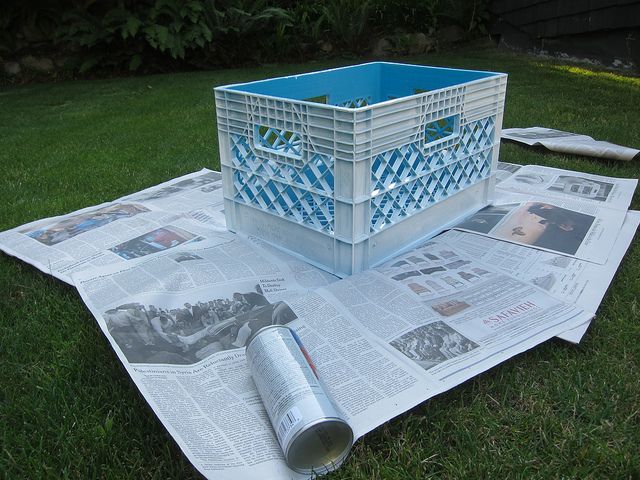
• Before planting, I like to spray paint my milk crates white -- this gives them a very clean, modern look.
Gutters: Found on nearly every building and home, gutters are easy to come by if you keep your eyes peeled on trash day, or roam the aisles of salvaged goods warehouses.
• Because gutter material is light (stainless steel, aluminum, or plastic), this is an ideal planter for tying to a balcony railing. Perfect for city dwellers!
• With their long, shallow shape, gutters are perfect for planting lettuces.
• Be sure to drill drainage holes along the length of the gutter before filling with potting soil and planting.
• Ideally, look for one made of stainless steel -- they are the best-looking.
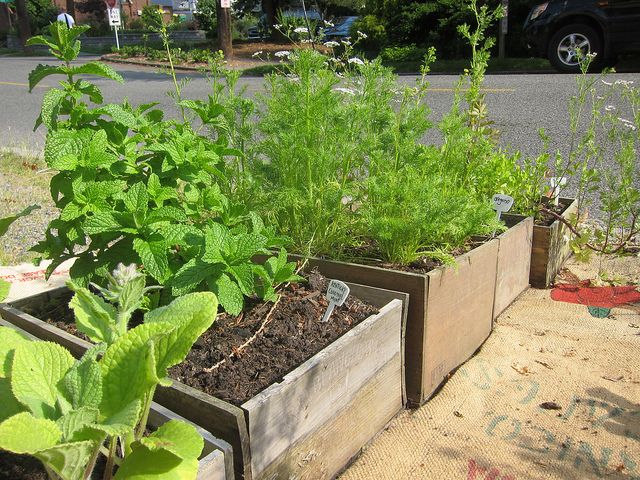
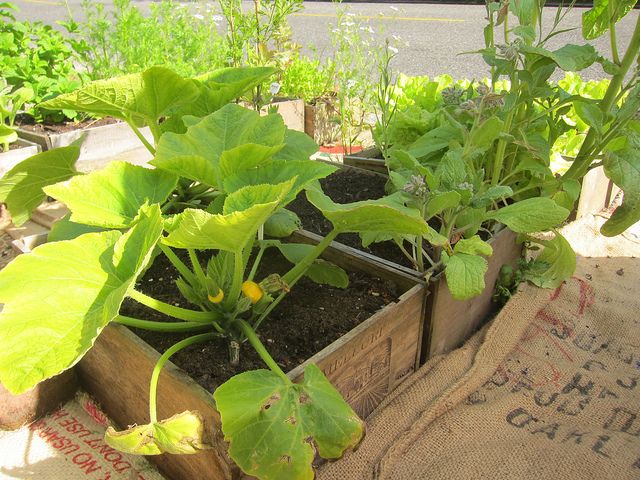
Wine boxes: If you live in or near wine country (or have a habit of ordering booze online), wooden wine boxes shouldn't be too difficult to find.
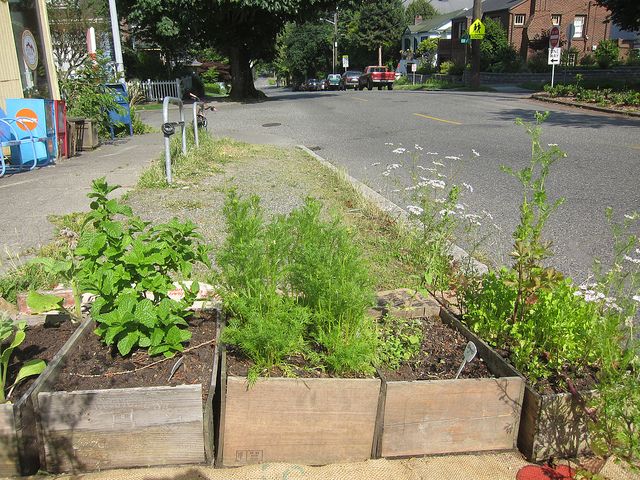
• These shallow boxes are good for lettuces, seed starting, and microgreens.
• The thin wood on these boxes will last longer if you apply a coat of oil before planting (choose a Danish oil or orange oil from your local hardware store). This helps give your boxes a tough and slightly waterproof finish, but know that they have only a two or three year lifecycle before they really fall apart from moisture.
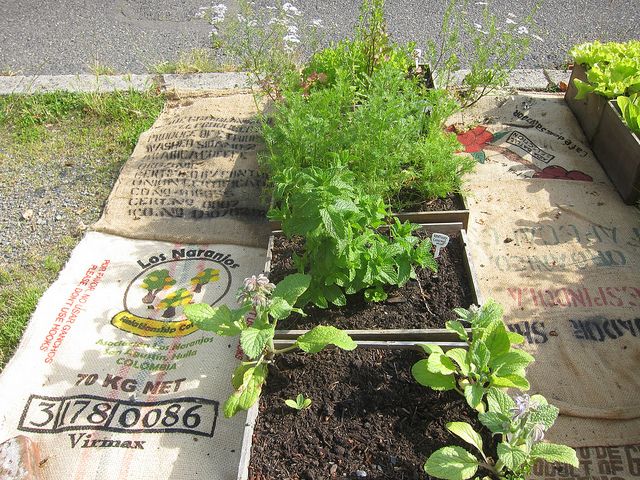
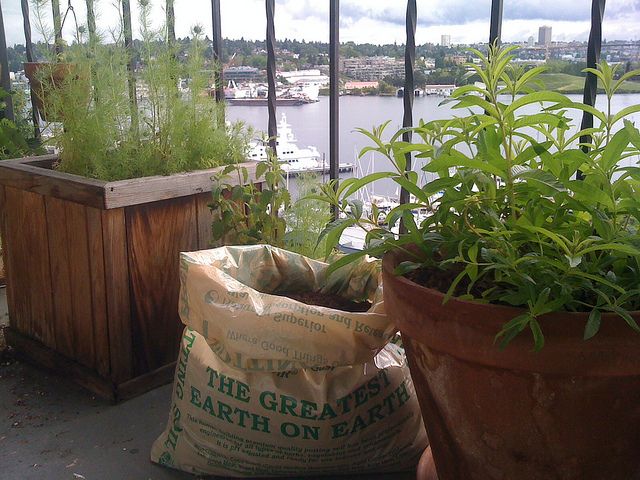
Burlap, potting soil bags, and other sacks: Remember the Potato-In-A-Bag post from a few weeks ago? Using the same concept, you can make your own "container" out of just about any bag.
• For a plant-in-a-bag project, I prefer a better-looking bag than potting soil bags, but those work, too. Burlap sacks and plastic woven feed bags are a bit more shabby chic. If you live in an area with local coffee-roasting companies, you should be able to find used burlap bags for free. Country feed stores are a good source for old feed bags. These often have the added benefit of vintage-looking logos -- a great way to add character to your urban garden.
• To plant in these, you need only steady the bag and split a hole in the top. Simply pour an entire bag of potting soil into the burlap sack or feed bag before planting, then add your starts or seeds directly on the soil surface. • Be sure the edges of the bag don't come up around the plant to block out sunlight. • Soil kept in burlap will dry out quickly, so be sure to monitor water needs closely. The plastic feed bags will hang onto water as a plastic pot would, so be certain not to overwater these.
These are some quick ideas for easy gardening projects anyone can accomplish in a weekend -- from those in studio apartments to gardeners with big backyards. I am 100% certain that you will also have some awesome ideas for DIY garden projects that are economical, easy, and efficient -- I look forward to hearing about them in the comments!
Written by: Amy Pennington
Popular on Food52
2 Comments
That said, the solution is SIP, or Sub-Irrigation Planting. I did a few minute video on how to whip one together in a matter of a few minutes for less cost than a few cups of coffee. It's easy!
http://youtu.be/Uus73SAngOA
See what other Food52 readers are saying.