Every other week, Anna Hezel talks about the innovations, decorations, and other quiet touches that make a party memorable.
Today: No need to be Martha to pull off a sweet jack-o-lantern. Here's a new way to carve, no fancy tools required.
Every year when October hits, my enthusiasm for pumpkin carving sky-rockets. I buy the biggest pumpkin I can carry home from the market, I raid the annals of Pinterest for inspiration, and I dream up intricate patterns, spooky tableaus, and celebrity portraits to carve into my jack-o-lantern.
And then like clockwork, a week into October, I become utterly and completely overwhelmed with possibilities and give up. Because pumpkin carving is messy, there is a lot of room for error, and how can a person choose between Beetlejuice and Jonathan Franzen?
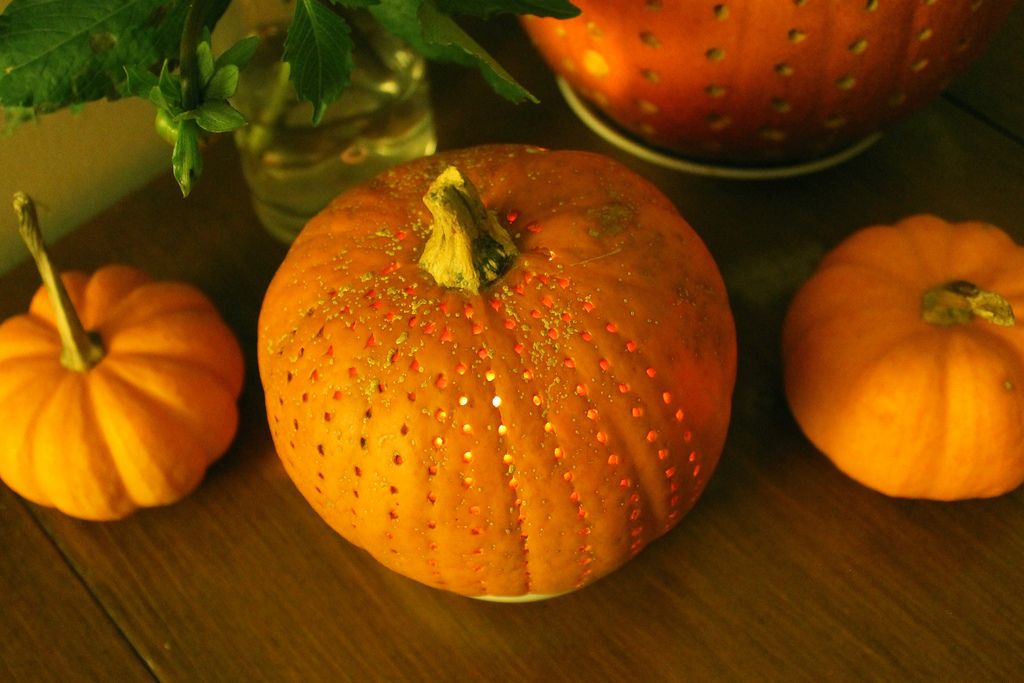
This year, I took a simpler approach. I bought several small pumpkins, hollowed them out, and then, rather than pulling out every variety of knife in my kitchen, I used a metal nail to perforate the pumpkins with patterns of tiny holes for the light to shine through. I found that it was easy, pretty impossible to mess up, and resulted in some perfect October centerpieces.
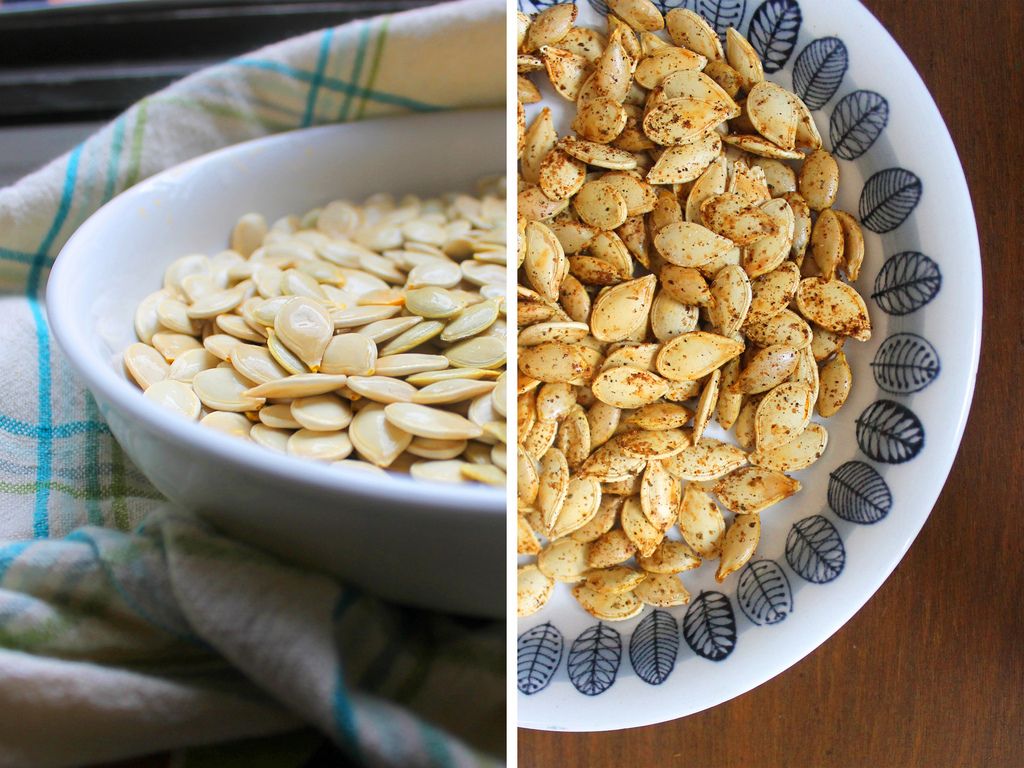
As an added bonus, of course, I had some pumpkin seeds to toast with Old Bay and bring to work for a snack the next day.
Supplies:
- a small pumpkin
- a sharp chef's knife
- a metal spoon
- a metal nail, skewer, or even a meat thermometer
Instructions:
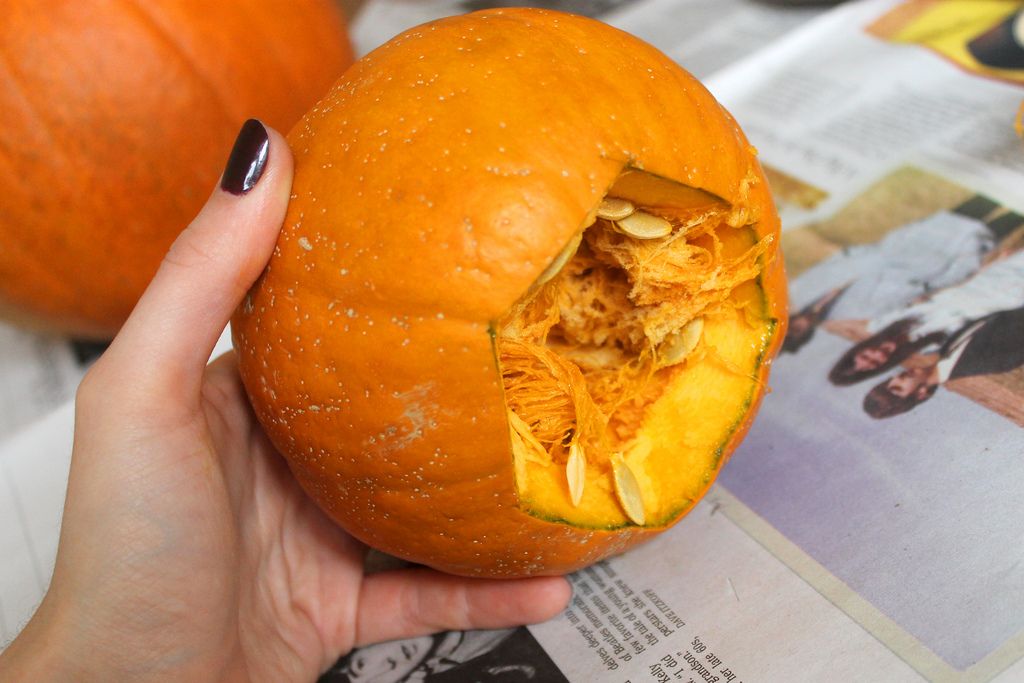
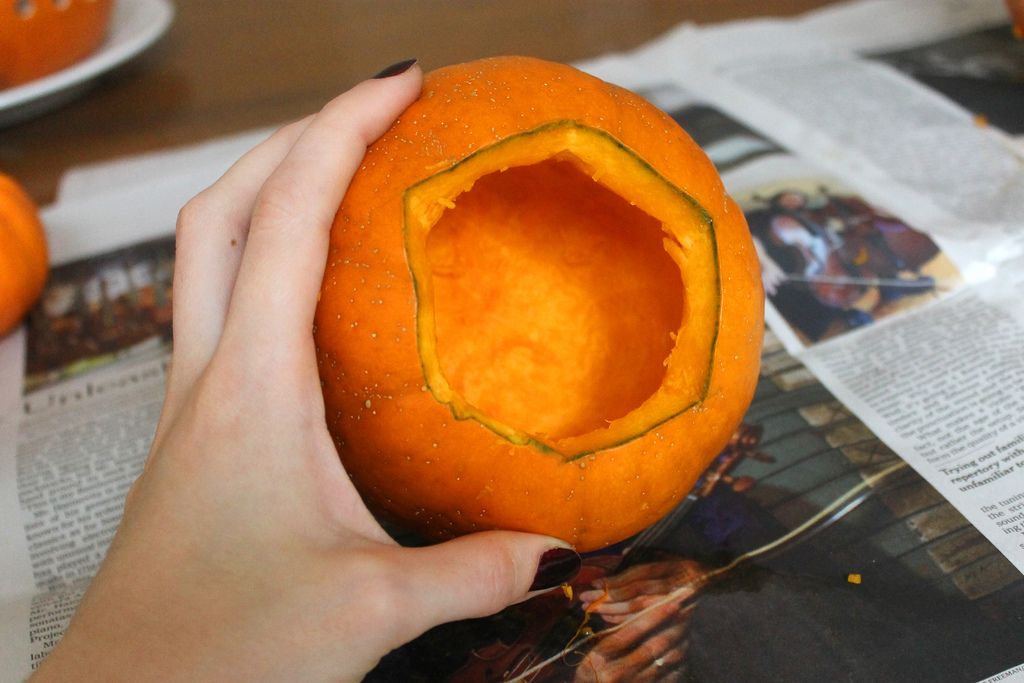
1. Cut a roundish hole in the bottom of your pumpkin. Wedge your knife underneath it, and pop it out.
2. Reach into the pumpkin to remove the pulp and seeds. After you've removed most of them, use a spoon to scrape away any stray bits from the inside walls.
3. Using your hole-poking tool (a nail, in my case), begin to poke small holes, about 1/4 inch apart from one another, in a line that follows the vertical ridges of the pumpkin. After you've completed one row, create another, no more than about 1/2 inch away from the first row. Continue until you've made your way around the pumpkin. Now your pumpkin is ready for a candle.
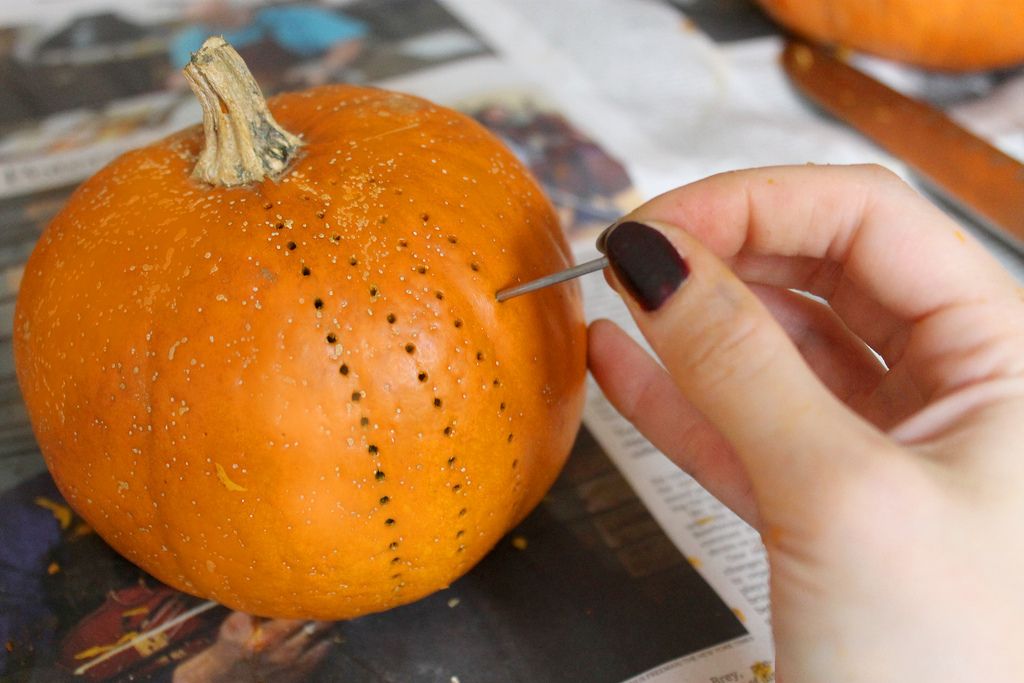
If you find that not very much light is shining through your jack-o-lantern, you can use your spoon to scrape away some more of the inside of the pumpkin, making the walls a little thinner.
4. Rinse your pumpkin seeds off, and pat them dry. Toss them with a couple teaspoons of olive oil and 4 or 5 shakes of Old Bay, and bake them for about 15 minutes at 350 degrees F, until they are crispy.
Photos by Anna Hezel

Choose your holiday adventure! Our Automagic Menu Maker is here to help.
View MakerWritten by: Anna Hezel
Popular on Food52
4 Comments
~Emily
http://www.theorangeslate.com
@emilyamccord
See what other Food52 readers are saying.