Inspired by conversations on the Food52 Hotline, we're sharing tips and tricks that make navigating all of our kitchens easier and more fun.
Today: The secret to the prettiest holiday cookies: royal icing. Here's how to decorate with it.
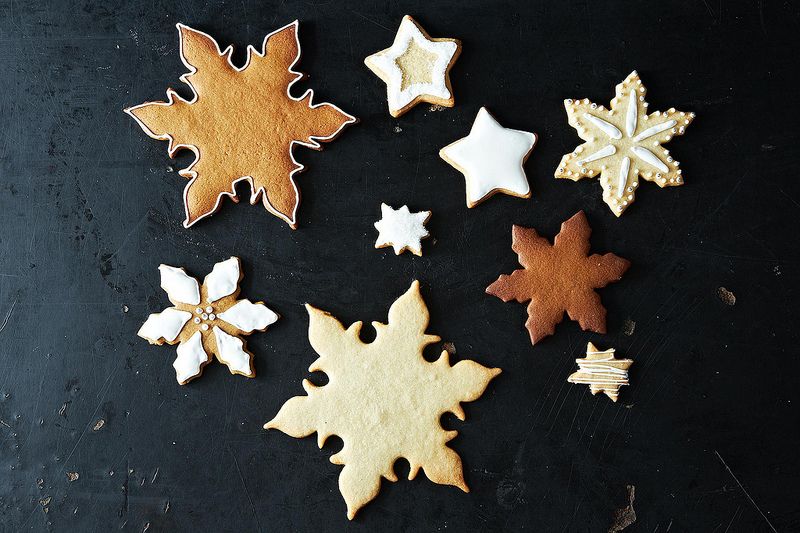
It's that time of the year again; your local bakery and every neighborhood Starbucks have their holiday cookies on display. The idea of trying to recreate those beautiful sugar cookies may seem daunting, out of reach -- but in reality, it's simple. With the right steps and with a little bit of patience, you will have a picturesque snowman that looks like he popped off the pages of Martha Stewart Living.
First, whip up a batch of royal icing. Now, here are the steps needed to create your fabulous, picture-perfect holiday cookies.
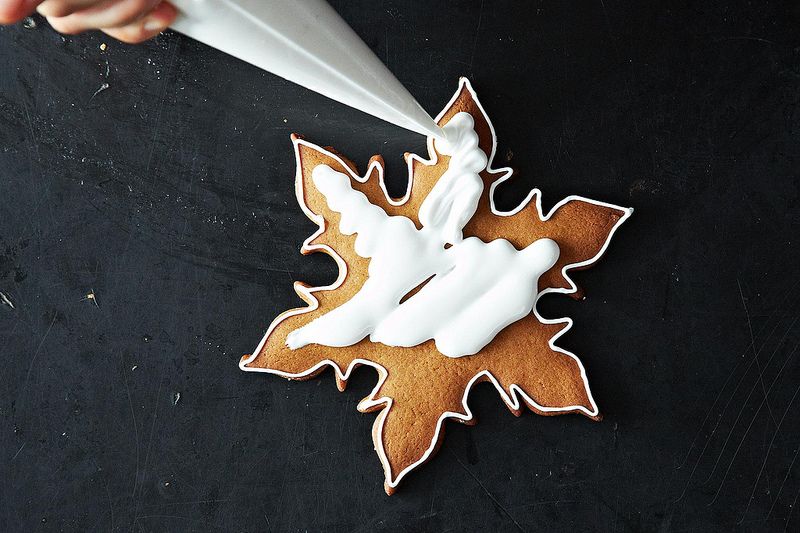
1. Make sure your cookies are completely cool. Begin by piping an outline of royal icing onto the cookie. Your icing should flow in a solid line from the piping tip. This creates a border or “dam” to make sure the flood icing does not flow over the edges. Let it dry a few minutes before you start flooding the design with additional icing.

2. After the cookie is outlined, use a thinner version of the same icing to fill the outlined area. This is called flood icing. This icing should be thin enough to flow smoothly from the piping bag.
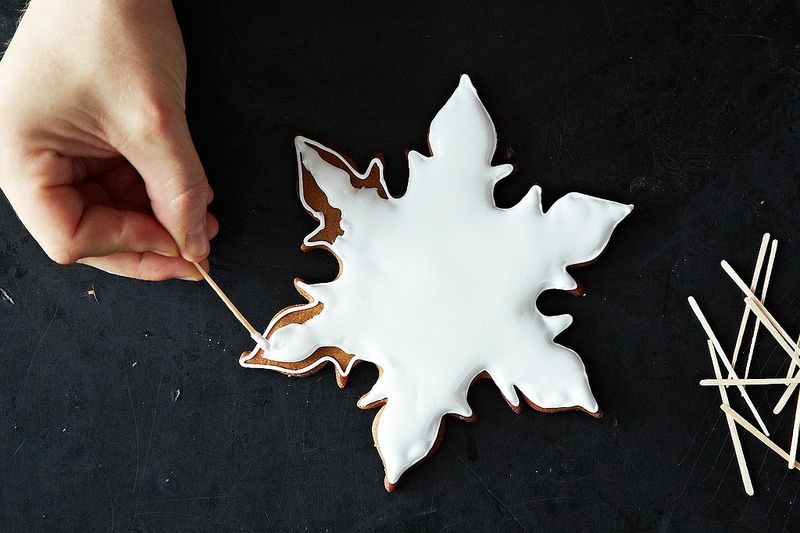
3. Keep toothpicks close by so you can spread the icing to the edges and pop air bubbles.
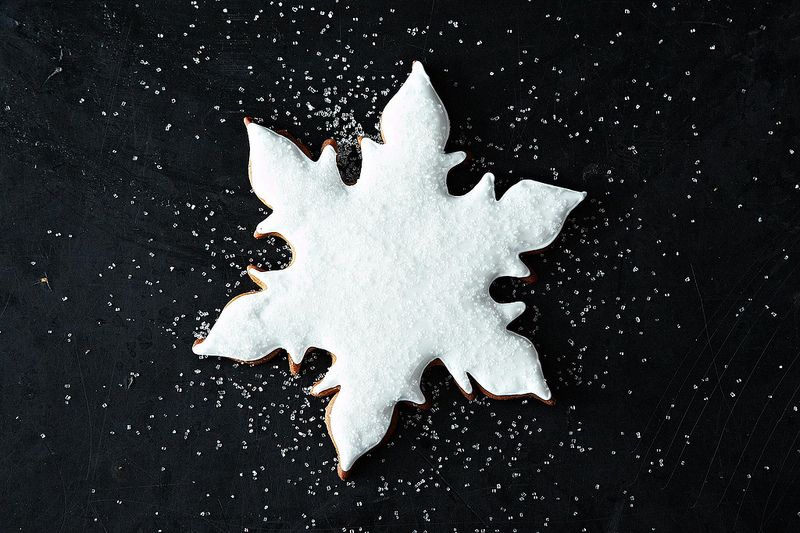
4. If desired, shake sanding or decorating sugar over wet icing. After icing dries completely, shake off excess sugar. And if you want to add designs on top of your icing -- especially with colors -- always let the flooded cookies dry for at least 24 hours at room temperature before continuing to decorate.
Makes about 3 cups
1 pound confectioners sugar
3 tablespoons meringue powder
1/4 to 1/2 cup warm water
1/2 teaspoon vanilla
See the full recipe (and save and print it) here.
What are your favorite ways to decorate holiday cookies? Let us know in the comments!
Photos by James Ransom

Choose your holiday adventure! Our Automagic Menu Maker is here to help.
View Maker
See what other Food52 readers are saying.