Every other week, Anna Hezel talks about the innovations, decorations, and other quiet touches that make a party memorable.
Today: Give your layer cake an ombre makeover without any fancy equipment.
Every few months, for no reason at all, I find myself compulsively making a layer cake. Sometimes it happens on birthdays or holidays, and sometimes it just happens because I can feel springtime getting nearer, and I want to coax it out with something sunny. Sometimes these cakes only taste okay, and sometimes they taste really wonderful, but that’s not necessarily the point. The point is often simply to build something -- a little monument forged from simple chemistry and engineering.
I once heard of a tower in Azerbaijan that was built from stone and held together with egg white cement. I’ve never since been able to erase from my mind the vision of medieval workmen shoveling white buttercream between dusty slabs of rock in pursuit of a truly impenetrable fortress.
More: 7 Fabulous Layer Cake Recipes
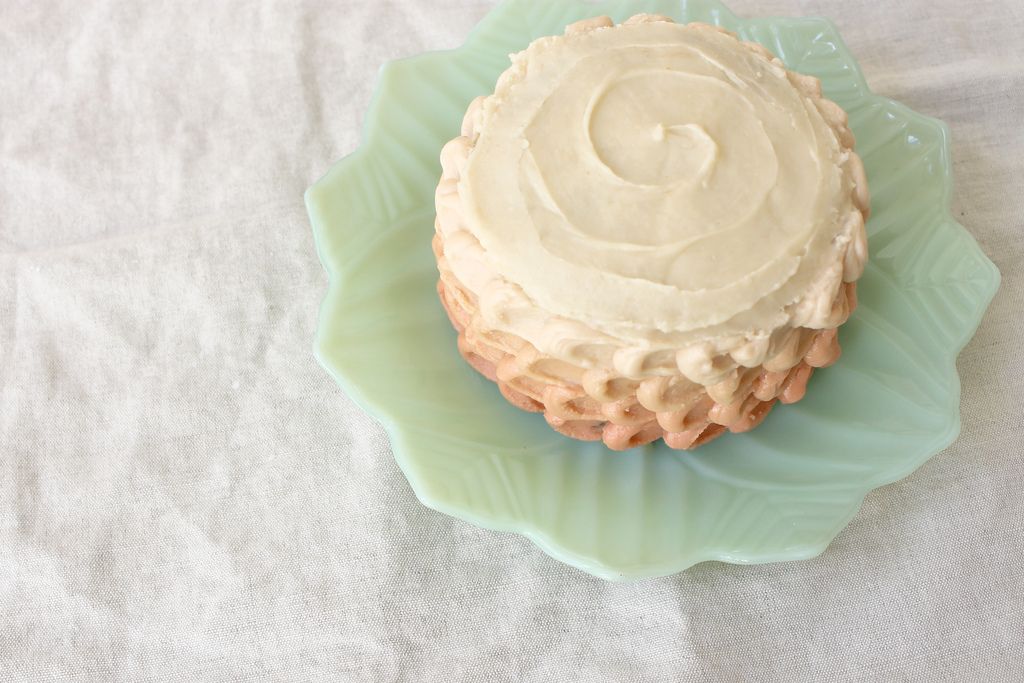
It is astounding, though, how useful and structurally sound a batch of buttercream can be. It wends to your will but holds its integrity. It doubles as the mortar that holds the cake layers together and the alluring facade. With a few drops of food coloring, a Ziploc bag, and a knife, you can turn your batch of buttercream into an impressive exterior of ombre.
This would work with any layer cake recipe with a frosting that is light in color, smooth, and spreadable. I used Smitten Kitchen's Chocolate Peanut Butter Cake, but I would also recommend trying janeofmanytrade's Cream Cheese Buttercream or Tessa_StyleSweetCA's Pink Peppercorn Buttercream.
Supplies:
- four sandwich-sized Ziploc bags
- scissors
- an ordinary table knife
- food coloring
- several small bowls and spoons for mixing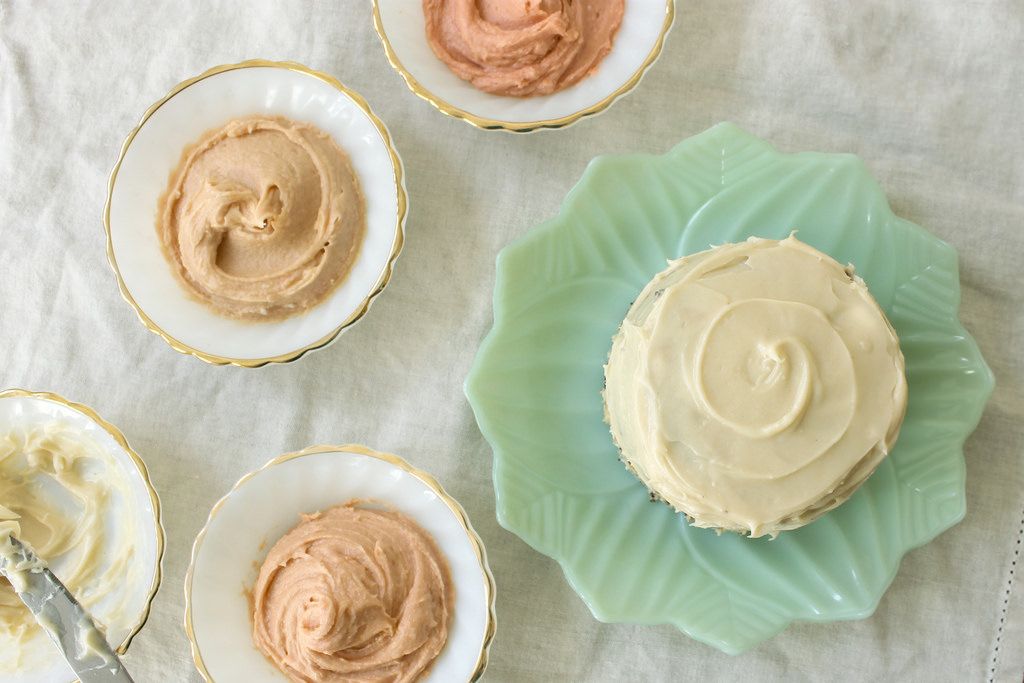
Instructions:
Assemble your layer cake according to the recipe's instructions. Frost the top of the cake with a flat layer of white frosting. Add a little bit of frosting to the sides of the cake, and spread with the back of a knife to create a smooth surface. It's okay if some of the crumbs poke through on the sides of the cake because you'll be covering the sides with the colored frosting. Refrigerate for about 10 minutes.
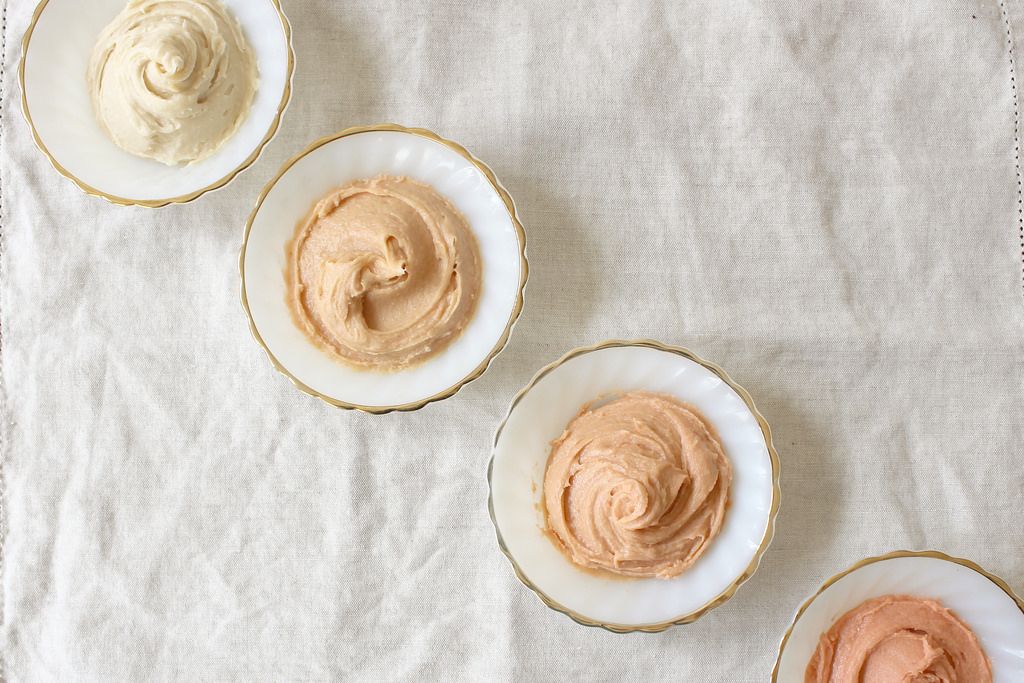
In the meantime, divide the remaining frosting among 5 small bowls (you may want to keep a little extra aside just in case). Add 2 to 3 drops of food coloring to one of the bowls. I used 2 drops of red and one drop of yellow to achieve a peachy color. Mix thoroughly.
Now you're going to distribute the colored frosting among the other bowls to create a gradient of colors. Add 1 spoonful, 2 spoonfuls, and 3 spoonfuls, respectively, to each of the next three bowls of frosting, leaving one bowl completely white. Mix each color well, and adjust the coloring to your liking.

Scoop the darkest shade of frosting into one of your sandwich bags, and seal the bag. Cut a hole in one of the corners of the bag, about a centimeter in diameter. Pipe a dot (about the size of a penny) along the base of the cake. Use the tip of a knife to smear the dot towards the right, creating a sort of sideways teardrop shape. In the middle of this teardrop, add another dot, and repeat. Repeat until the pattern wraps all the way around the bottom of the cake. Refrigerate for 10 minutes.
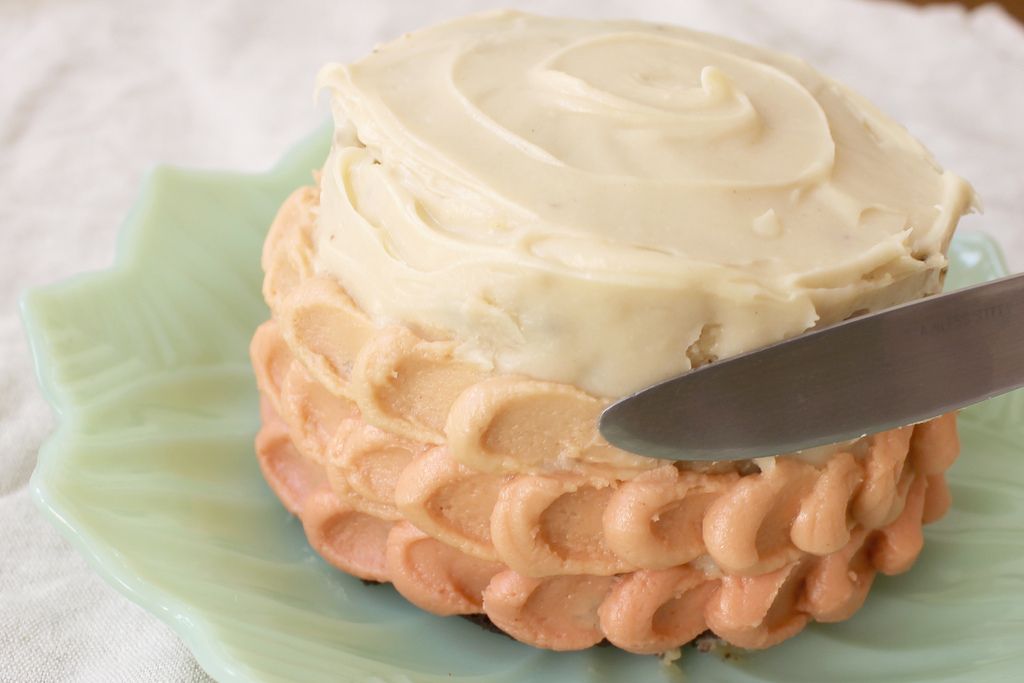
Now, scoop the second-darkest shade of frosting into another sandwich bag and repeat. Continue adding rings of color until you reach the top of the cake, refrigerating for a few minutes between each layer.
Photos by Anna Hezel
See what other Food52 readers are saying.