-
Serves
4 (with leftovers for tomorrow's lunch!)
Author Notes
Almost everyone I know is ready to say goodbye to winter and to welcome spring. I feel the same way, but at the same time I tend to cling to the cooler weather about to depart because I am not quite ready to say goodbye to winter ragus or slow braised stews. This recipe has become one of my favorite way to bridge the seasons. It offers all of the delicious, warming comforts of a slow-braised dish for those chilly gray days that are a part of springtime in Victoria, but it also includes some of the springtime bounty that I am starting to see in my garden, such as slightly spicy dandelions and arugula that say to me that warm, sunny weather will soon arrive.
This dish has several components but other than cooking the grits most of them be made ahead of time. In fact, the flavor of beans seem to improve when they are cooked a day in advance. Following the advice of chef Thomas Keller and Deb Perelman, author of the Smitten Kitchen blog, I have become a convert of cooking dried beans in the slow cooker. The gentle even heat makes for meltingly tender beans that don’t fall apart. This recipe will make a lot more beans than you need, but they are a great thing to have on hand. Freeze them and add them to soups, stews or pasta dishes. Or I sometimes just heat up a bowlful for lunch. Add some diced spring radishes, some thinly sliced avocado, a sprinkling of grated ricotta salata cheese, drizzle with some extra virgin olive oil, and you will dine quite well.
The technique for broiling the tomatoes is inspired by Nancy Harmon Jenkins and Zuni Café chef Judy Rogers. I experimented with a variety of different techniques of roasting tomatoes and I found the quick broiling method to be the best one for delivering a maximum amount of flavour, especially when using not-yet-local tomatoes.
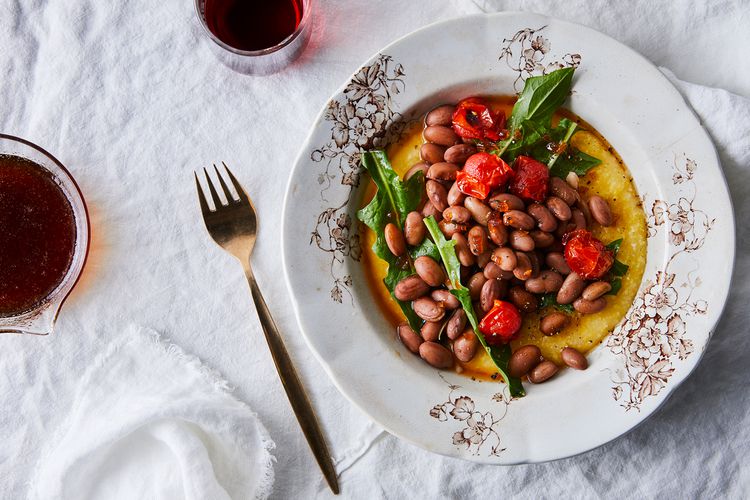
The agrodolce is my version of an old school Sicilian sauce that is traditionally made with vinegar and sugar. I use a local wildflower honey instead of sugar and add some shallots for an added boost of flavor. I love the contrast of the sweet and sour notes of this sauce and how it can perk up just about any dish. It particularly brightens this stew with its delicious flavors of earthy, soft beans, peppery greens, creamy grits and bursts of blistered tomato. —cookinginvictoria
Ingredients
-
2 cups
dried borlotti beans, picked over and pebbles removed
-
1/2
small yellow onion, roughly chopped
-
1 sprig
2-inch fresh rosemary
-
3 sprigs
1-inch fresh thyme
-
1 tablespoon
leaf lard or extra-virgin olive oil
-
2 teaspoons
kosher or sea salt, divided (or more to taste)
-
1 cup
stoneground white or yellow grits
-
2 tablespoons
unsalted butter
-
4 cups
baby arugula, dandelion leaves or other small spring greens, washed
-
1 splash
your best extra-virgin olive oil, for drizzling
-
2 cups
cherry tomatoes (about 24)
-
1 1/2 tablespoons
extra-virgin olive oil, divided
-
2 tablespoons
shallot or sweet onion, diced
-
1/2 cup
honey (I used a local wildflower honey)
-
8 tablespoons
good-quality red wine vinegar
Directions
-
SOAKING THE BEANS: If you have time, soak the beans overnight. Put the beans in a large bowl. Add about three inches cold water to cover and leave the beans for at least 8 hours. Alternatively, you can do a quick soak method. Put beans in a large saucepan add three inches water to cover and bring to a rolling boil. Let boil for 2 minutes, then remove from heat and let sit 1 hour.
-
SLOW-COOKER METHOD: Drain the beans from the soaking water and discard. Put beans into the slow cooker insert. Add chopped yellow onion, rosemary, thyme, 1 tablespoon lard or olive oil and about 2 inches water to cover. Put lid on and turn slow cooker on to high heat. Once the mixture starts to simmer (after about 1 1/2 to 2 hours), reduce heat to low. Stir every couple of hours. After about 4 hours of total cooking time, add salt. I suggest adding about 3/4 teaspoon. You can add more later, if needed. Total cooking time will be about six hours. You’ll know the beans are done when they are gloriously tender but not falling apart. Try a couple to see if they are completely cooked. Now is the time to add more salt, if needed. Beans should not have a salty taste, but they shouldn’t taste flat either. If making ahead of time, store beans in their liquid in the refrigerator for up to 4 days.
-
STOVETOP METHOD: Drain the beans from the soaking water. Add beans to a large Dutch oven or saucepan. Add yellow onion, rosemary, thyme, lard or olive oil and about 6 cups water. Bring beans to a simmer and cook for about 1 hour, stirring occasionally. Season to taste with salt (see above) and taste a few beans to ensure that they are evenly cooked. Remove from heat. If making ahead of time, store beans in their liquid in the refrigerator for up to 4 days.
-
MAKING THE GRITS: About half an hour before you are ready to dine, prepare the grits. In a medium saucepan, bring 4 cups water to a boil. Add 3/4 teaspoon salt. Turn heat to medium low and slowly add grits in a thin stream to the water, stirring well with a wooden spoon so that grits dissolve and no lumps form. Keep stirring for a minute or two and turn heat down, so that grits cook at a gentle simmer. If grits start to stick to saucepan, add small amounts of additional water (about 1/8 cup at a time) and turn heat down further. Cook grits for about 25 to 30 minutes, stirring occasionally, until grits are creamy. Taste a spoonful. When they no longer have a sandy texture, they are done. If they need more salt, now is the time to add another pinch or two. Remove from heat. Add butter to grits and stir until melted. Keep grits covered until you are ready to plate. If grits appear to thicken before you are ready to serve, just thin with a tablespoon or two of hot water.
-
WARMING THE BEANS: While the grits are cooking, remove about half of the beans and a few ladlefuls of liquid to a small Dutch oven or medium saucepan. Warm the beans over very low heat until they just start to bubble.
-
PREPARING THE TOMATO GARNISH: Set your oven to its broil setting. Place cherry tomatoes in a small rimmed baking sheet or pie pan. Add 1 tablespoon olive oil and a pinch of salt. With your hands or a big spoon, thoroughly coat tomatoes. Place in oven and broil for about 4 to 5 minutes or until tomatoes begin to blister and develop a few charred spots. Keep a careful eye on them, so that they don’t burn. Remove from oven and with a fork gently press down on tomatoes until a little juice dribbles out. Put back in oven for 1 minute. Remove from heat.
-
MAKING THE AGRODOLCE SAUCE: In a small skillet, heat ½ tablespoon olive oil. Add shallot or sweet onion and sauté until golden. Remove pan from heat. Add honey. Put pan back on burner and adjust heat to medium low. Stir honey and shallot mixture until honey begins to caramelize and mixture begins to form large bubbles. Continue cooking for one minute, then slowly add vinegar to pan and bring back to a boil, stirring occasionally. The mixture will smell very vinegary. Let simmer until vinegar has reduced, sauce has thickened slightly and has a syrupy consistency. Add a pinch of salt to taste and remove from heat. Add any accumulated juices from the broiled tomatoes to the sauce.
-
COOKING THE GREENS: Add greens to beans in the pot and stir gently for about a minute or until wilted. Remove from heat and drizzle on your best quality extra-virgin olive oil.
-
PLATING THE DISH: Put a heaping spoonful or two of grits on each plate, spreading the grits on the plate to form a thin layer. Add a ladleful of beans and greens over the top of the grits, making sure to include some of the bean liquid. Garnish with several tomatoes. Finally, drizzle the agrodolce sauce on top of all, passing more around at the table. Serve with some nice crusty ciabatta bread and a glass of your favorite wine. Enjoy!
In 2009, after living more than twenty years in NYC, my husband, young daughter and I packed up our lives and embarked on a grand adventure, moving to Victoria, B.C. There are many things that we miss about New York (among them ripe, vine-ripened tomatoes, fresh ravioli and New York bagels), but, I have to admit, that living in the Pacific Northwest has been pretty amazing food-wise. Now we have a yard with plum and apple trees, a raspberry and strawberry patch and a Concord grape arbor. I have a vegetable and herb garden, so I can grow at least some of our food. And we have an amazing farmer's market a block from our house.
I love cooking (and eating) seasonally and locally. And it's been very rewarding introducing my daughter to cooking and eating, and teaching her where our food comes from.
See what other Food52ers are saying.