Every week, a DIY expert spares us a trip to the grocery store and shows us how to make small batches of great foods at home.
This week, Rosanna Nafziger Henderson has us making our own camembert with this recipe from her latest book, The Lost Arts of Hearth & Home: The Happy Luddite's Guide to Domestic Self-Sufficiency.
Camembert cheese has a fussy reputation that it doesn’t necessarily deserve. In some ways, it’s one of the simplest ripened cheeses to make at home: you don’t need a cheese press, and you don’t need a specialized curing chamber to ripen it. It conveniently ripens at ordinary refrigerator temperatures.
A layer of mold growing on the outside — the “bloomy rind” — is what gives Camembert its distinctive texture and flavor. The digestive enzymes in the mold break down the cheese curd, creating a creamy soft cheese inside an aromatic fungal rind. So, not only do you get to grow enchanting gardens of mold and bacteria, but that mold transforms the cheese so completely you’ll feel like a bit of an alchemist when you present your guests with creamy, melting slivers of homemade Camembert!
Another great reason to make Camembert at home is that traditional raw-milk Camembert cannot be sold in the United States. If you have a source of high-quality raw milk, you can have your own raw-milk Camembert without traveling to France.
You can easily find your cheese cultures and rennet online. Try Cultures for Health or the New England Cheesemaking Supply Company. Get a packet of either Flora Danica or Mesophilic Type B cheese culture. You’ll also need a packet of Penicillium camemberti mold spores (also called P. candidum) and a bottle of rennet. Store the cultures in your freezer until you’re ready to use them, and keep the rennet refrigerated.
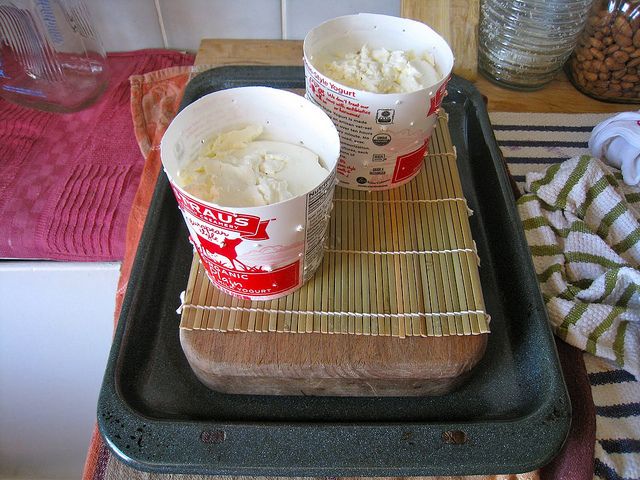
Next, find a lidded box or plastic tub at least 8 by 12 by 4 inches, and get three small reed mats (like the setup pictured below). The reed mats sold for rolling sushi will work perfectly. Cut or fold one of the mats to fit neatly on the bottom of your plastic tub. Also, get a piece of fine-mesh cheesecloth, about 1 square yard. Most cheesecloth in stores has a very large open weave. You could use this kind if you layer it several times. A fine tea towel, pillowcase, or large napkin would also work well. You’ll also need an ordinary kitchen thermometer that measures between 30 and 100 degrees Fahrenheit.
You’ll then need to make a pair of cheese molds. Look for a cylindrical plastic jug, quart-size yogurt container (like I used below), or aluminum can—something about 5 inches in diameter and 6 inches tall, with straightish sides (if the sides are slightly angled, your cheese will just be somewhat less perfect looking). Cut the bottom out of the mold so it’s open on both ends, and trim it so the cut edge is smooth and level. Then poke large holes in the sides of the container with a clean nail or other sharp device, every inch or so. Poke the holes from the inside out, so the interior of the mold stays smooth. You can also buy proper Camembert cheese molds, but I wouldn’t suggest investing in them until you find yourself making a lot of cheese.
Camembert Cheese
Makes two rounds of cheese
1 gallon fresh whole milk (raw or pasteurized, but avoid ultra-pasteurized)
1 pint cream (not ultra-pasteurized)
¼ teaspoon Flora Danica or Mesophilic Type B cheese culture
1/8 teaspoon P. camemberti mold culture
1/8 teaspoon rennet
3 teaspoons fine sea salt
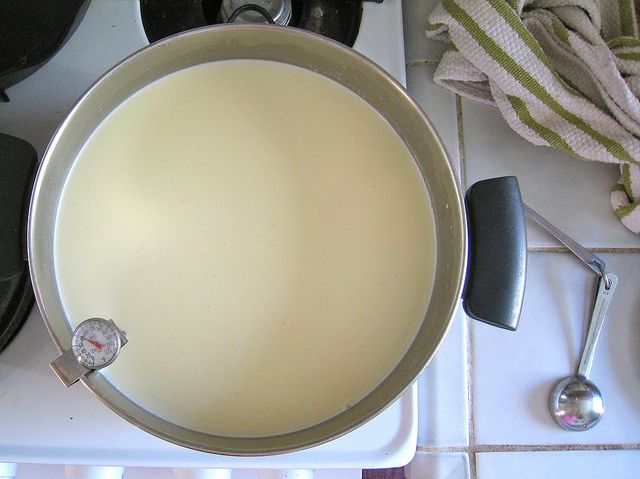
In the morning of your cheese-making day, heat the milk and cream over a very low flame. Stir it frequently until it comes to 86ºF. Turn off the heat (if you have an electric stove, you will need to move the pot off the burner) and sprinkle over the milk ¼ teaspoon of cheese culture (the Flora Danica or Mesophilic Type B) and ? teaspoon of P. camemberti mold culture. Stir gently, cover the pot, and drape a towel over top. Leave the thermometer in the pot so you can keep an eye on the temperature.
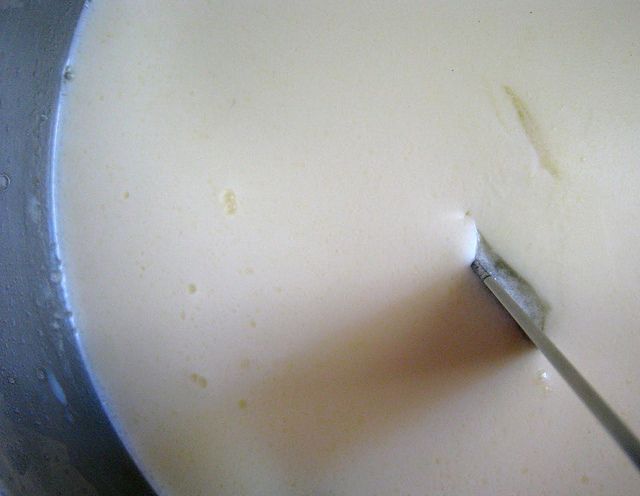
After 90 minutes of culturing, check the temperature. Turn the heat on for just a moment while stirring the milk, until it’s up to 90ºF. Dilute ? teaspoon of rennet in 2 tablespoons of cool filtered water. Drizzle it into the milk and stir gently for 1 minute. Cover the pot again and leave it undisturbed for 90 minutes.
While the cheese is setting up, heat a large pot of water up to boiling. Submerge your cheesecloth, molds, cheese mats, and two cutting boards, and set aside to drip dry somewhere very clean.
When 90 minutes have passed, the milk should have firmed up into a nice curd. Insert a long knife into the curd and pull it out. There should be a clean edge to the hole the knife left behind, indicating a firm curd. If it’s a little more pudding-like, leave the curd for another 30 minutes or more.
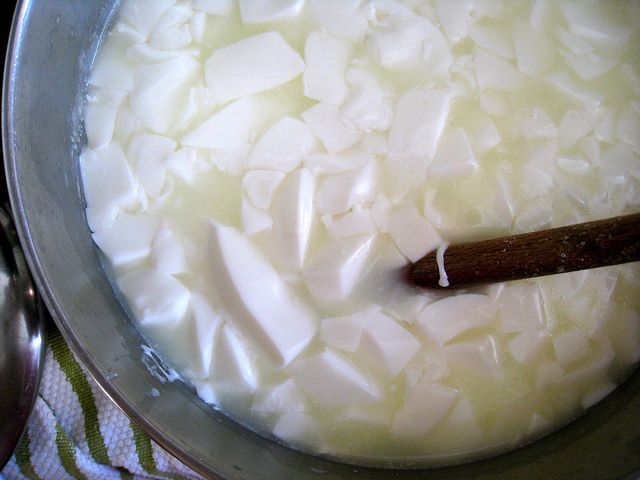
If the curds are firm, slice them inside the pot in a ½-inch grid pattern, making sure the knife goes all the way to the bottom of the pot. Then make more slices at an angle to the surface of the curd, again ½-inch apart. Gently stir the curds, using a spoon to break up any that are significantly larger than ½-inch cubes—but avoid mashing the curds. Stirring gently, turn the heat on once more and carefully bring the temperature back up to 90ºF. Turn off the heat, cover the pot and let the curds rest for 15 minutes.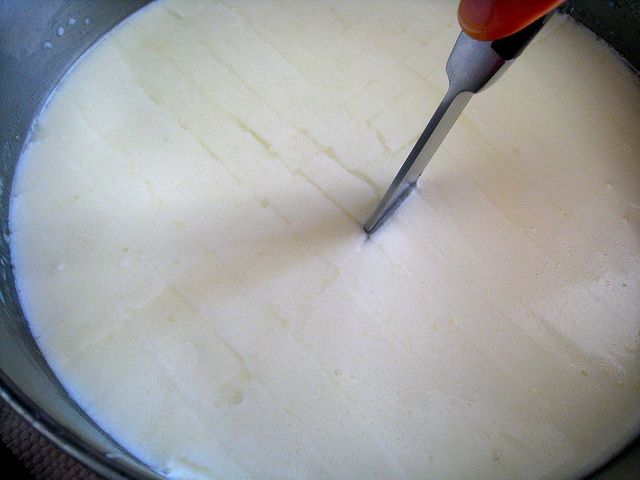
After the 15-minute rest, the curds will have contracted and firmed up a bit. Place a colander in a bowl and line it with the cheesecloth. Ladle the curds into the cheesecloth and tie the corners together. If your sink is deep enough, you can hang the curds from the faucet, but a large wooden spoon placed on the backs of two chairs makes a good rack, too. Leave the bowl under the suspended bag of curds to catch the dripping whey.
Let the whey drain for about 30 minutes. Shift and tug the bag around to keep the whey draining freely. Meanwhile, you can set up your cheese molds. Place one of the cutting boards in a tray to catch the whey runoff, and put a reed mat on top of the board. If your cheese molds are not perfect cylinders, set them on the reed mat with the narrow end down.
Ladle the drained curds into the two prepared cheese molds. The curds should not fill the molds all the way to the top. Cover the molds with another reed mat and the other cutting board. Let them drain for 3 to 4 hours. As the whey seeps out under the gentle weight of the curds, the cheeses will shrink down and firm up.
When the cheeses hold their shape, you can flip them. Lift the cutting-board-cheese-mold stack out of the tray and carefully flip it over. Set the stack down and take a peek at your cheeses: They should have released from the reed mats and dropped down in the molds. If they haven’t, you can peel the mat back by curling it away from the cheese to loosen it up.
Flip the cheese rounds several times more during the next 12 to 18 hours. They should stay out at room temperature on your counter. When the cheeses are just a couple of inches high or so and fairly sturdy, they’re ready to salt down and cure.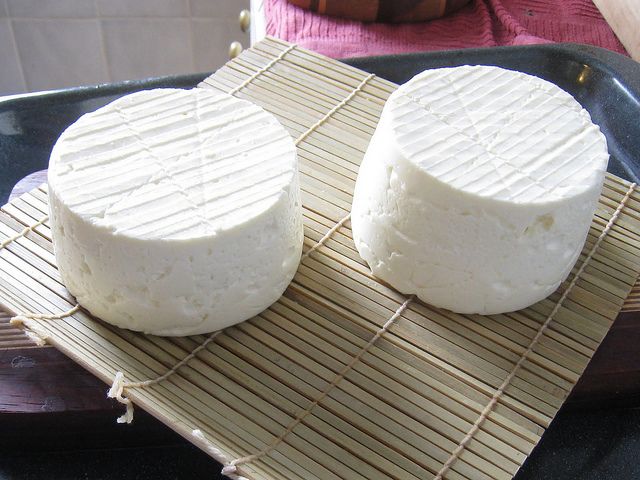
Now it’s time to prepare the curing chamber! Sterilize your curing box or tub in boiling water, along with the third reed mat you cut to fit inside of it. When they’re cool, place the mat in the box. Find a relatively warm corner of your refrigerator for the box to live for the next 2 months; 45ºF is ideal. Check with a thermometer: it’s surprising how much temperature variation there is between the back and front and top and bottom of a refrigerator. If it’s a little too cold, that’s fine; the cheese will just take longer to ripen.
Sprinkle ½ teaspoon of very fine sea salt evenly on each surface of the cheese—that’s 1½ teaspoons per cheese. Salt on the exterior of the cheese protects it from opportunistic foreign mold during the early weeks of ripening. By the end of the ripening period, the saltiness will be evenly distributed throughout the cheese.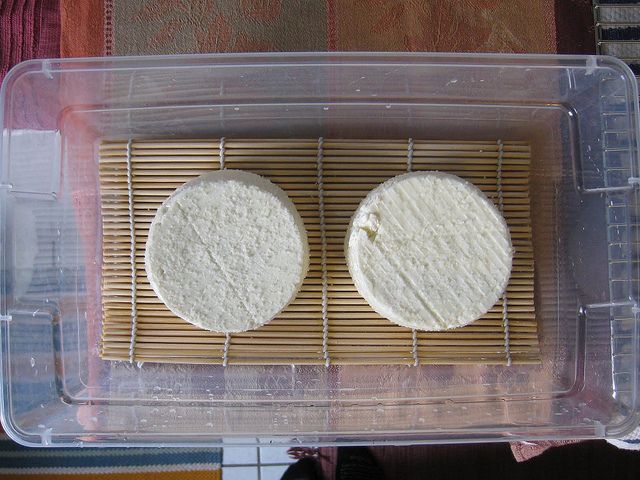
Place the salted cheeses on the reed mat in the box, with room for air to circulate around them. Put the lid on securely and put the whole thing in its special mold-friendly ripening spot in the fridge.
During the next few days, keep an eye on the box to fine-tune the cheeses’ environment. You want it to be quite humid, so condensation on the inside of the box is to be expected. If there’s no condensation, pour a few tablespoons of cool sterile water onto the reed mat. Keep a thermometer in the box to make sure the temperature is staying where you want it. I find that I need to turn the box regularly because one end always gets cooler than the other.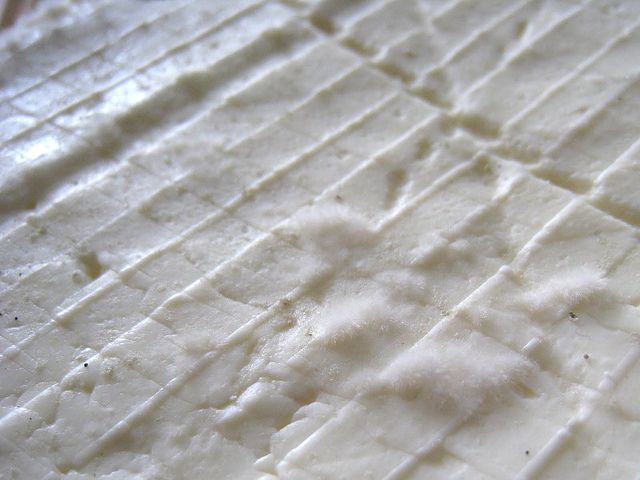
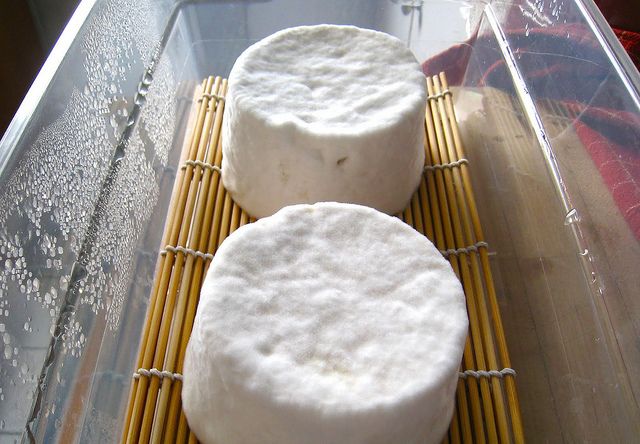
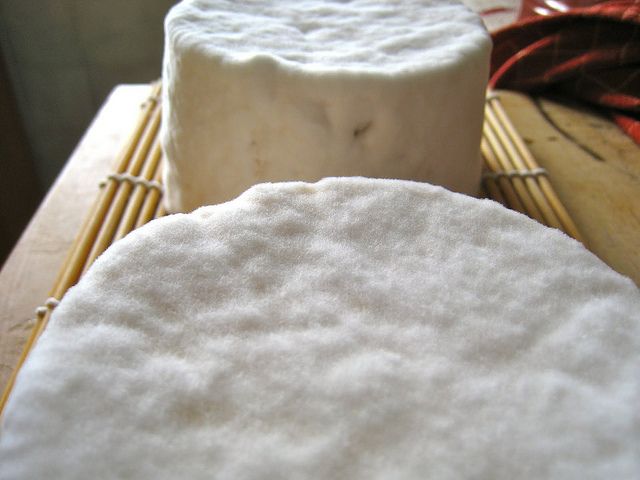
After a few days to a week, the mold will start to grow. It starts as spots of fluffy snow- white fuzz and eventually grows to cover the entire surface. If the mold takes longer to form—two weeks, say—then you know your box has been too cold. Apart from slowing down the cheese’s progress, the cold is not a terrible problem; however, you’ll want to remember that the cheese is a late bloomer when you come to the later stages of ripening.
When there’s a coating of mold, turn the cheeses over. You will have to carefully peel them off the mat; curl it back reed-by-reed to release the cheese. Keep turning the cheese every few days to prevent the mold from permanently fusing the cheese to the mat.
Though it probably won’t be an issue if you sterilized your equipment and salted the cheese thoroughly, keep a sharp eye out for dark mold of any sort. If you see any, cut it out immediately and dab vinegar over the incision site.
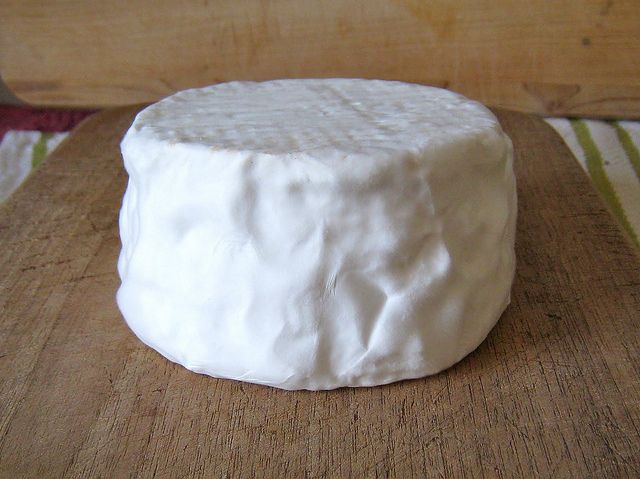
When the cheese is thoroughly coated with a thick blanket of white mold (after another week or so), you can wrap it. You could also just leave it as-is, but the wrapping saves you from having to flip it every few days. If you buy specialty cheese paper, you can even get rid of the ripening box entirely at this point, since the cheese paper holds in enough humidity while allowing the cheese to breathe. However, you will do just fine by wrapping the cheeses in parchment and leaving them in the box. In any case, keep the cheeses at the same warm-refrigerator temperature.
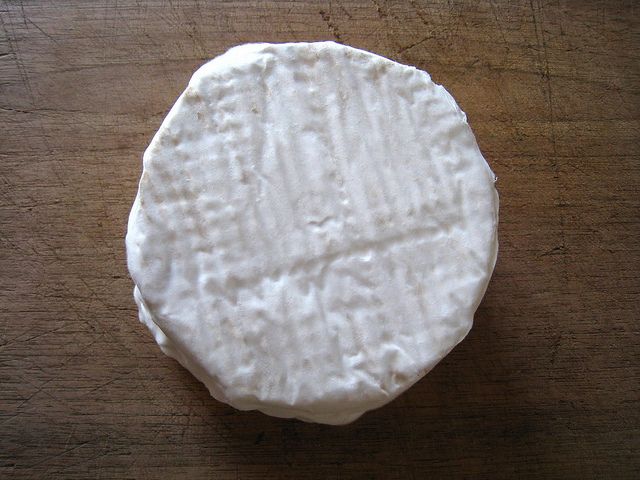
Now comes the hardest part: knowing when to cut into the cheese. Once you sample it, the ripening process comes to a halt. Of course, even a slightly underripe cheese is still delicious; the edges will be creamy even if the center is a bit firm and chalky (and this is exactly how some cheeses are supposed to be eaten). At the very least, though, wait 4 weeks after wrapping the cheese, and then start looking for ripeness cues.
A ripe cheese has a firm rind with a soft interior. It will give in the middle when gently pressed, even if the rind feels stiff. The surface of the cheese will become a bit sway-backed, sagging slightly from the edge.
You might even insert a very sharp, narrow, sterile knife into the middle of the cheese to feel if there is a firm resistance—if there is, pull that knife out and wrap that cheese back up. If you’re lucky, the mold will grow back over the cut and nobody will know. Try again in another few weeks.
If your mold took a long time to form in the early stages of ripening, you will want to allow extra ripening time now. Allow the cheese two months from the wrapping date to ripen.
On the other hand, if your cheese's environment got too warm, and it ripened up while you weren’t paying attention, don't panic. Overripe cheese easily develops an acrid ammonia aroma, but the center of the cheese may still be okay, as the ripening proceeds from the outside in.
Bloomy-rind cheeses are best showed off and served at room temperature. Let them warm up on the counter for ½ hour or so before eating. Once cut, keep them wrapped in parchment in a loose plastic bag in the fridge.
Save and print the recipe here.
Rosanna will be answering questions about camembert on the Hotline for those of you who want to take on this project at home. For the quickest response, go to her recipe and ask a question from there -- we'll email her your question right away!
Written by: Rosanna Nafziger Henderson
Popular on Food52
15 Comments
Thank you for contributing this home cheese making recipe. I cannot wait to begin my first batch.
Question: is there a vegetable enzyme one can use in lieu of rennet?
See what other Food52 readers are saying.