Food52's Test Kitchen Manager Erin McDowell is here, with tips and tricks to help you master the ABCs of baking.
Today: Homemade English muffins beat the store-bought variety every time.
I never understood the allure of the English muffin. I would see commercials and packaging boasting nooks and crannies, but I thought the dry hockey pucks were lacking in flavor and a little bit cardboardy—definitely best used as a vehicle for butter. I was totally anti-English muffin.
That is, until I tasted a fresh one, made in front of my eyes and handed to me right out of the oven. Now, I could write love letters to their pillowy softness and their chewy exterior that toasts up so perfectly. Of course, they are still a vehicle for butter—but a much more delicious vehicle than I ever knew. Best of all, they’re quite easy to make at home, and while recipes may vary, the technique stays generally the same.
Let’s break it down (or skip straight to the recipe):
1. The Dough
2. Slow Rise
3. Rolling and Shaping
4. Dipping
5. Cooking the Crust
6. Baking
7. Cooling
8. Serving
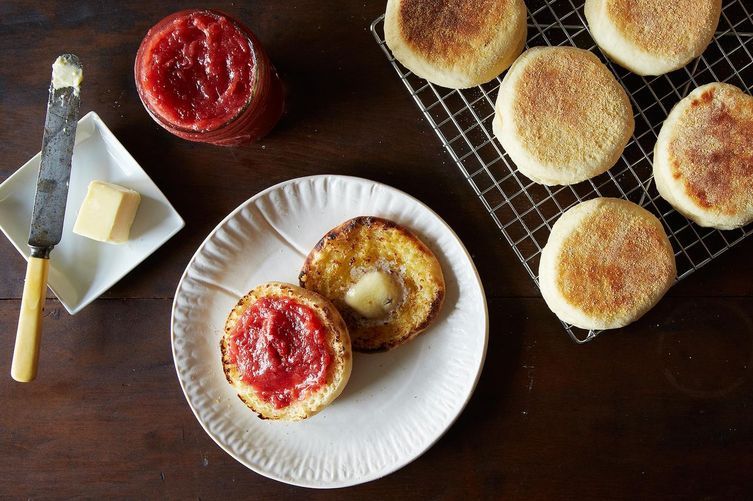
Christina Tosi's round English muffins, served with Pickled Strawberry Jam.
1. The Dough
English muffin dough is most commonly enriched—with butter, milk (or other dairy), and/or sugar—though often only lightly so (and eggs are not usually in the mix). It’s a yeast-raised dough and it benefits from the structure/higher protein levels of bread flour. The dough is often mixed somewhat minimally (though recipes may vary), but the one included with this article gets mixed for 7 minutes total (four on low speed, three on medium speed). I find that this is just enough time to create a smooth dough without overmixing, which could lead to toughness.
Unlike doughs that are intensely mixed (like brioche, for example), English muffin dough requires minimal handling (a brief roll-out, then a quick cut before baking), which means there’s no need for strong, intense gluten strands. Breads that are rigorously mixed, like brioche, have a tight crumb structure, whereas those that are handled minimally have a more open structure (and that's how they get those nooks and crannies).
It’s also worth noting that the dough shouldn’t be overly tacky: If you find yourself with sticky dough, knead in a few tablespoons of extra flour until it’s smooth and easy to handle.
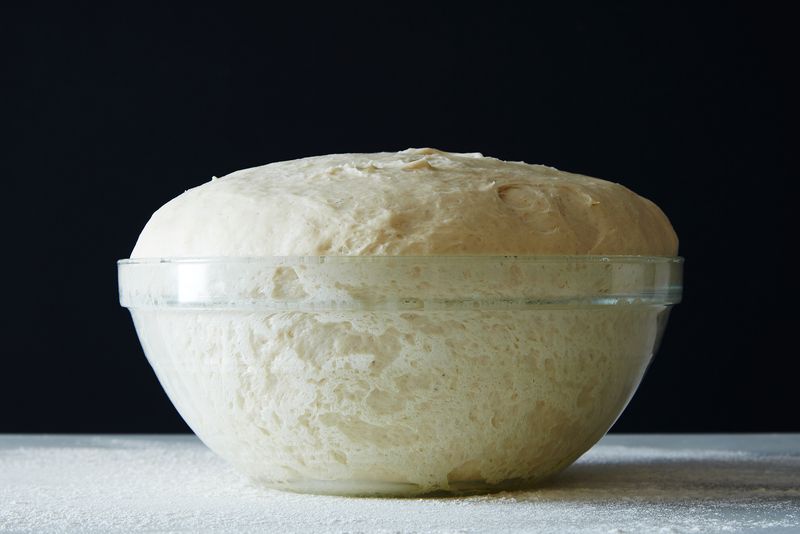
2. The Slow Rise
Because I want to eat English muffins for breakfast but don’t always have the mental capacity to mix dough early in the morning (or the patience to wait for it to rise, for that matter), I tweaked my favorite English muffin recipe to allow for a slow rise.
I mix the dough the day before, using room temperature (not warm) liquid, and then I refrigerate it overnight. Not only does this save me time come morning, it also provides excellent flavor—a depth of yeasty goodness that’s usually provided by the use of a pre-ferment (a bit of dough made at least several hours in advance of mixing the final dough).
By removing this step, I've streamlined the process without sacrificing flavor. Just remember to bring the dough back to room temperature before shaping. But, if you’re really an all-in-one day type of baker, no worries: Use warm liquid and let the dough rise for 1 hour before shaping and 15 to 30 minutes after shaping.

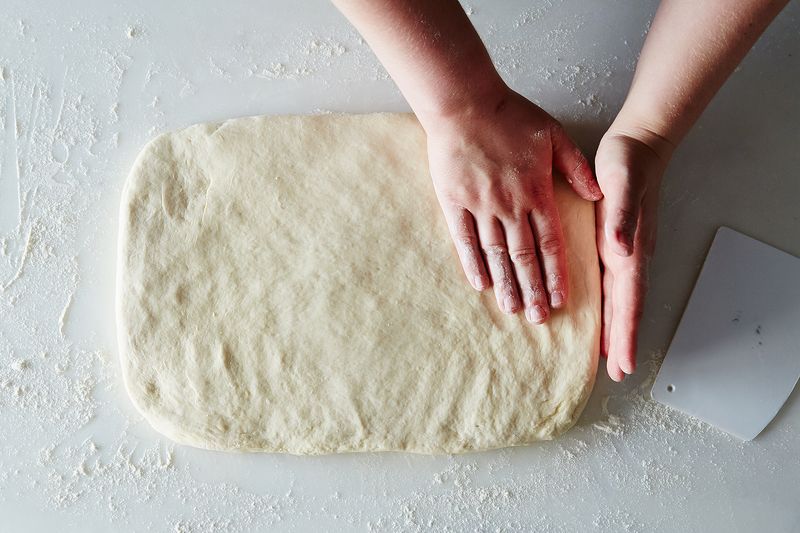
4. Rolling and Shaping
English muffin dough is so beautifully soft and tender that it doesn’t take much work to roll it into shape. There are a few ways you can handle the shaping: You might choose to roll out the dough and use a cutter or to shape individual rounds (like Christina Tosi does).
But my preferred method is the least fussy (have I emphasized enough that I want as little work between me and these muffins on my plate as possible?). On a lightly floured surface, roll out the dough to 1/2-inch thick. Any thicker and you’ll have the largest muffins in the world, but you can go a bit thinner (1/4-inch thick is fine) if you’re looking for a squatter muffin that's more like the store-bought variety.
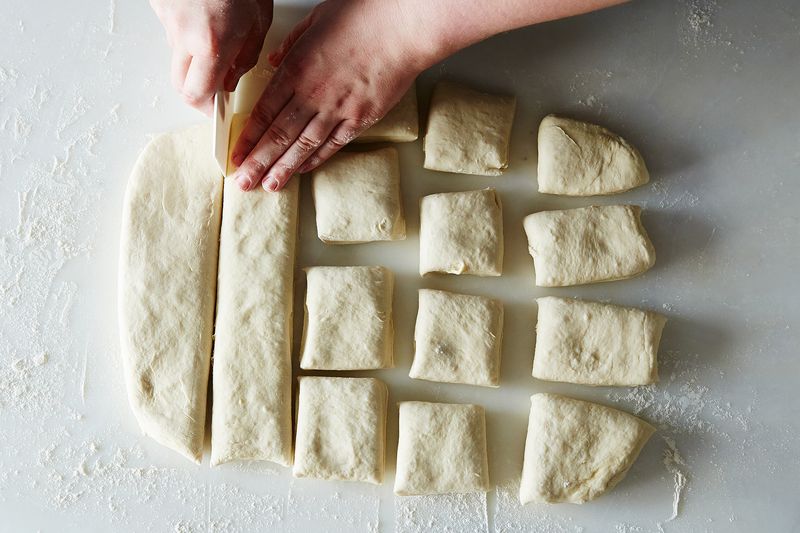
Instead of using cutters, which force me to re-roll scraps of dough (and start to overwork it in the process), I use a bench knife or pastry wheel to cut the muffins into squares, about 2 1/2 by 2 1/2 inches. Square may not be the typical muffin shape, but it means less work and that’s just fine by me!
Cover the shaped muffins loosely with plastic wrap and let them rise for 15 to 20 minutes on your work surface.

5. Dipping the Outside
Before you can cook the English muffins, they need an important garnish of sorts. To create the signature outer crust (with a little crunch and a lotta chew), the English muffins are dipped in a textured flour or meal, the most common being semolina flour or cornmeal. I opt for semolina, but I’ve also had some mighty fine muffins boasting very coarse cornmeal.
Dip each side of the shaped muffin into a shallow dish of semolina. This coating on the exterior will also help the muffins from sticking during the first part of their cooking process.
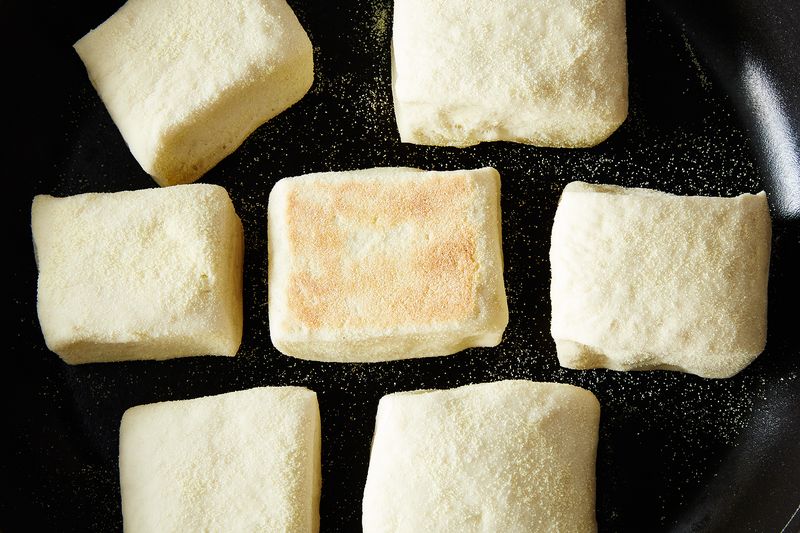
6. "Cooking" the Crust
This was one of those “a-ha!” moments for me the first time I saw an English muffin being made. In pastry school, my teachers constantly pointed out the differences between cooking and baking. Well, English muffins are one recipe that gets both cooked and baked!
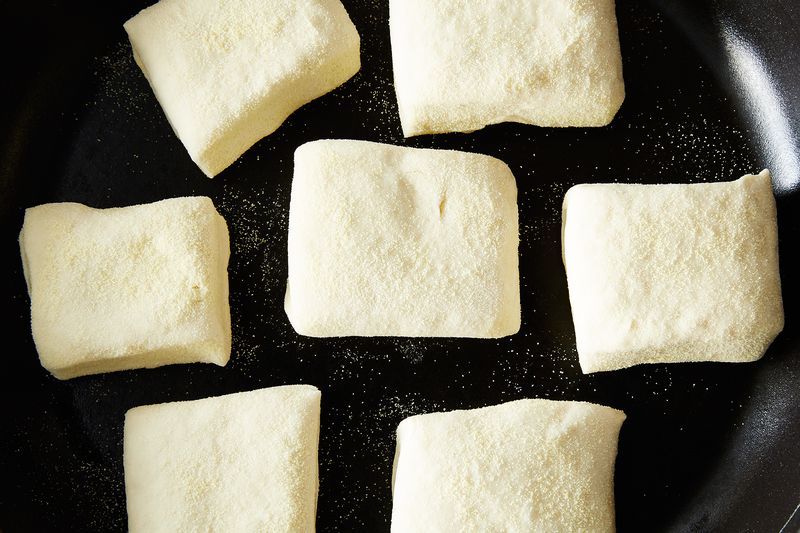
Once the dough has been shaped and has had it’s final rise, it’s cooked in a cast-iron skillet before it hits the oven. The hot skillet gives the outside a golden, crackly appearance and sets the crust. Then the so-soft interior gets finished in the oven. While this is one extra step (sorry—heading straight for the oven will not yield the same, delicious results), it also means a shorter overall bake time.
Make sure the skillet is nice and hot—but not smoking—before adding the muffins. Cook until golden (2 to 4 minutes), then flip and repeat on the other side. If you have a large cast-iron griddle, you can do them all at once. If not, work in batches. Transfer the finished muffins to a parchment-lined baking sheet.
7. Baking
English muffins bake at a high temperature for a short amount of time. Bake the muffins for 7 to 9 minutes at 475° F. These homemade muffins will be much puffier and fluffier than the kind you’re used to seeing, and since they won’t brown too much more in the oven, it can be sort of difficult to tell when they are done. The best way is to stick a thermometer in there. Go in at the side so that the hole will be easier to hide to whomever you’re serving and make sure you settle the thermometer in the very center. Look for an internal temperature of between 200 and 215° F.
8. Cooling
Yeah, this is the hardest part. And by no means do you actually need to heed my advice here, but it’s best to let the muffins cool for 5 to 10 minutes before you serve them. Don’t worry: They’ll still be nice and warm, but their crumb structure will have had time to set and some steam will slowly escape from the interior. With that being said, I’ve been known to rip into one pretty much immediately. Just be careful of your fingers and the roof of your mouth!
If you’re making your muffins a good bit in advance, no problem either. Let them cool completely, then transfer to an airtight container. The cooled muffins can be warmed in a low oven or toasted to perfection.
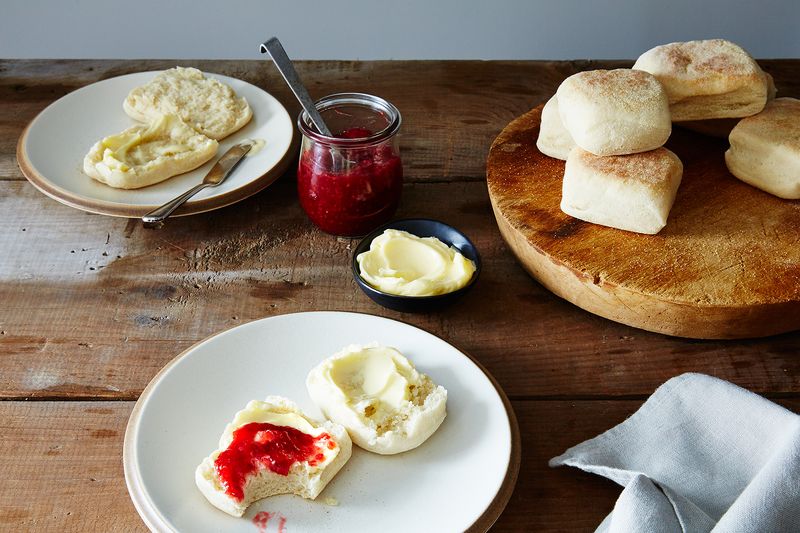
9. Serving
Grab some butter—the salted kind. Get your hands on some jam or jelly. Slather, bite, and repeat.
Makes about 15 muffins
27
ounces (5 1/2 cups) bread flour
0.35
ounces (1 tablespoon) instant dry yeast
0.75
ounces (1 1/2 tablespoons) salt
0.25
ounces (2 teaspoons) sugar
19.25
ounces (2 1/4 cups) room temperature water
2
ounces (4 tablespoons) room temperature butter
Semolina flour, for dipping
See the full recipe (and save and print it) here.
Photos by James Ransom
See what other Food52 readers are saying.