Popular on Food52
Continue After Advertisement
51 Comments
ajk1664
January 10, 2016
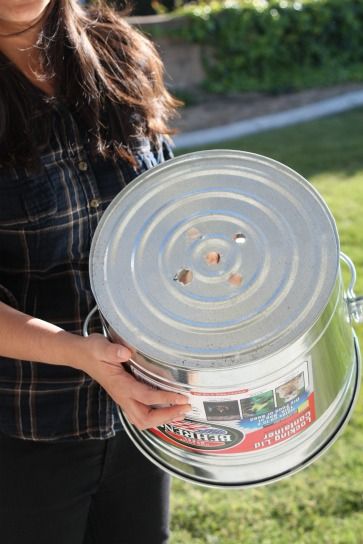
I didn't see any answers to the questions about lead-free pots. Cooking in a leaded pot would certainly be dangerous. There could also be other harmful chemicals in there. I'll go to Lowe's and Home depot and try to find out the manufacturers of these items and call about their composition. I'll leave an update here. The suggestion about having a potter make one seems expensive. The galvanized can you show in the photos is not coming into contact with food, so it may not matter, but whatever is in those pots is definitely getting into the food and the smoke that you're breathing. I love your project so I want to find out more about this before I begin my build. Thanks for the excellent instructions.
Miah
May 24, 2014
Hi
I purchased one for my home from this site http://kslbuyonline.co.uk/product/shaan-tandoori-oven/
I purchased one for my home from this site http://kslbuyonline.co.uk/product/shaan-tandoori-oven/
Shawn D.
October 3, 2013
I have built a Tandoor in my garden just this week,I used a large Greek urn which I drilled a 3 inch diameter whole in near the base as ventilation,I then lined the base inside with flat larva rock to act as insulation and then robbed an old bbq of it's side burner pot stand on which I placed the colander which I use as a brazier for the coals. The lid is a Terracotta plate with 1/2 holes drilled in for ventilation also(I use a brick to close these if I need too),I hang the food from a bar that sits across the top and so far results have been good with it running at temps above 200 degrees Celsius but if I want it hotter for naan bread I add a stand above the coals that I pile up with larva rocks and that generates more heat. I have discovered that it can be started and up to temp in minutes using a heat gun get to get it started(electric paint stripper)with great results.
I've finished it off with a brick surround and filled that with grit sand to insulate it,all in all I'm WEEL pleased with it.
I've finished it off with a brick surround and filled that with grit sand to insulate it,all in all I'm WEEL pleased with it.
Amudha
September 5, 2013
Love this (and what a great blog, btw). My family is not into the regular BBQ fare, but we love to grill, so our grilling inevitably includes something South Asian. Lately I have been obsessed with getting a home tandoor (truly, there is nothing like it) and have gotten my family into it, as well. We're not a very DIY family, but I have a feeling this will be an exception. Cannot wait for next summer - already dreaming of the kulchas and tikkas!
athurston
July 28, 2013
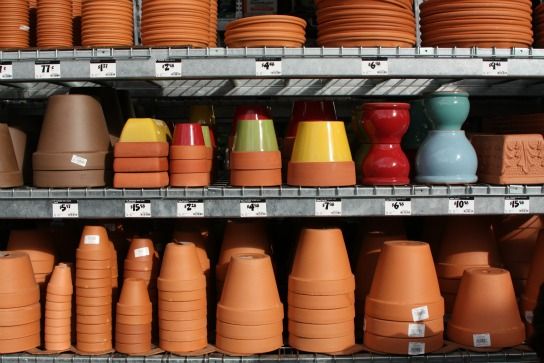
Can you recommend a good place to find lead-free terracotta pots? It seems like you went to home depot/lowes .. but how did you verify that the pots were lead-free?
Anisah S.
July 9, 2013
many terra cotta pots imported into the States have lead. I'd be quite leary of any terra cotta pot. Safer to have a potter make you the desired form rather than risk lead poisoning (since they don't have to necessarily list lead on a flower pot's label!)
soraya P.
February 8, 2013
What a great idea - I love it! Maybe I can get my husband to make me one.... I make curry dishes all the time and would love to have one of these. So, was the nahn store bought or made? If made, how did you make it?
deborah.bradek
August 3, 2012
i was just thinking could get some metal hooks and metal chains and connect the hooks to the chains at the top together and then connect the bottom chains to a metal rack together and then connect the hooks at the top to the top of this outdoor homemade oven is that even possible? and maybe even put a lid over it or what i did that but on the chain i added like 3 metal racks in different spots one over the other like a shelves and then laid it in the oven then i could have smoked chicken on the bottom rack corn on the middle rack and corn break in a small pan on the top rack and then i could close it with a lid! wow could i do that? i mean smoked food like that sounds awesome... please tell me if that's even possible! btw awesome post and i think i will be doing this!
aakashgupta
July 31, 2012
Sorry for the double comment but the link in my previous one to a tandoor construction that is safer and sturdier yet still cheap is here - again, inspired by you guys, thanks!
http://www.aakashg.com/2012/07/19/backyard-tandoor/
http://www.aakashg.com/2012/07/19/backyard-tandoor/
aakashgupta
July 31, 2012
Thank you for this! Inspiring post and videos - inspired me to make my own tandoor! Made a few changes to make it more permanent, sturdy, and safe. http://www.aakashg.com/2012/08/01/product-creation-and-the-80-20-rule/
Liam15207
May 20, 2012
Great job ladies! Very clever. i have one question: You mention adding the oil to 'season' is it, how often is this done? Is it ever time you cook or more of a once or twice a year task?
Panfusine
May 14, 2012
*SPEECHLESS* totally tongue tied as to what to say.. (my expressions of awe would sound perfect in Hindi rather than English)..sharing this please!
Anum&Liyna
May 15, 2012
lol thanks for the sweet comment Panfusine!! it really is as simple as it looks! You should try it!
Burnt O.
May 14, 2012
I am awed by the McGuyveresque approach you took - as well as your determination! One question though - how do you go about reusing the pot without taking it all apart again? is the hole in the bottom big enough to sweep the charcoal dust through it?
Anum&Liyna
May 15, 2012
hahaa thank you!! Yup, the hole at the bottom is large enough for us to sweep out all the charcoal dust. So before each use we take out all the large pieces of old charcoal out by hand (with a glove on and after it cools down!), make sure all the dust is swept out of the hole, and then wipe down the sides of the oven. Takes like 5 minutes!
julie_chicago
May 14, 2012
Great job! But why do you think the crack happened, and do you have any ideas on how to prevent it? Also, do you think you can use the tandoor over and over? Thanks.
Anum&Liyna
May 15, 2012
Thanks julie_chicago! So here's why we think the crack happened: when we were figuring out how to put this oven together we wanted to put all the parts together first to get an idea if it would work before we put the sand in (because once the sand was all in, it would be really hard to do-over). So we put it together without the sand, lit the coals and let it burn for a while. And that's when it happened. I think the super high heat just made the pot expand too much and it cracked. I think if you make this with the sand all around it first and then light it, the sand should keep it all in place; even if the pot expands from the heat, the sand will keep it tight in place and hopefully not crack. So yea, I'd say put the sand in before you light. And yea! we've already used it more than 5 times. Not sure it would last forever ever, but it seems to be holding up :) We're hoping to get at least a year or two out of it.
nykavi
May 13, 2012
Wonderful effort girls.... I have tried many ways . Then I read about an upside down pressure cooker trick in an old cookbook ... Place the upside down pressure cooker on an open flame turned up high. Let the pan get heated for 10 minutes . Remove and quickly place the dampened roti or naan on the sides. Watch your fingers!!! Return pan to flame and cook for 3 to 5 minutes... The bread turns out quite ok!
Anum&Liyna
May 15, 2012
omg that sounds SO cool!! we are definitely going to try that technique :) thanks for the tip!
watergirl
May 13, 2012
I found a link to you on Pinterest. This was so very cool! My husband & I love naan and tandoori chicken and try to eat out at local places for date night (no kids). You *almost* make me feel like I could do this and eat delicious creations at home anytime! Love it :P
Anum&Liyna
May 15, 2012
oooh date nights at home with your homemade tandoor also sound like a great idea ;) trust us, you could definitely make it :)
Samantha A.
May 8, 2012
I just did something similar to make a wood oven for cooking pizza in my back yard. I used a metal trash can and some dirt. I blogged about it here: http://samanthamenzies.com/home/2012/04/garbage-can-pizza-oven/
Devangi R.
May 8, 2012
Right now only way I can get tandoori naan is by flipping my skillet over open flame the recipe that I have added on this site, but this is going to be my project the moment I happen to have a backyard. The videos are awesome! What wonderful looking Naan!
Anum&Liyna
May 11, 2012
Thanks for the sweet comment :) Also, we love your user name....do those exist? where can we get one of those?!?

See what other Food52 readers are saying.