I can't remember exactly what was going through my head when I called Bitter and Esters, a home brew shop in Brooklyn, asking about their starter beer-making kit, but it went something along the lines of this: "I like beer, so it should be a breeze to make it—right?" Not exactly.
As I learned in one of their classes, through the guidance of many, many brewing friends who checked my work, and after making my own home brew: The act of brewing isn't all that complicated, but it's a very precise process that doesn't allow for much error. And going from being a non-brewer to being a brewer under the guidance of brewers is like learning a foreign language in total immersion. Words they considered to be basic vocabulary (mash, malt, wort) were completely alien to me at first—which only goes to show that if I can brew beer, anyone can. Before you get started, here are some basic things to keep in mind:
- Brewing beer takes about two and a half hours of active time all together, and four weeks from start to beer.
- Beer is made from a recipe, just think of it as a complicated baked good if that helps!
- Sanititze everything that touches cooled wort. In other words, when I say sanitize, you jump.
- It helps to have a buddy, but it's possible to do it on your own!
Now that you're ready (you're ready, right?), here is a complete, 101, beer-for-non-brewers guide to brewing beer at home:
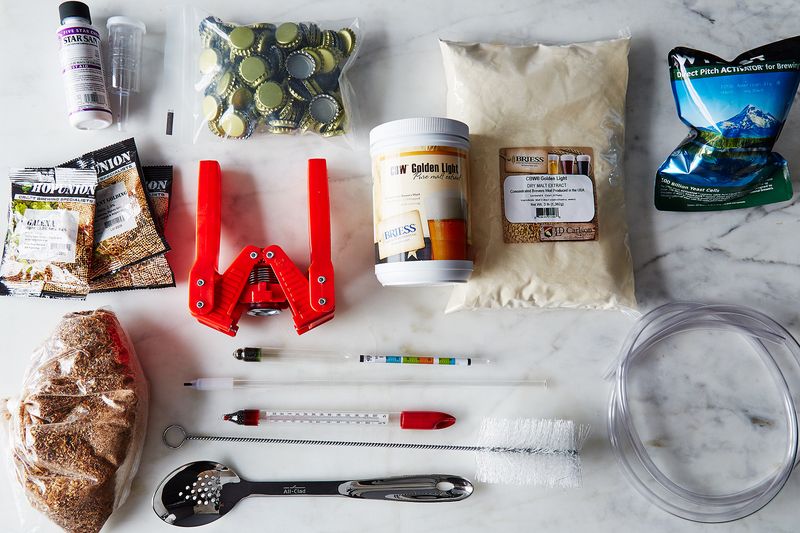
Equipment You Will Need
Don't get scared off by this ingredient list! Most of the equipment is available in home brew starter sets, and recipes are available through the same purveyors.
Ingredients
- Grains: Since the method I chose uses extract brewing (rather than all-grain brewing), the grains will need to have been roasted to varying degrees, then ground, then soaked in hot water—to pull out the sugars so that the enzymes get locked in (you can purchase grains that have already gone through this process). The color of a grain is measured on a system called a Lovibond Scale, which runs from 1 (think an American lager, or a Natty Light if you've been to any frat parties recently) to 40 (Guinness—where you can shine a light through and not see the other side). Different grains are used to make different beers; for example, flaked rice is used in many light Japanese beers, while flaked wheat is common in Belgian lambics, and flaked barley is often used in stouts. Grains are often sold in bulk containers by the pound.
- Hops: Hops are leafy cones that grow on vines, which adds flavor, aroma, and bitterness to beer. There are many varieties of hops and each beer recipe calls for a different kind. Hops can be used in a few forms (dry whole cone hops, fresh wet hops, and hop pellets), which each have their own advantages and disadvantages. And each hop is rated for bitterness by International Bittering Units (an IPA is around 50 IBU while a porter is around 30 IBU, for example). For your first time brewing, pay attention to when the hops are added to the boiling wort, as adding hops at different times affects the bitterness, flavor, and aroma of your beer.
- Yeast: This is what ferments your wort and makes your beer. There are different types of yeast that can affect the flavor of your beer, from spicy to woody to funky, and yeasts come in both dry and liquid form. Most recipes will specify a type of yeast—just don't use baker's yeast, they aren't the same!
- Malt extract: This is the glucose that yeast eat to ferment the wort and turn it into beer. Malts are used to add additional flavors in your beer.
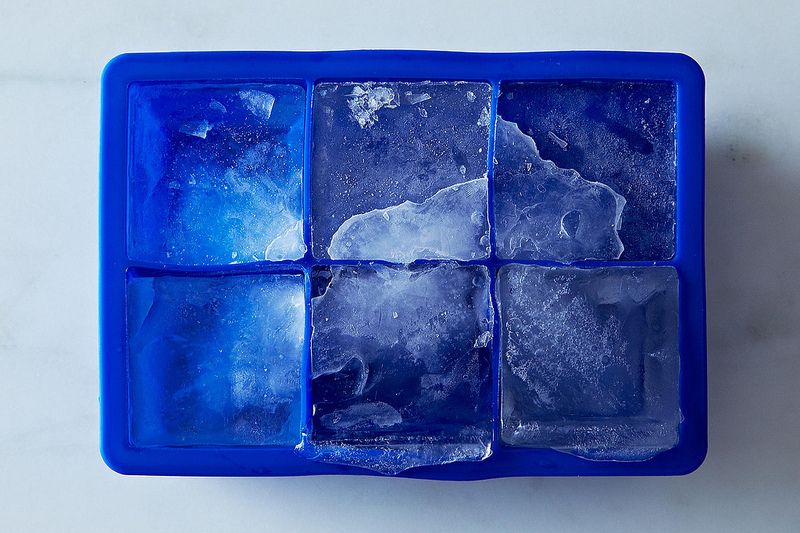
- Ice or wort chiller: Buckets and buckets of ice to use when you cool down your beer, or you can get a wort chiller if you love beer equipment.
Basic equipment for brewing:
- Stove top: Your wort must remain at a consistent boil for a full hour so make sure you use a stove that's strong enough to heat up 3 gallons of water and can consistently stay at a boil
- Brew pot: Must hold up to 3 gallons of liquid with room for boil-over (I used 6-gallon pot to be safe). Stainless steel is great, but it can be aluminum.
- Stainless steel spoon: Something with a long enough handle that you don't burn your hand and stainless steel because wood is harder to clean and sanitize (bacteria can live in its pores!) and plastic can impart flavor into your beer.
- Grain bag: Cheese cloth-like bag used to steep grains into hot water to color and flavor it. But do not use cheese cloth, purchase a specialty bag at a brew store that's woven more tightly so that grains can't get out.
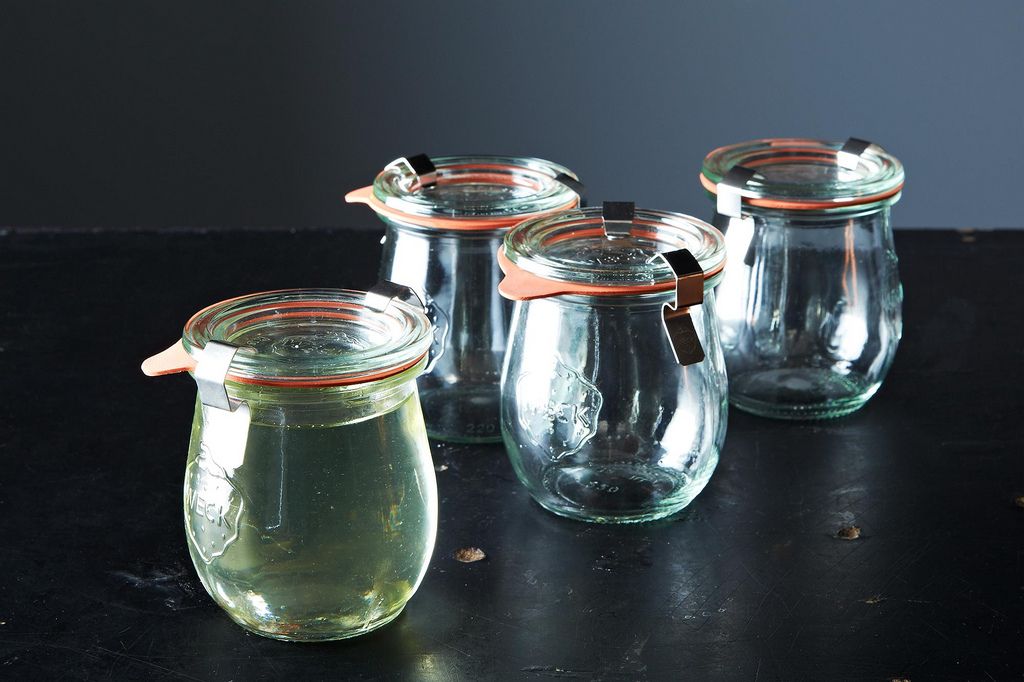
- Fermenter bucket: A large, 5-gallon bucket with a tight-fitting lid, a spigot, and a place for an airlock, a plastic attachment that fits on top and lets out air as your beer ferments. It's helpful to have another 5-gallon bucket on hand to hold your sanitizer, but not necessary.
- Pot-holders: Good holders that you trust enough to carry a pot of boiling water from your kitchen to an ice bath (wherever that may be).
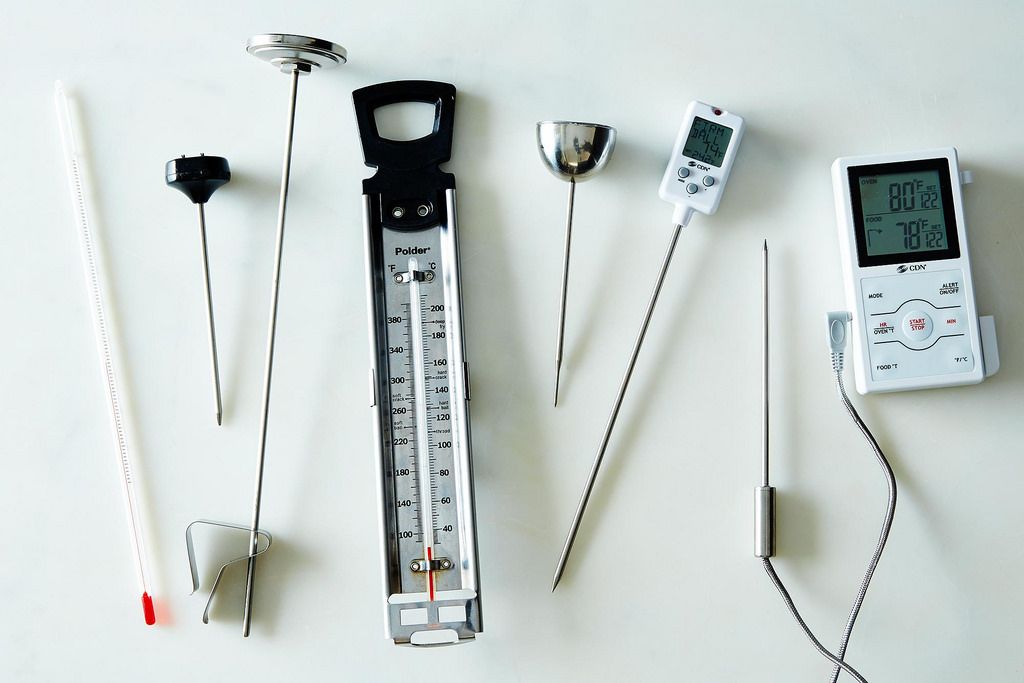
- Thermometer: You will need to check the temperature of your wort several times as it cools so make sure you have a thermometer on hand.
- Hydrometer: This reads the density of the wort, your original and final gravity (more on this later!), which ultimately gives you your ABV and lets you know if you're on track.
- Double-mesh strainer: You can use two regular strainers stacked on top of each other, this is for straining hops out of your beer.
- Sanitizer: Once your wort has cooled (which you'll know all about around Step 8), everything that touches it must be sanitized. Use a acid-based sanitizing solution that's safe for consumption, like Star san, which is made for home brewing.
- Scissors: For cutting your packet of yeast and hop packets, if needed.
- Timer: You can use any timer, including the one on your phone, for timing boil time.
Basic equipment for bottling:
- Fermented wort (a.k.a. unfermented beer): By steeping grains and adding hops to the boiling water, you'll get wort—which eventually becomes beer.
- Priming sugar: A simple syrup mixture you'll add to your bottling bucket.
- Bottling bucket: Similar to your fermenter bucket, this is a 5-gallon bucket with a tight-fitting lid and a spigot.
- Tubing: This is used to transfer (rack) the beer to a sanitized bottle bucket.
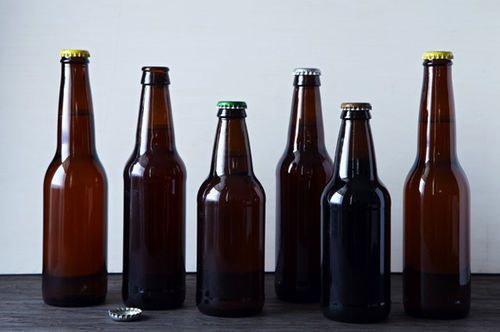
- Bottles: For every 5-gallon batch of beer, you should make 48 bottles-worth. Have these cleaned, sanitized bottles on hand for bottling day. Recycling your used bottles is a good idea!
- Bottle filler: For filling your bottles without de-sanitizing them.
- Bottle brush: To clean any leftover yeast or sediment out of your old beer bottles.
- Bottle capper: A hand-held contraption that clamps caps onto bottles.
- Bottle caps: Caps can only be used one time, but you can buy a bag of them from any brew shop.
- Towels: Have some on hand to set down on your floor to account for splashing.
How to Do It (for a 5 Gallon Batch)
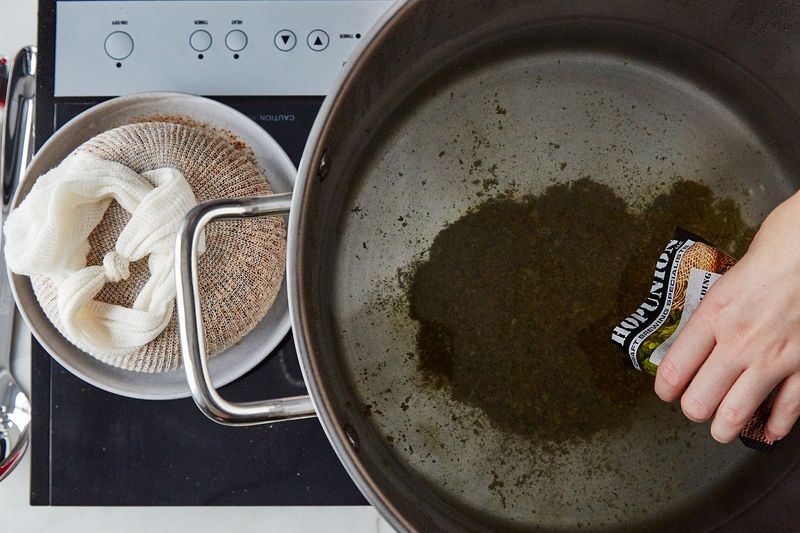
Step 3, Some recipes call for added hops before steeping your grains.
Making Your Wort
- Heat water. In a large, 4- to 5-gallon pot (This pot, referred to as a brew pot, will be ultimately hold 3 gallons of liquid, but you'll want it to be larger than that in case of boil-over), bring 2 gallons of tap water to 165° F over high heat. Go over 165° F, and the heat will start pulling tannins out of your grains, which is not a good flavor.
- Sanitize the fermenter bucket. While the water comes to temperature, follow the directions that come with the sanitizing solution and fill your fermenter (plastic bucket with a spigot) with it. Cover loosely with the lid and set aside until you have completed making your wort.
- Steep grains in a grain bag. As the water comes to temperature, place the specialty grains from your recipe into a grain bag. When the water reaches temperature, turn off the heat. Knot the grain bag and place it into your brew pot to steep (like tea) for 30 minutes. The color of the water in the pot will change to a light brown (also like tea!) and start to smell delicious. Depending what recipe you're following, it may call for you to add hops here.
- Remove grains. After 30 minutes, remove the grain bag with tongs or a slotted stainless steel spoon, lifting it above the pot to allow some water to drain back into the pot (but do not squeeze it, or you risk pulling the tannins out of the the husk of the grains!). Once drained, either discard the grains and grain bag or save them—they're edible and can be used to make things like bread!
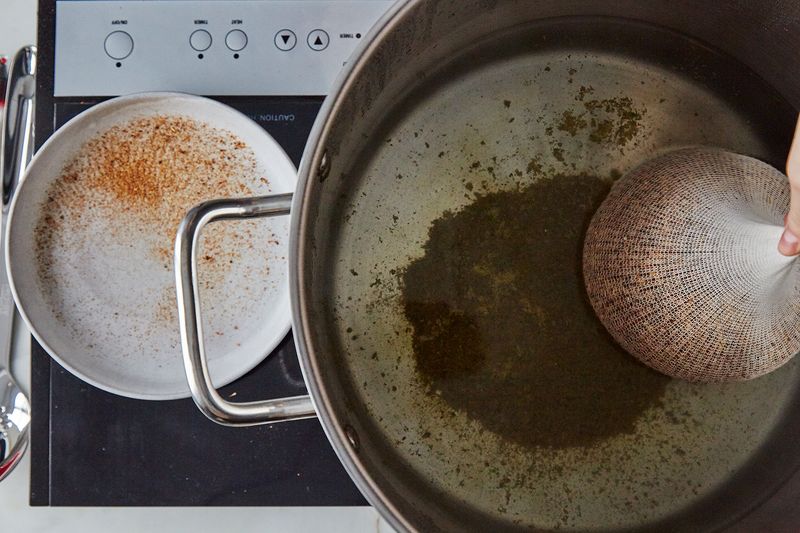
Step 3, Carefully lower your grain bag into the water to steep.
- Add water, boil. Top off your brew pot with 1 gallon of tap water and bring the whole thing to a boil. You can keep the cover on here to expedite things.
- Add malt. Once your water is at a boil, turn off the heat and add half of your malt extract (If more than one type of malt extract is listed on your ingredients, start with the malt listed first). Foam should form as soon as you add the malt. At this point, you have wort.
- Boil the wort. Watching carefully for boil-over (which you will be able to anticipate when you see foam beginning to form, also called a "hot break"), bring your wort back to a rolling boil. You may have to adjust the temperature several times to hit the right heat.
- Add bittering hops and boil. Once you've found the right temperature for a consistent rolling boil, add bittering hops, if using, and continue boiling, stirring occasionally. Boil the wort for 1 hour, uncovered, unless otherwise directed by your recipe. Depending on whether you have a malt-focused or hop-focused recipe, you may have to add additional malt or hops for flavoring and aroma throughout this hour. During the last 15 minutes of your boil, add the remaining half of your malt extract.
Left: Step 3, As your grains steep, the water will start to take on their color. Right: Step 4, Remove your grain bag using a stainless steel slotted spoon.
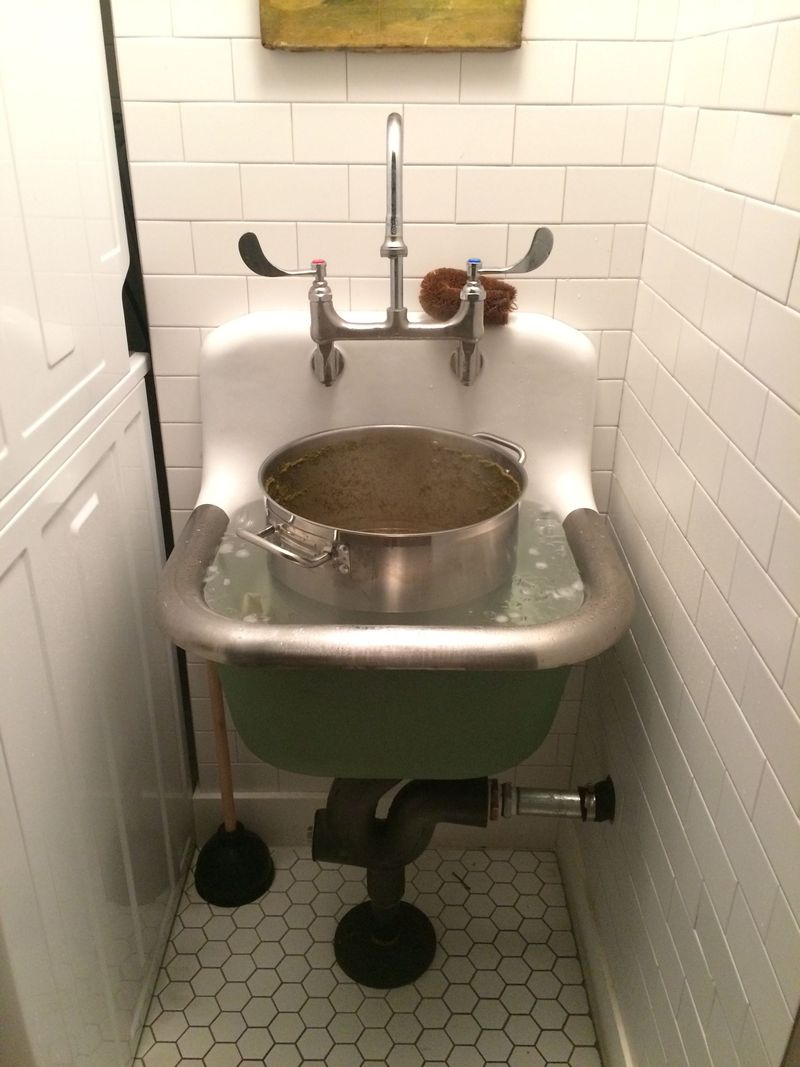
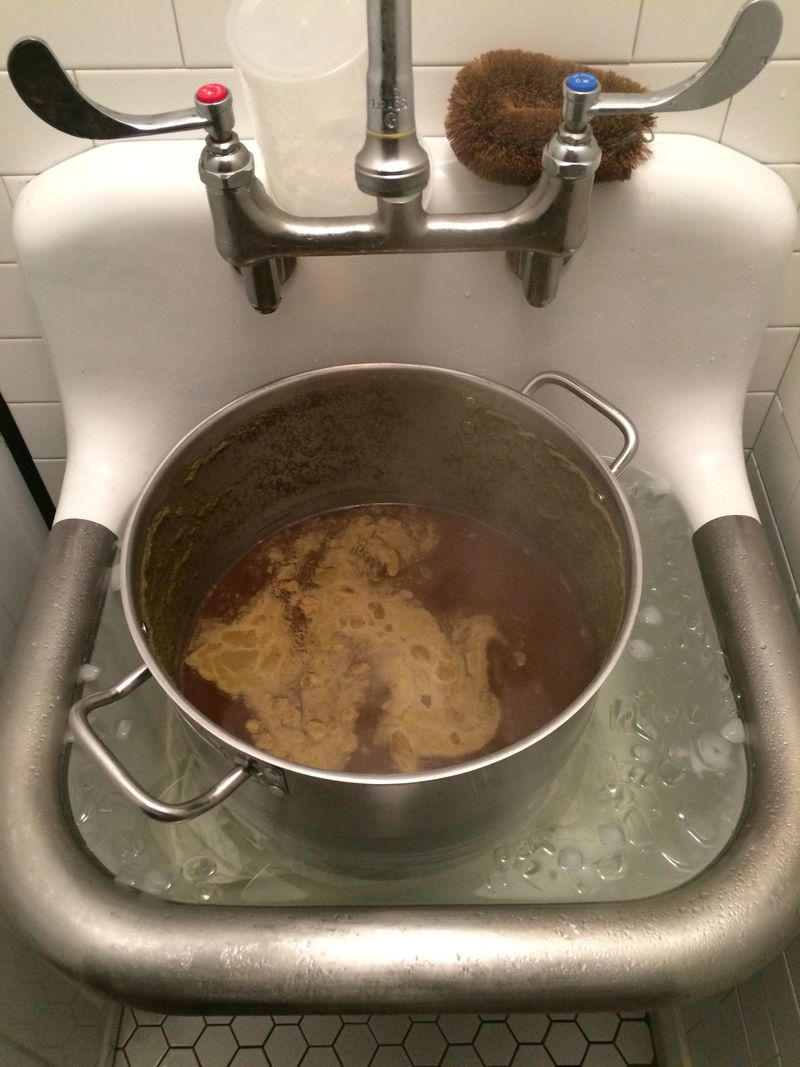
- Prep an ice bath for the brew pot. While the wort boils, prepare an ice bath to submerge your pot in (about three-quarters deep)—this can be done in a sink, bathtub, or cooler. You'll want the wort to cool as quickly as possible for two reasons: 1) So that wild yeast, which is the stuff that makes funky sours, doesn't get a chance to enter into your perfect wort; 2) For aesthetics: Cooling your wort quickly causes proteins to break down and drop out of suspension, making for a clear, less opaque beer.
- Cool the brew pot and hydrate the dry yeast. Once your wort has boiled, immediately take your brew pot by the pot holders and submerge it in an ice bath. From this point onwards, everything that comes into contact with the wort must be sanitized. If you have to rehydrate your dried yeast as per the package instructions, add it to some pre-boiled and cooled water like a slurry and let sit. After 15 minutes, gently swirl and set aside.
- Take its temp. After about 30 minutes, use a sanitized thermometer (that has been dunked into the sanitizing solution in your fermenter) to measure the temperature of your wort—it should be about 75° F. If it's too high or too low, adjust accordingly by leaving it in the ice bath or removing and and bringing it to a warmer area.
 Step 6, Add half of your malt extract to the brew pot.
Making Beer (!) and Preparing it for Fermentation
- Remove sanitzer from the fermenter. Since the sanitizer solution lasts for roughly 2 weeks and you'll need it for bottling (more on that later), pour it out of your fermenter into another large bucket, reserving at least 1 gallon. If you don't want to save any for bottling, set aside that 1 gallon and pour the rest down the drain. Do not rinse out the fermenter after pouring the sanitizer out—the water will de-sanitize it, and though the sanitizer will leave bubbles, this is a good thing! Bubbles mean your fermenter is sanitized (which doesn't taste like anything and is completely safe to drink).
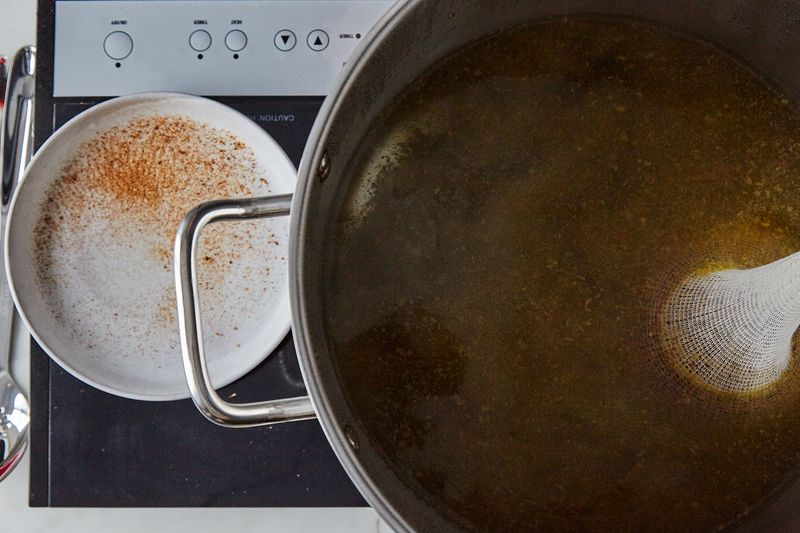
- Sanitize a strainer. Dunk a strainer into the sanitizer solution, making sure to completely submerge any part that will be touching the wort.
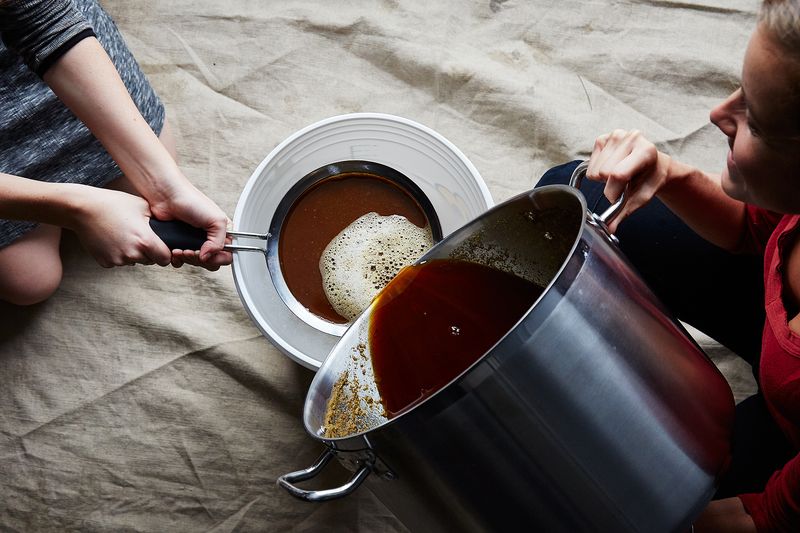
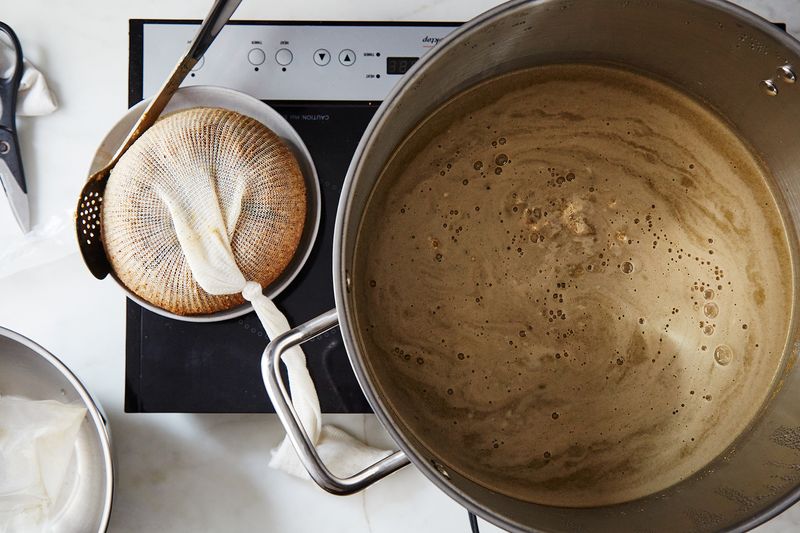
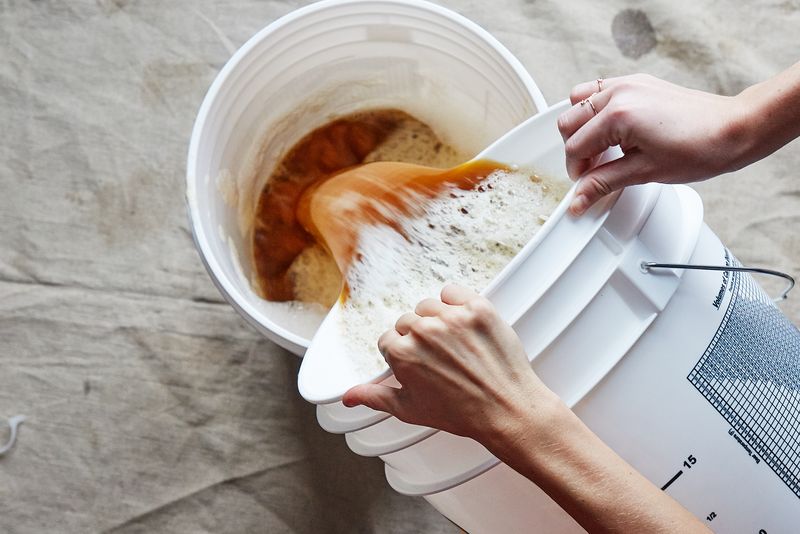
- Transfer wort to the sanitized fermenter. Pour your cooled wort through the strainer into the sanitized fermenter. Sludge from the hops will collect in the strainer, and you can use a (sanitized!) stainless steel spoon to push down on the solids to get all the delicious wort out.
- Add water to the strained wort. Add enough bottled distilled water to bring the wort to make it 5 gallons (most fermenter buckets have markings on them to help you measure this).
Left: Step 6, stir in your malt. Right: Step 7, bring your wort to a rolling boil for an hour.
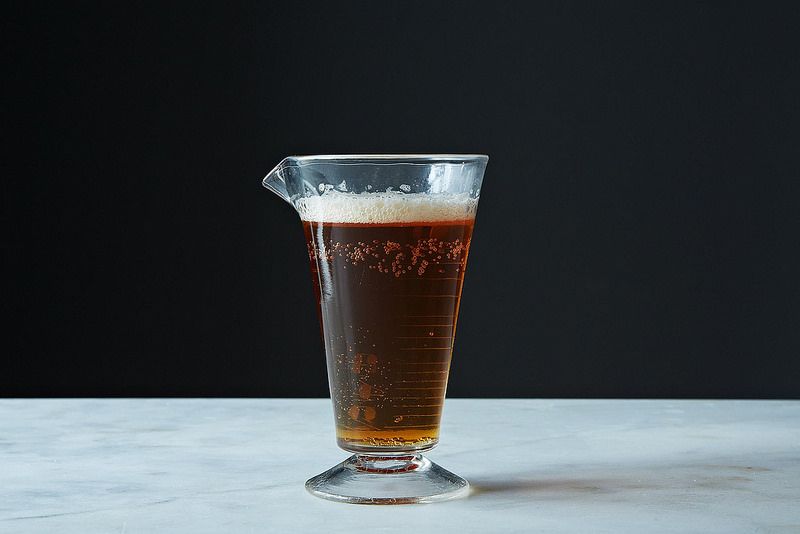
- Take a hydrometer reading. Using the spigot on the fermenter, a sanitized turkey baster, or a wine thief (if you happen to have one on hand), collect enough wort in another vessel so that your hydrometer can float in it, but not so much that you waste beer—then, take a hydrometer reading. Taking the wort's hydrometer reading is done to measure original gravity, which is noted by most beer recipes, and doing so will let you know if you're on the right track. If your original gravity is off, there's nothing you can do this time around, but write it down so you know for next time (in case you've just accidentally created an amazing beer!). Toss the wort you used in your measurement as it's now un-sanitized, or, if you would like a teaser for the flavor profile, drinking it is also an option. (Bye, wort!)
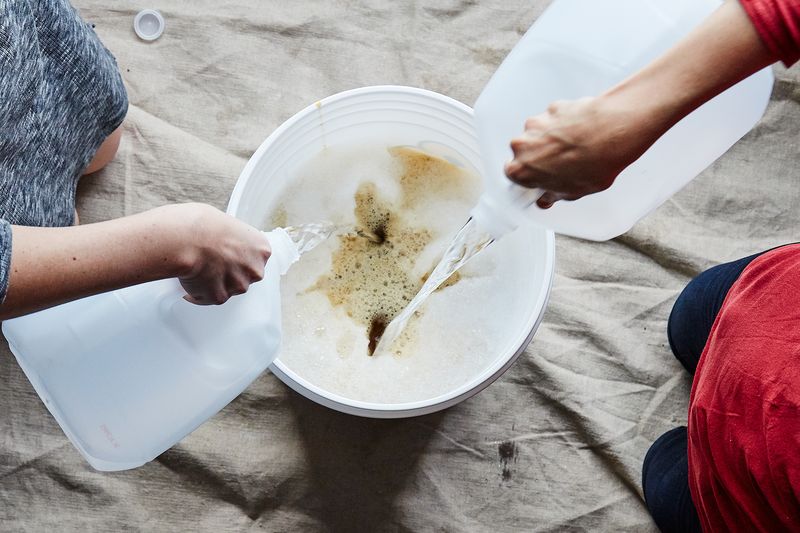
- Oxygenate your wort. Securely cap your fermenter, where the wort is, with a sanitized lid and shake it vigorously to oxygenate your wort, which is very important! (Alternatively, sanitize your 5-gallon pot or bottling bucket and pour the wort back and forth between the two sanitized containers several times, then back into the fermenter.)
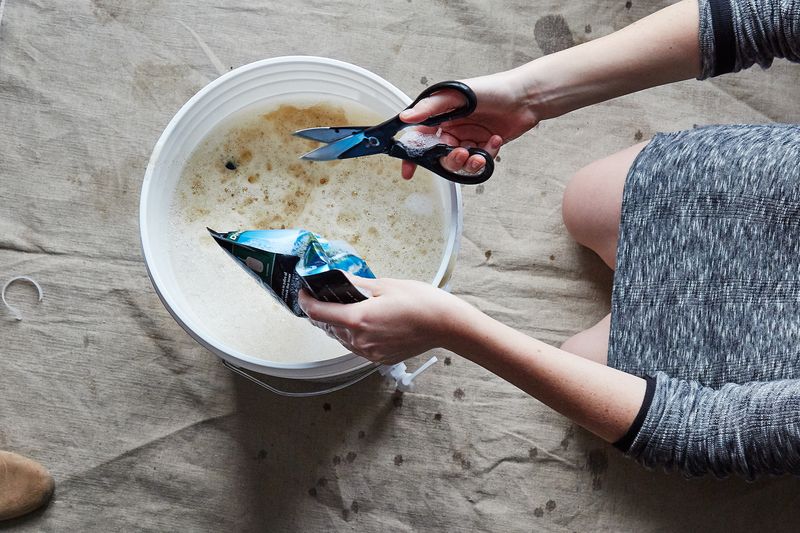
- Pit the yeast. Now it's time to pitch your yeast (also known as the fancy term for adding yeast to the wort to make it beer!). If you're using a yeast packet, make sure that the packet itself and the scissors you use to open it are (you guessed it) sanitized, then split it open and dump the yeast in. If the inner packet in your yeast packet flops into the beer, just leave it in—it isn't worth risking de-sanitization to fish it out. You now (legally, though not taste-wise) have beer!! (But don't drink it quite yet.)
Step 10, Using a sink, bathtub, or large container, place your pot into an ice bath to cool your wort as quickly as possible.
Allowing Your Beer to Ferment in the Fermenter
- Attach the airlock and set aside to ferment. Once you've pitched your yeast, re-sanitize the lid of your fermenter and put it on the fermenter. Fill your sanitized airlock (that's the device that lets air out but not in) half-way with sanitizer and attach it to the top of the fermenter. Allow your beer to sit and ferment in a 65° F to 70° F area away from light for 2 weeks (the back of a closet is a good option). A good way to make sure your beer is the right temperature is to set a cup of water on top of the fermenter cover and take that water's temperature. If the beer is too cold, wrap it in a blanket; if it's too warm, move it to a cooler place. Now just check the temperature periodically, but mostly, let it sit there and dream about beer.
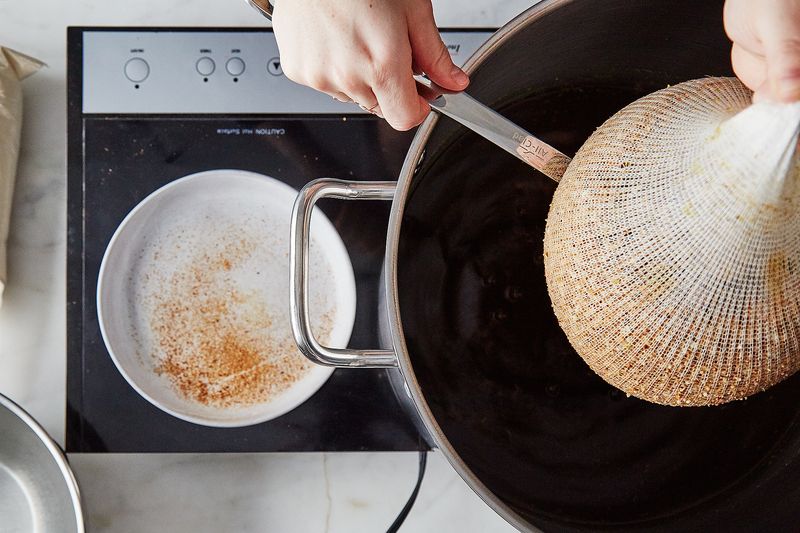
Step 14, Pour your cooled wort through a sanitized strainer into the sanitized fermenter (having a buddy helps for this!).
Bottling Your Beer (Hooray for Bottling Day!)
The most important thing you need to know about bottling day is that it's bad luck to bottle beer without drinking one at the same time. The second most important things are listed below.
- Take its hydrometer reading. After 2 to 3 weeks, depending on what your recipe suggests, take a hydrometer reading for the final gravity the same way you measured your original gravity, remembering to sanitize. If you hit your final gravity or are below it (and if the beer is clear), you are ready to bottle! If you're above your final gravity, let the beer sit for a few more days until you reach the right number. Now for a little math: Take the difference between your original gravity and final gravity and multiply by 10—this is your alcohol content!
- Clean the bottles. You will need 48 clean, brown 12-ounce bottles for a 5-gallon batch of beer. The easiest way to do this is to drink a lot of brown-bottled beer, then rinse the bottle out right after drinking it (to get rid of any excess, lingering yeast). If you receive the bottles or don't rinse them out right away, use a tube cleaner and Powdered Brewing Wash (PBW) to clean out the bottles. To get the stickers off of the bottles, let them sit in PBW for 15 minutes—they'll come right off! Set aside.
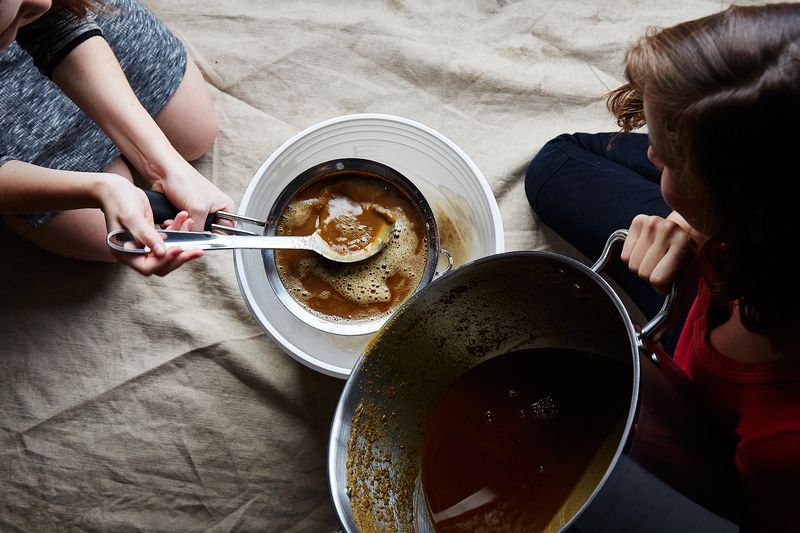
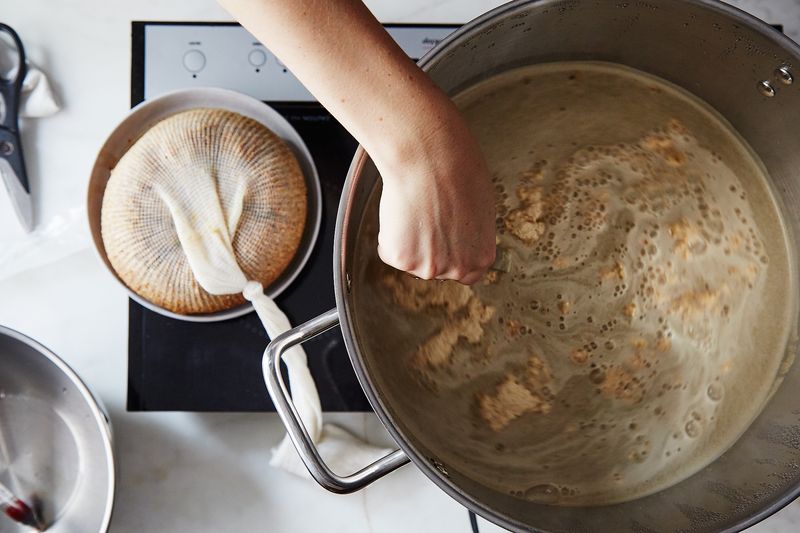
Left: Step 14, You can use a (sanitized!) stainless steel spoon to push down on the hops in the strainer to get all the delicious pre-beer out. Right: Step 15, Add enough (bottled) distilled water to bring the wort to 5 gallons.
- Make a corn sugar solution. In a small pot or saucepan, boil 2 cups of water with 4 ounces of corn sugar. Allow this solution to cool to 70º F, around room temperature.
- Sanitize the bottles. While it boils and cools, clean your tubing and bottle bucket (always use the soft side of a sponge to wash the bucket so as not to scratch the plastic and make indents where yeast and bacteria can live), then place the tubing in the bottom of your bottling bucket to sanitize it for later. Fill the bottling bucket with that set aside batch of sanitizer (or a newly made batch) from when you sanitized the fermenter. Attach your bottle filler to the spigot on the bottling bucket, and use it to fill each bottle half-way up with sanitizer. This is done by pushing the filler against the inside of the bottle of the bottle to release sanitizer into it. Capping the bottle with your thumb (which will get sanitized itself in the process), shake each bottle so you get the entire bottle wet with sanitizer.
- Set aside a little sanitizer and ditch the rest. Remove the bottle filler and tubing (place them somewhere sanitized, like a plate with sanitizer on it) from the bucket, make sure the spigot is closed, and pour some of the sanitizer from the bucket into a small bowl; discard the rest of the sanitizer down the sink. If there's foam leftover—that just means it's clean!
Left: Step 17, Sanitize your 5-gallon pot or bottling bucket and pour the wort back and forth between the two sanitized containers several times, then back into the fermenter. Right: Step 18, Pitch your yeast—legally, this is when wort turns to beer!
- Sanitize bottle caps. Place your bottle caps into the bowl of sanitizer, then pour the sanitizer in the bottles out into the sink.
- Add corn sugar to the bottling bucket. Pour the corn sugar simple syrup into the sanitized (but sanitizer-free) bottling bucket.
- Rack the beer. Attach the sanitized tubing to the fermenter spigot, then carefully transfer your beer from the fermenter through the tubing to the sanitized bottling bucket by placing the fermenter on a table and the bottling bucket on the floor (this is called racking). Do not let the beer splash (be gentle), and stop racking once you get to the muck at the bottom of the fermenter (called Trub, which is essentially byproduct of the yeast fermentation, including heavy fats, proteins and inactive yeast). Try not to let any Trub get into the bottling bucket, even if this means sacrificing some beer.
- Fill the bottles with beer. Attach the bottle filler back onto the spigot of the bottling bucket and place the bucket on a table or counter. Place a towel or bucket under the spigot to catch any foam or beer that falls over. Fill each bottle to the top—there will likely be some sanitizer that bubbles over, which is a good time to stop. When you pull the bottle out of the bottle filler, it will leave a small space at the top of the bottle. This is what you want.
- Cap the bottles. Place a sanitized cap on a bottle, center your capper over the bottle and push both handles all the way down, then pull the handles all the way up. (This is where it's handy to have a friend help—one of you can sanitize while the other caps!)
- Let the beer ferment in the botles. This is the hard part: Let your bottles sit at 65 to 75° F away from light for two weeks to allow the beer to complete its fermentation in the bottle. The priming sugar is giving the yeast its last meal which provides the CO2 to carbonate the beer.
- It's beer!! Throw a beer party! Chill your beer, pour it into a glass (not quite all the way, as there may be some yeast sediment at the bottom), and enjoy! (Repeat.)
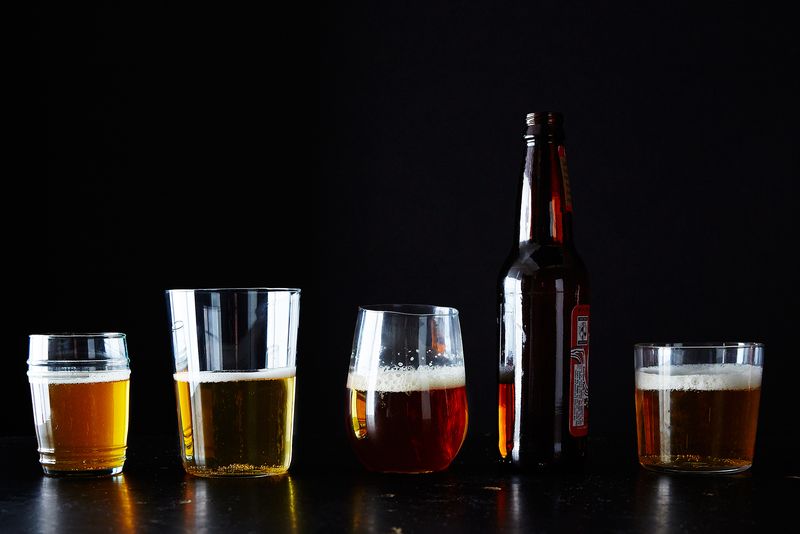 The fruits of your labor!
Bitters and Esters Disaster IPA
Below is the recipe we used in this recipe, for Disaster IPA (by Bitter and Esters). Just use the ingredients below (available online and at most brew shops) and follow the instructions above for five glorious, hoppy gallons.
Ingredients
Grains and Extracts
2 ounces Breiss Caramel 20L
1 pound Briess Caramel 60L
3 pounds Briess Golden light dry malt extract
3.3 pounds Briess Golden light liquid malt extract
Hops
.5 ounces Kent Goldings (first wort hop)
1 ounce Galena (60 minutes)
1 ounce Cascade (45 minutes)
1 ounce Cascade (15 minutes)
.5 ounce Kent Goldings (final hop addition)
Yeast
1 packages (11.5 grams) Safale US-05 Dry Ale Yeast
4 ounces corn sugar for priming
Characteristics
Color: 12 SRM
Bitterness: 65 IBU
OG: 1.056
FG: 1.012
Alcohol: 6.0% ABV
Was that the longest article you've ever read? Do you feel ready to brew beer? Have you used this guide to brew beer?? Tell us in the comments below!
Photos of miscellaneous equipment by James Ransom; all others by Bobbi Lin. Recipe for Rye Porter provided by the incredibly friendly people at Bitter and Esters (Hi John, Dave, and Doug!). An enormous thank you to Regan Stephens, Mike Simons, and Harry Whalen for their help, patience, and fact-checking.
Written by: Leslie Stephens
Popular on Food52
4 Comments
Having made a few brews now (some from a kit and some from a recipe) I can say that your directions are much clearer and easier to follow than most of the kits out there!
And so glad you enjoyed the directions!
Now I am curious how this ever came together for beer makers from long ago. What a process!
See what other Food52 readers are saying.