It's always more fun to DIY. Every week, we spare you a trip to the grocery store and show you how to make small batches of great foods at home.
Today: Meg Dubina of Bread + Barrow makes a New England classic: the two-in-one chocolate-vanilla ice cream cup.
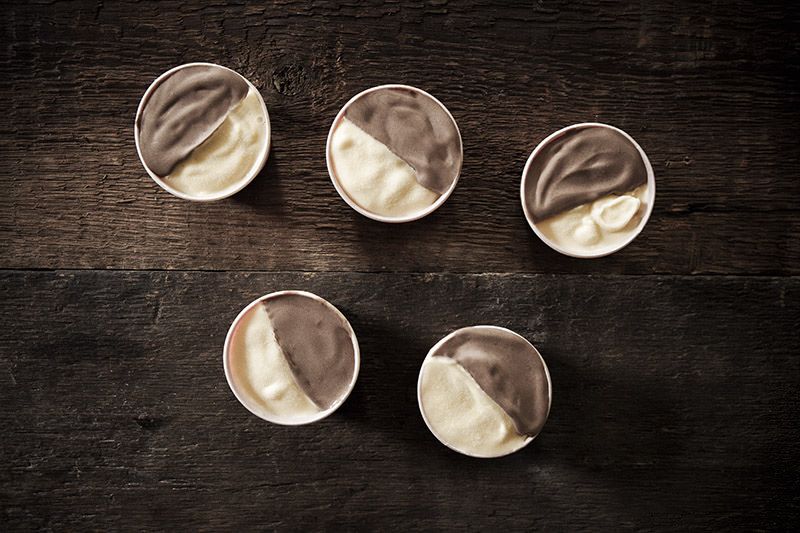
In New England, summer would not be summer without Hoodsie Cups. East Coasters have enjoyed the little waxed paper cups, filled with equal parts chocolate and vanilla ice cream, since 1947, when they were first produced by Hood, a Massachusetts-based dairy farm. For decades, these ice cream cups have been used to entice children to come home for dinner, to end that last game of kick the can, or to finally return from the beach—and my family was no different.
When we were kids, we ate these little treats all the time. We ate them at school after big end-of-the-year pizza parties, we ate them from the ice cream truck at the beach, at Red Sox games and at the family barbecue, and at a pit stop along our favorite bike path. These homemade versions of the cups are perfect for June, as we approach the end of the school year and the start of summer activities.
Making Hoodsie Cups is a little tricky because unless you have two ice cream makers—or a factory-grade Hoodsie Cup maker—at your disposal, you'll have to do a little bit of planning and creative aluminum foil origami. To make these, I first made the vanilla ice cream, then the chocolate ice cream. I attempted to make both at the exact same time in separate pans, but quickly realized that I am not, in fact, an octopus, and had to abandon one pan of simmering milk while I tended to the other. It's easy to forget how needy custard can be. If you are like me and find multitasking to be the ultimate challenge, heed my advice: Just focus on one custard at a time.
More: Chocolate and vanilla not your thing? Here's a no-churn, blackberry lemon ice cream dream.
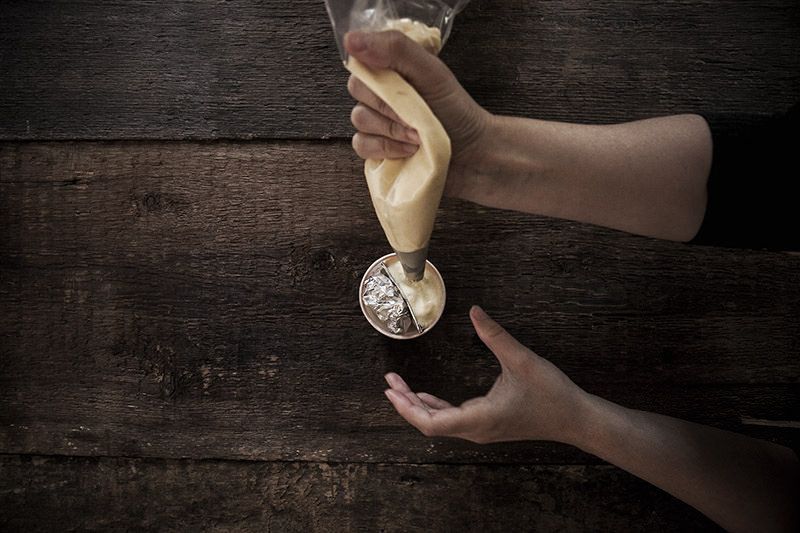
As for making clean-cut half chocolate, half vanilla cups, I simply folded aluminum foil to create a solid divider in the center of each cup. I then squished a small ball of aluminum foil and placed it on one side of the cup to give a little bit of resistance when I piped in the ice cream. Oh yeah, did I mention that I piped in the ice cream? I did. Best decision by far. Trying to spoon soft-serve ice cream into a small cup was such a mess. Using a piping bag was a much better idea. And it made it look so even!
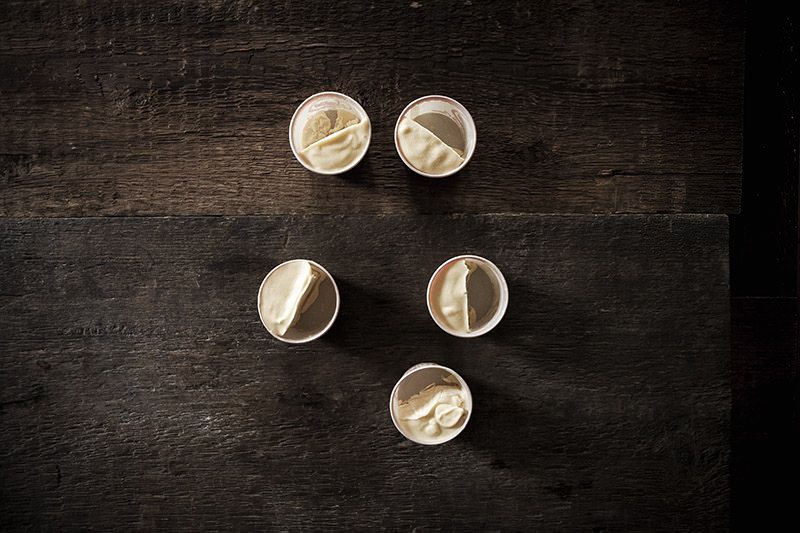
The next day, when my vanilla cups were solid, I removed the aluminum foil that was still sticking to the ice cream, and churned my chocolate custard to soft-serve consistency so I could pipe it right in next to the vanilla. I then covered them with plastic wrap and popped them back into the freezer overnight. The next day, I could finally enjoy this creamy, nostalgic treat. They were definitely worth the three-day wait—and the best news is that this recipe makes 8 little cups, plenty to bring to the beach!
Makes 8 Hoodsie Cups
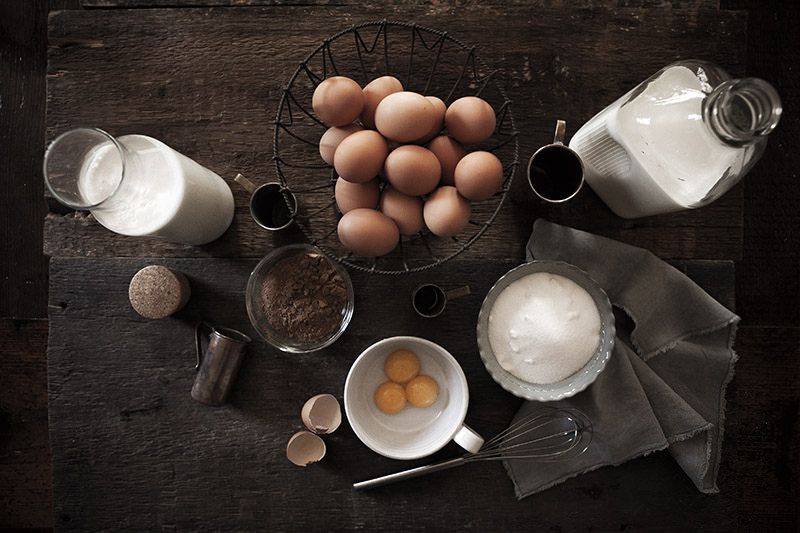
For the vanilla ice cream:
1 cup whole milk
1 cup heavy cream
1 tablespoon vanilla extract
6 egg yolks
1/2 cup granulated sugar
1/2 teaspoon sea salt
For the chocolate ice cream:
1 cup whole milk
1 cup heavy cream
1 tablespoon vanilla extract
1/2 cup unsweetened cocoa powder
6 egg yolks
1/2 cup granulated sugar
1/2 teaspoon sea salt
You will need:
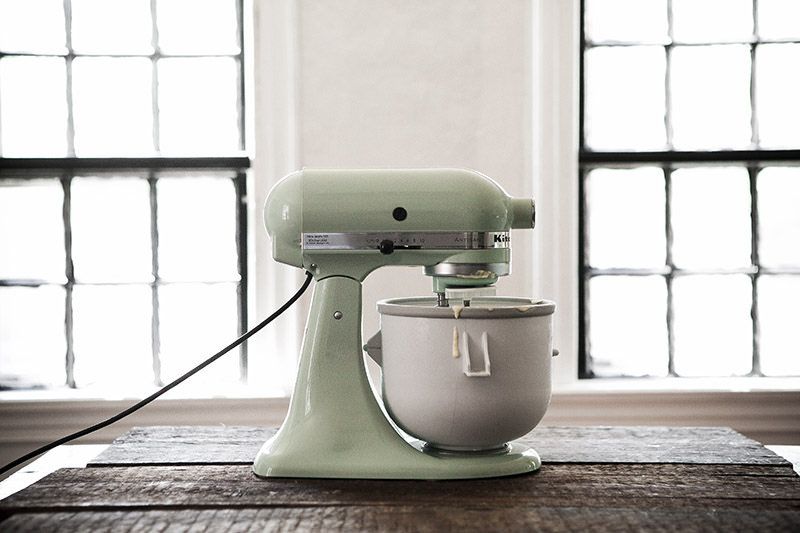
An ice cream maker
3-ounce waxed paper cups
Aluminum foil
Plastic wrap
Begin by preparing the vanilla ice cream. In a saucepan over medium heat, add the milk, cream, and vanilla. Bring the liquid to a gentle simmer, uncovered. Remove the mixture from the heat and set it aside. In a separate bowl, vigorously whisk the yolks, sugar, and salt together. Slowly pour half of the warm cream mixture into the yolks while whisking.
Pour the egg, sugar, and cream mixture into the saucepan and return to medium-low heat. Stir it in a figure-eight motion with a wooden spoon or rubber spatula for several minutes, until the mixture has slightly thickened. Remove the pan from the heat. Pour the mixture into a heatproof bowl and press plastic wrap directly against the liquid to prevent a skin from forming.
Place it into the refrigerator to chill until very cold, about 2 hours. At this point, you can start on the chocolate ice cream.
The chocolate ice cream follows almost the same procedure as the vanilla ice cream, but (you guessed it) with cocoa powder. To make it, add the milk, cream, vanilla, and cocoa powder to a saucepan over medium heat. Repeat the same method you followed for the vanilla custard, and place it in the refrigerator to chill for 2 hours.
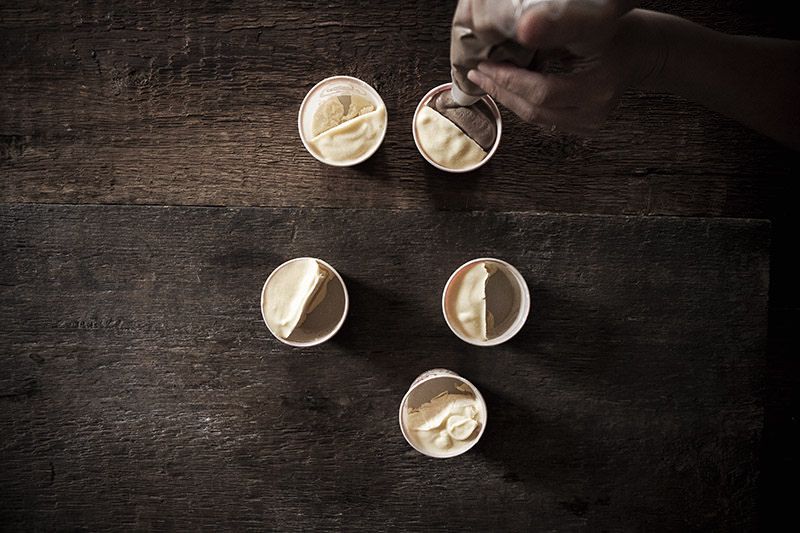
Meanwhile, prepare your paper cups. Fold a large piece of aluminum foil, about 1 square foot, into itself until you have a small rectangle that will fit across the middle your paper cup. It should be short and thick, and strong enough to hold back a wall of ice cream. Take another smaller piece of aluminum foil and crumple it into a ball that can be stuffed into one side of the paper cup so that there is enough resistance when you fill the other side with ice cream, as shown in the photos below.

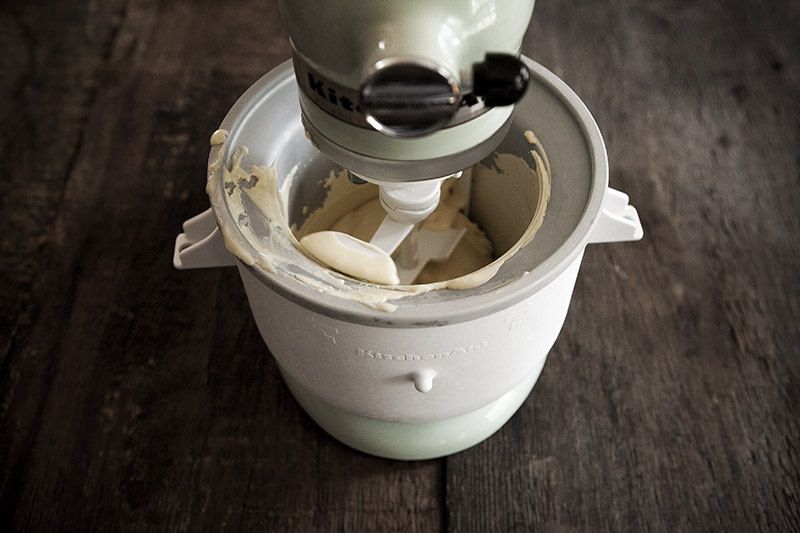
Once the vanilla custard has been chilled, churn the vanilla ice cream in an ice cream maker according to the manufacturers' instructions until it has reached a soft-serve consistency.
Once the custard has been churned, spoon it into a piping bag fitted with a large nozzle. Evenly distribute the vanilla ice cream, piping it into one side of each paper cup, being sure to only fill one side. Cover each paper cup with a bit of plastic wrap and place in the freezer. Allow the vanilla ice cream to freeze until solid, 6 hours or up to overnight.
Once the vanilla ice cream is fully frozen, churn the chocolate ice cream in your ice cream machine according to the manufacturers' instructions. Once the ice cream has been churned to a soft-serve consistency, spoon it into a piping bag fitted with a large nozzle.
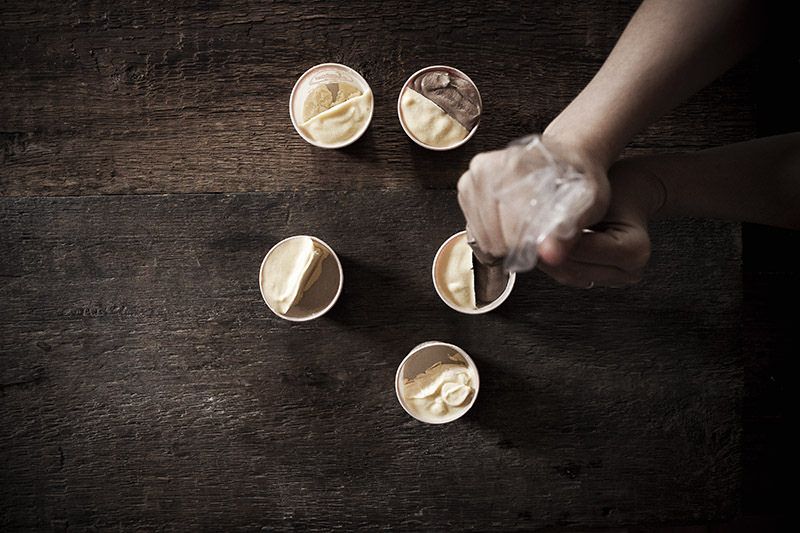
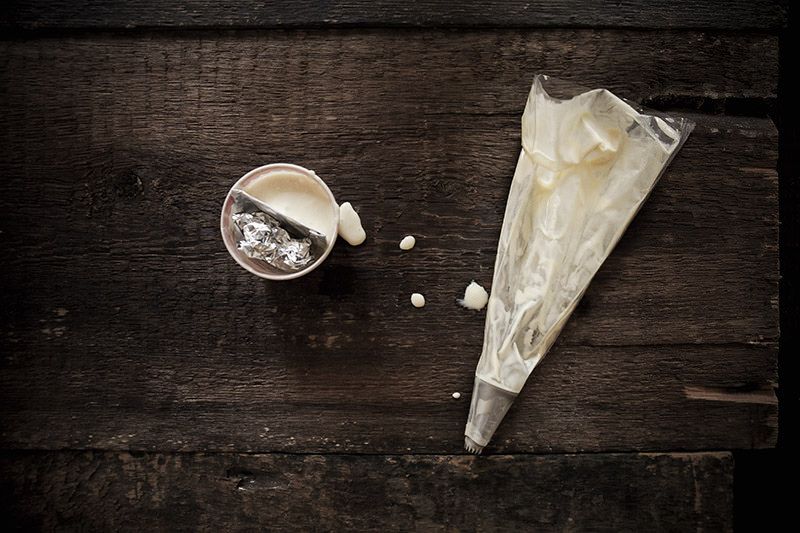
Take the half-vanilla cups out of the freezer and remove the aluminum foil from the center, leaving only the solid half of vanilla ice cream in the cups, as shown in the photos above. Pipe the chocolate ice cream into the empty side, next to the solid vanilla ice cream.
Cover each paper cup with a bit of plastic wrap and return to the freezer. Allow them to freeze until solid, six hours or up to over night.
Remove them from the freezer and enjoy them on the beach, at the park, on a boat, or at the game!
See the full recipe (and save and print it) here.
Photos by Meg Dubina
Written by: Meg Dubina | Bread+Barrow
Popular on Food52
16 Comments
One thought: freeze custard in cups (half ALL choc, half ALL vanilla), let set, dip outside in warm water, cut each in half, swap halves so you get choc and vanilla in each. Could work?
But, advertising aside, this is so cute! Reminds me of day camp snacktime.
See what other Food52 readers are saying.