Every week, a DIY expert spares us a trip to the grocery store and shows us how to make small batches of great foods at home.
Today, Cathy Barrow (A.K.A. MrsWheelbarrow) shows us how to make our own salami and work it beautifully into an antipasto panzanella.
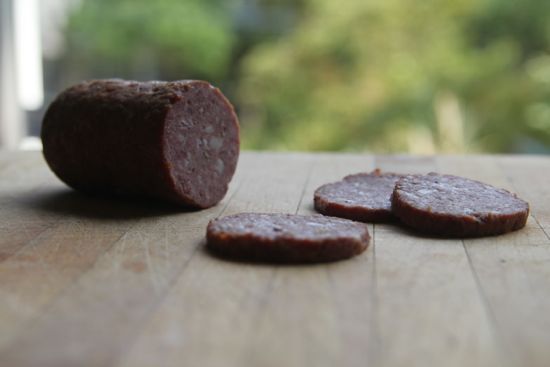

When I was very young, my parents would host bridge parties. In black leather cases, there were two sets of beautiful Kem cards from England that I was not allowed to touch. But I had touched them. And I knew they were silky soft and whispered across the top of the card table when the hands were dealt.
Because of the cards, my mother only served food that could be skewered on a toothpick. Of these snacks, what I remember best is a quarter round of salami with a sweet pickle. Or a pickled cherry pepper stuffed with bel paese cheese and salami. Pickled onions and salami and provolone. Pimento filled green olives and salami and an orange wedge.
When I started thinking about making salami, that’s what I remembered. Certainly, later on when I travelled to Italy, or found salumerias here in the states, I would enjoy their labors, beautifully sliced and displayed on dark cold slate. But always, in my mind, salami is served in chunks, on a stick.
Salumi, Michael Ruhlman's and Brian Polcyn’s recent follow-up to Charcuterie, the bible of Charcutepalooza, is rich with detail and recipes. The front of the book is devoted to excellent illustratations of both American and Italian butchery practices, showing seam butchery that support the classic “Big Eight” Italian cured meat products: guanciale, coppa, spalla, lardo, lonza, pancetta, prosciutto and salami.
The more than one hundred recipes focus on technique and curing flavors, with plenty of room to experiment. There are many I will try as soon as it’s a little cooler. Even with a curing cabinet, with outside temperatures and humidity right now, I just can’t contemplate hanging meat to cure for a month or so. The last few recipes suggest ways to serve, and foods to serve with, salumi.
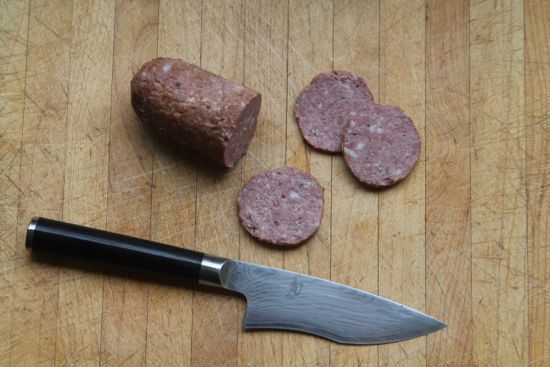
Cooked salami or salami cotto turned out to be just what my mother had toothpicked all those years ago. The headnote describes it as “most like the salami you’ll find in the grocery store.”
It started out well enough. It was great to get the old Charcutepalooza gang, Paul and Elaine, together. Joined by Ally, who came to learn, we all got busy.
The salami calls for beef shoulder mixed with pork fat. The only additional flavors are caraway seed, black pepper and garlic, so the quality of the beef is really important. The shoulder is a lean cut, and if it’s grassfed, you might want to increase the pork fat a little.
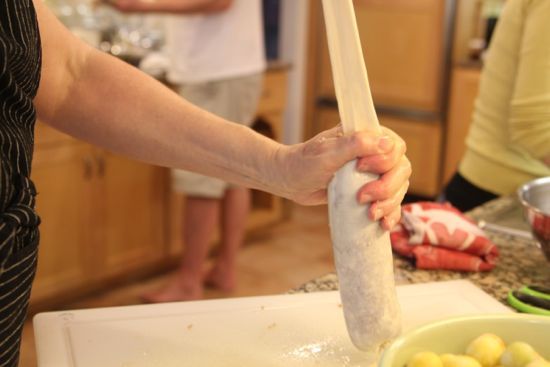
After twice grinding the beef with plenty of intermittent chilling, ice bowls, and air conditioning, we hand stuffed the beef middles (no, really, you don’t want to see a photograph of this). The four salamis, each about one and a half pounds, got a bubble tie on each end, a special and very secure knot, well illustrated in the book.
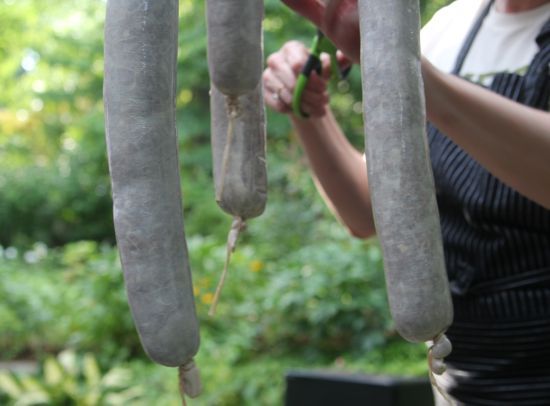
The sausages hung in the cold smoker for two hours, at which point the smoker was heated up, and the internal temperature of the salami headed toward the goal of 150°.
Everything was going well enough until the thunderstorm. That electric smoker sitting out on the patio seemed like a very bad idea, with lightning striking all around, so, with golf umbrella tucked under one arm, a pair of scissors (to cut down the salamis) and a sheet pan (to catch them,) I braved the elements. I think the last thing my husband said was “Hope you’re wearing rubber soled shoes!” Funny, right?
In hindsight, it may not have been a great idea to finish the hot smoke in the oven. The internal temperature soared to 165°, the fats started to render and the house filled with the smell of smoke. The ice plunge may very well have been the last insult for these salamis, as the casings pulled away from the sausage and wrinkled like a newborn shar pei.
But, don’t get me wrong. The salami tastes wonderful. Just what I remember from my childhood. The spicing is subtle, the smoke is perfect, and the beefy flavor is very satisfying. But I’m afraid these salamis will win no beauty contest.
Salumi, says Michael, “is a narrower, more focused, and more difficult craft, one that should be approached the way one might hunt wild boar: with knowledge, respect, the proper tools, and the recognition that you might have a good day and you might not.”
All in all, because making meat is a social occasion, full of good food, drink and friendship, it was a very good day.
Try this salami in my Salami Antipasto Panzanella -- an ode to my mother's bridge party foods.

Salami Cotto
(From Salumi: The Craft of Italian Dry Curing, by Michael Ruhlman and Brian Polcyn. 2012, W.W. Norton & Company.)
Makes Two 1.75-pound/800-gram salami
Cotto means cooked in Italian. In this case, we use the smoker with a light coating of smoke, or smudge. It should have a hint of smoke while cooking slowly so as not to lose its fat, since it has considerably less fat than usual. This is most like salami you’ll find in the grocery store.
4 pounds/1815 grams lean beef shoulder or round, cut into large dice
1.5 ounces/42 grams sea salt
1 teaspoon/7 grams pink salt
2 teaspoons/12 grams finely ground black pepper
2 teaspoons/8 grams ground caraway
3 large garlic cloves, minced
1 pound/450 grams pork back fat, cut into large dice
1 cup/225 milliliters ice water
Two 18-inch/45-centimeter lengths beef middle, soaked in tepid water for at least 20 minutes and rinsed
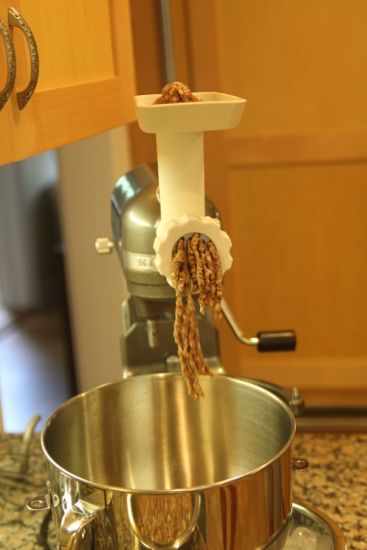
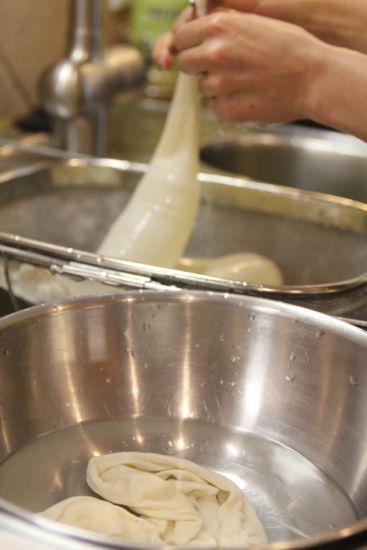
1. Combine the beef, salt, pink salt, pepper, caraway, and garlic and grind through a ¼-inch/6-millimeter (medium) die into the bowl of a stand mixer. Using the paddle attachment, mix for 2 minutes on medium speed until the ingredients are well distributed. Cover with plastic wrap, pressing down on the wrap so that it’s in contact with the surface of the meat, and refrigerate for 8 to 24 hours.

2. Add the fat and mix on medium, adding water as you do until everything is well distributed. Grind the mixture through the same die back into the mixer bowl. Mix on medium for 1 minute, or until the ingredients are well distributed.
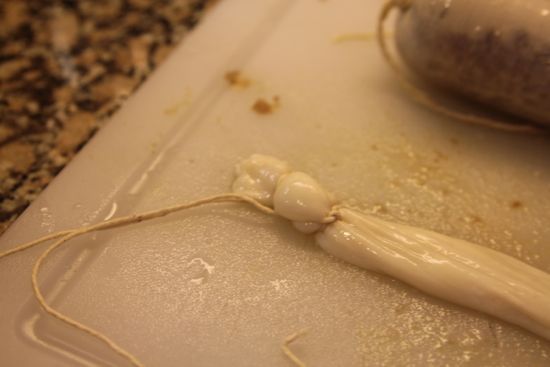
3. Tie one end of each casing with a bubble knot. Stuff the sausage into the casings and tie each one off with another bubble knot. Refrigerate, uncovered, overnight.
4. Cold-smoke the sausages for 2 hours. Cold-smoking is defined by a temperature of less than 90 degrees F./32 degrees C. or lower so that the meat is smoked but not cooked. Heat is necessary to create the smoke; therefore, the heat source for the smoke has to be separate from the chamber containing the meat. Without the proper equipment, cold-smoking can be difficult. There are few products on the market that can be used in a single chamber (e.g., a kettle grill), such as the smoke gun by Polyscience and the A-MAZE-N-SMOKER, which give foods smoke with little heat. Or you can jerry-rig a cold smoker in a kettle grill or build a makeshift smoker using a large cardboard box and some clothes-dryer tubing through which to pump smoke. There are lots of how-to’s on the Internet if you’re the tinkering type.
Regardless of whether you have a proper cold-smoking unit or have fashioned one of your own design, the conditions you need are the same: an enclosed chamber for the meat and smoke and a temperature below 90 degrees F./32 degrees C. Recipes suggest how long the meat should stay in the smoke for optimal results, but you can vary these times as dictated by your equipment. Use your common sense and your sense of taste to guide you.
5. Hot-smoke the salami to an internal temperature of 150 degrees F./65 degrees C. Jerry-rigging a hot-smoking device is easier than setting up a cold-smoking device. It can be as simple as building a very low charcoal fire in a kettle grill and covering it with soaked wood chips. Another strategy is to smoke the item first, then finish it in a low oven (200 degrees F./93 degrees C.). Then chill the salami thoroughly in an ice bath before using.
If this project has you hungry for more guanciale, salami, and prosciutto, stay tuned for Punk Domestics' upcoming Salumi Challenge.
In next week's Small Batch, Marisa McClellan returns with a recipe for tomato conserva to make now and use in the months to come.


See what other Food52 readers are saying.