We should all have a solid command of the ABCs of baking. Thankfully, Food52's Test Kitchen Manager Erin McDowell is here, with tips and tricks to help you master the most essential desserts and the simplest breads.
Today: Erin gets over her fear of roulades, and shows us how to do the same.
The roulade is a cake that has been around for a long time—so long that some people (myself included) think they are bit old-fashioned or outdated. Yes, I’ll admit it: I’ve been a roulade hater for many years because I’d always thought of them as finicky or stuffy. A few months back, however, I was challenged to write about them, and, after spending some quality time with my mixer and some perfectly flat sheet pans, I have to admit that I am now a convert. Why did I think they were time consuming? They bake faster than most cakes and are finished with super simple fillings like jam or whipped cream. I may have even thought they were flavorless or stale, but done right, they are moist and deliciously nostalgic. I’m not going to say that they are my new favorite cake, but I am going to say that after making a few, I’m over my fear and dislike of them for good.
The first step to helping me get past my dislike of roulades was to find a solid recipe. Normally, I develop my own, but since I had never really “mastered” the roulade, I turned to the experts. After trying a few recipes (with various levels of failure), I found a winning recipe in Rose Levy Beranbaum’s book Rose’s Heavenly Cakes. Her detailed instructions helped me troubleshoot what I’d been doing wrong, and I’ve adapted her recipe to share what I’ve learned.
Let’s break it down:

1. It’s all about organization.
Here’s one of the reasons I never loved roulades: You need to have your mise-en-place together—like, really together, before you start. Many bakers probably work this way anyway, but I like to multitask: When making cookies, I start creaming the butter and sugar, and while the mixer whirs away, I scale my flour and mix it with the other dry ingredients. This is impossible with roulades. They may have a short ingredient list, but it’s critical to have everything in place and ready to go before starting because once you begin the mixing process, there isn’t an opportunity to stop. This sounds scary, but in reality, it means you’re way closer to cake than you think: Short mix time plus short bake time equals faster-to-plate time. Make sure that, as the recipe specifies, ingredients are at room temperature. This allows all of the ingredients to come together quickly and easily. Sift flour onto a piece of parchment paper—this important step will also ease the process of adding the flour into the mix later.
2. Prepare your pans.
I use 12- by 17-inch half sheet pans, but many recipes use jelly roll pans, which are typically 10- by 15-inch. Grease them thoroughly with butter (or with nonstick spray), line them with parchment paper, then grease the parchment paper, too. If the parchment bunches around the corners, use scissors to cut a small slit in the paper at each corners. Press the paper flat in the pan and it should evenly overlap onto itself in the corners. This step may seem tedious, but it helps make straighter edges that you’ll be glad for it when it’s time to spread the batter into the pan. Finally, make sure the pan you’re using is as flat as possible and not warped. The final batter is relatively thin and will spread largely on it’s own, but if your pan is off-kilter, your cake will be too!
3. Know your ingredients.
Roulades aren’t typical cakes, as they generally contain no chemical leaveners and are only leavened by the aeration of eggs. They also contain less flour than other cakes, which is important because flour provides structure and its absence thus means that roulades are very fragile. Flour must be kept at a minimim, however, or the the cake will not be flexible enough to roll. Some roulade recipes call for all-purpose flour, but the most successful recipes I tested used cake flour.
More: Before you run out to the store, try making your own cake flour at home.
Cake flour is the softest, most tender flour available. It has the lowest protein content, coming in between 8 and 10% and provides structure while maintaining tenderness. Also keep in mind that cocoa powder plays a similar role to flour, so the amount of flour should be decreased to accommodate it. Sugar is generally added with the eggs and this mixture then gets whipped until light and airy. Some recipes contain additional ingredients: oil or butter for added moisture and tenderness, and water or (maybe) milk to help liquefy the batter or create a paste with the cocoa or other flavoring agents. Some recipes use ground nuts or nut flours for flavor and texture. With so few ingredients involved, it is important to note exactly when and how these ingredients are added to the batter.
4. Where it all comes together.
After scaling your ingredients, you’re ready to mix. The first step in my recipe is to combine hot water and cocoa powder to form a paste, which needs to be cooled to room temperature before getting mixed into the batter. You can do this the patient, old-fashioned way, or you can pop it in the fridge for 5 to 10 minutes for rapid cooling. Much like making sponge cake, you start the batter by whipping the whole eggs or egg yolks with a small portion of the sugar. Aerated whole eggs or yolks will maintain their aeration when held for a while, whereas egg whites will begin to deflate almost immediately—that's why we save this step for the very end.
Here's a brief outline of what happens while the cocoa paste is cooling:
- Whip the eggs and sugar to a “ribbon stage": The eggs will have nearly tripled in volume and pale yellow in color; when you dip the whip into the egg and pull it out, a thick ribbon will fall back into the batter and look like a ribbon on the surface of the batter before it melts back in.
NOTE: Because the amount of eggs and sugar is often relatively small and some stand mixers have difficulty mixing smaller quantities, I like to use a hand mixer for this process. Furthermore, not everyone has two bowls for their stand mixer and/or two sets of attachments, and you cannot use the same bowl for whipping whole eggs or yolks as you do for the whites shortly thereafter without a vigorous cleaning and drying session. I like to use two medium glass bowls (one for the whole eggs or yolks and one for the whites) and my hand mixer. That way, when I’m done whipping the whole eggs, I can wash and dry the beaters and keep going—easy as that.
- Once the whole eggs or yolks are at the ribbon stage, you can begin to add the other ingredients to the batter. For my recipe, this means gently folding in cocoa paste.
- After this is fully incorporated, I gently fold in the flour. Remember when you sifted the flour onto the parchment paper? Now you can use the parchment, folded into a little pouch of sorts, to gently “shake” the flour into the batter while you fold. This is significantly more efficient than dumping or spooning the flour in, as the weight of a large amount of flour all at once can deflate the whipped eggs. Gently shaking the parchment over the egg mixture at the same time that you fold ensures even mixing while maintaining maximum volume.
- When the batter is fully combined, whip the egg whites with the remaining sugar to stiff peaks. It’s important that the egg whites get to be stiff peaks, but they should not be dry or clumpy. The cake needs the structure of a stiff meringue, but if the whites are over-whipped, the batter will never be smooth and the final cake will suffer. “Temper” the batter by adding about 20% of the egg whites and mixing them in slightly vigorously. This will give the batter a more accomodating consistency when you fold in the remaining whites. I generally add the rest of the egg whites in two additions, rotating the bowl as I fold to ensure full incorporation.

5. Putting it in the pan.
You can normally scoop or pour batter into the prepared cake pan with no problem. With roulades, however, it’s important to take a little more care: You don’t want to ruin all that delicate aerated structure you’ve worked so hard to achieve! Pour the batter into the prepared pan but keep your mixing bowl as low and close to the pan as possible, letting the batter fall from on high can promote deflation. The batter will be fairly runny, so it should only take a few swipes of the offset spatula to ensure it’s even and hitting the edges of the pan on all sides. Don’t overwork it! The more you touch the batter, the more it will deflate in the pan.
6. Bake it through, perfectly.
If you underbake a roulade, it will be too sticky and moist to roll and will simply fall apart. If you overbake a roulade, it will be hard and will crack when you attempt to roll it. At the same time, checking on the progress of your roulade constantly will negatively effect its baking. With such a short bake time, constant oven opening will cause temperatures to fluctuate and can lead to uneven baking. Follow the recipe's guideline for timing, but err on the side of caution. Test the cake by gently pressing your finger into the very center. It should make a shallow impression that springs back after you take your finger away. If the impression doesn’t bounce back, continue baking for 1 to 2 minutes more. If the cake begins to pull away from the edges of the pan, remove it from the oven right away (this can be a sign that it’s done and may be overbaked).
When the roulade comes out of the oven, sift powdered sugar or cocoa powder over it immediately. This helps to absorb moisture on the surface of the cake and can prevent it from being sticky when you go to finish it later.
7. Roll it while it’s hot.
Roulades are most flexible while they’re warm—don't miss this opportunity! When the roulade comes out of the oven, run an offset spatula or paring knife around the edge of the pan to loosen the cake and parchment from the edge. Pick an end and start rolling, using the parchment paper to help guide you if the cake is too hot for you to handle easily. For a traditional roulade, roll from the longer side. For my vertical roulade, roll from the shorter end. Let the roulade cool completely, rolled up in its own parchment, before filling and finishing.
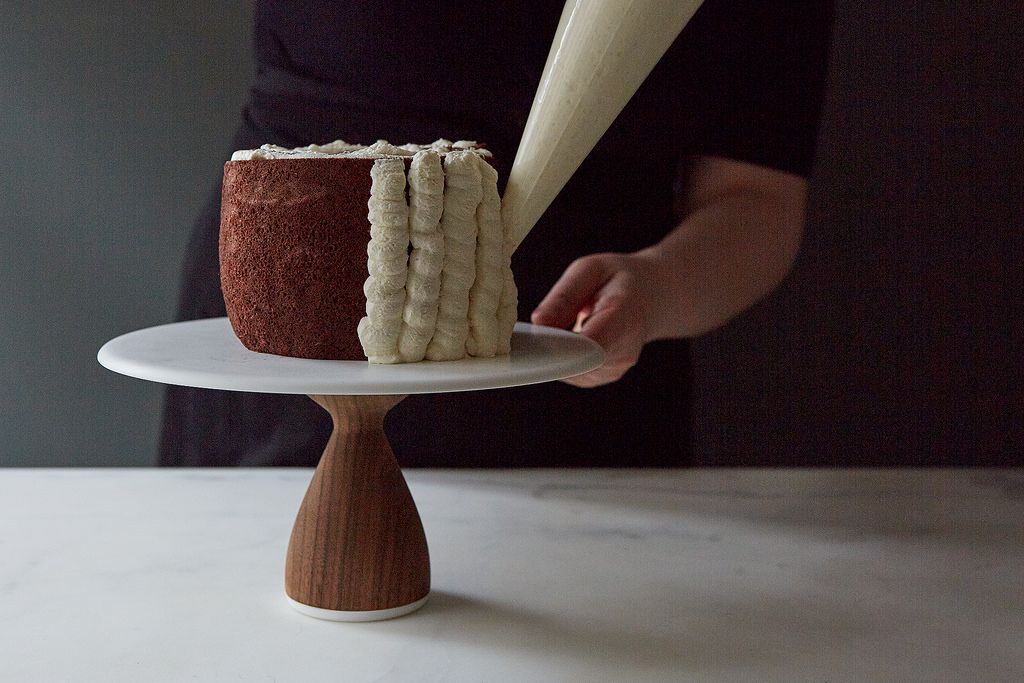
8. Finishing your cake.
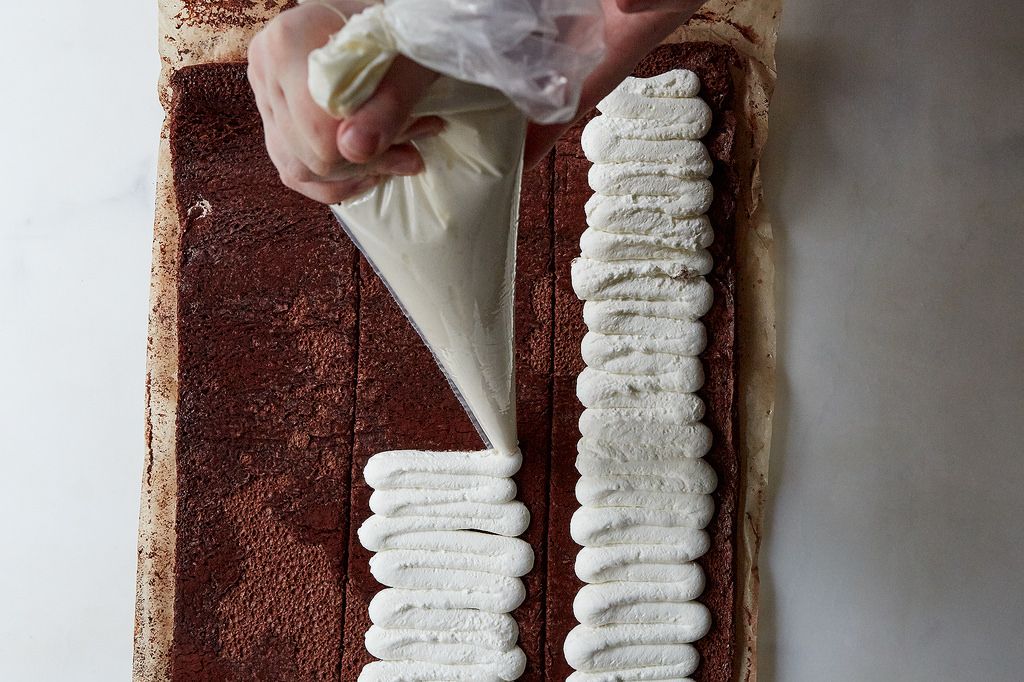
This is the easy part. Unroll the roulade and spread the filling evenly over the inside. For a traditional roulade, you'll then use the parchment to help guide you as you roll it up again.
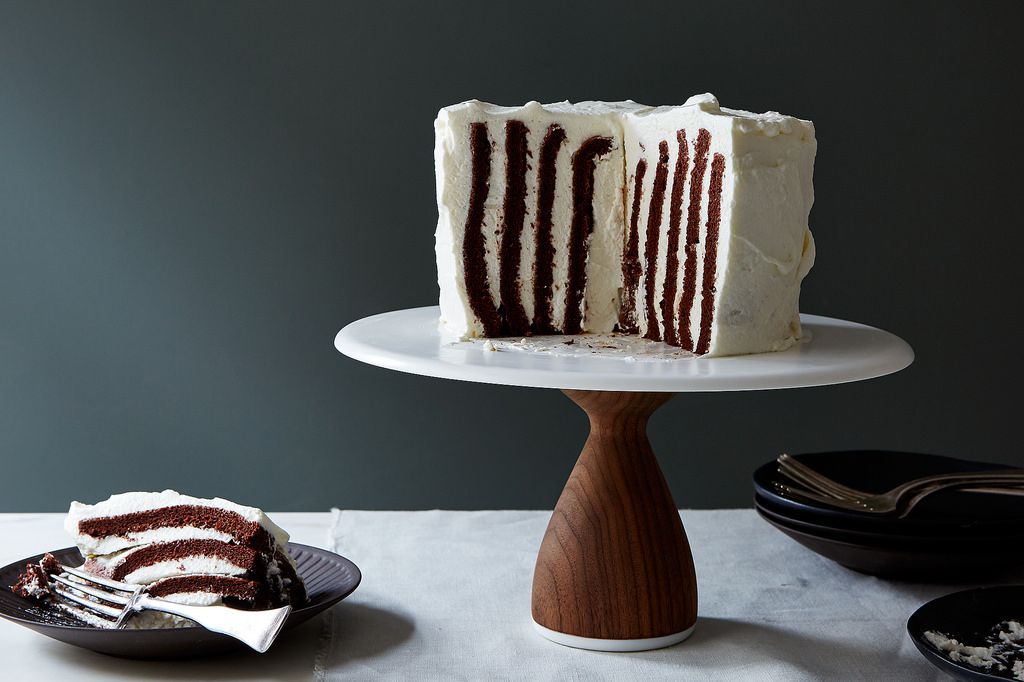
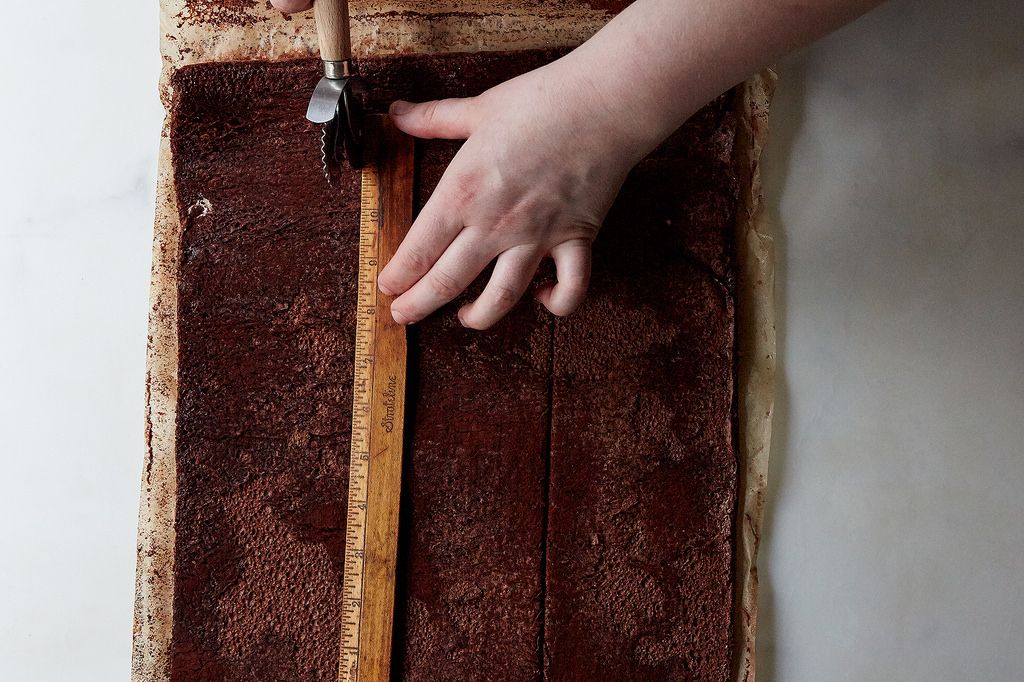
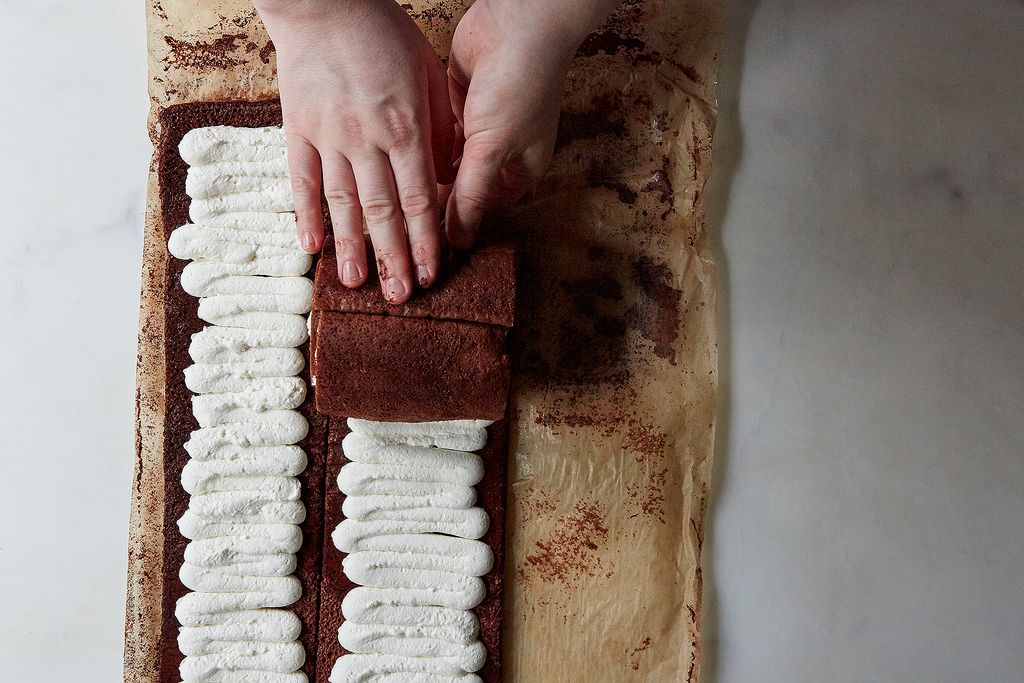
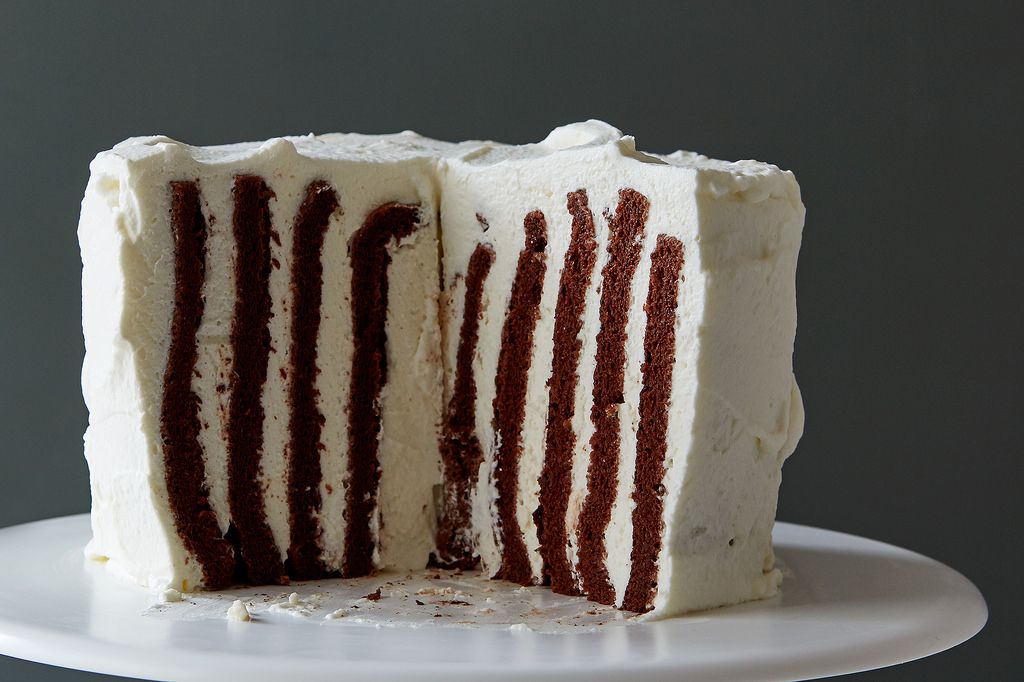
Since I wanted to get over my dislike of roulades, I decided to try to build my roulade a bit differently. After the roulade cooled in its parchment paper cocoon, I unrolled it and cut it into three, long even strips (starting from the shorter side). Then I filled it using those three strips as guides. I rolled the first strip up, starting with its short side, into a tiny roulade. I placed that roulade on top of the next strip, and rolled that up, too. Finally, I placed it on the last strip and rolled them all up together in a fat, short tube. Finally, I turned the whole thing over to create a small cake with vertical layers. I frosted the whole thing in whipped cream before slicing and serving. This roulade recipe works beautifully to make a classic roulade too—this other way is just an alternate!
Adapted from Rose Levy Beranbaum's Rose's Heavenly Cakes (Houghton Mifflin Harcourt 2009)
Makes one 12- by 17-inch roulade
For the cake:
2 ounces water
3/4 ounces cocoa powder
1 teaspoon vanilla
2 whole eggs
3 eggs, separated
5 ounces sugar, divided
1/4 teaspoon cream of tartar
1.2 ounces cake flour, sifted onto parchment
Cocoa powder, for dusting
For the whipped cream:
2 cups heavy cream
1/4 cup sugar
1 teaspoon vanilla extract
See (and save and print) the full recipe here.
Are there any cakes that you love but are afraid to tackle? Tell us in the comments below!
Photos by Bobbi Lin
See what other Food52 readers are saying.