We should all have a solid command of the ABCs of baking. Thankfully, Food52's Test Kitchen Manager Erin McDowell is here, with tips and tricks to help you master the most essential desserts and the simplest breads.
Today: What goes up must come down. And what goes upside-down cake must come out delicious.
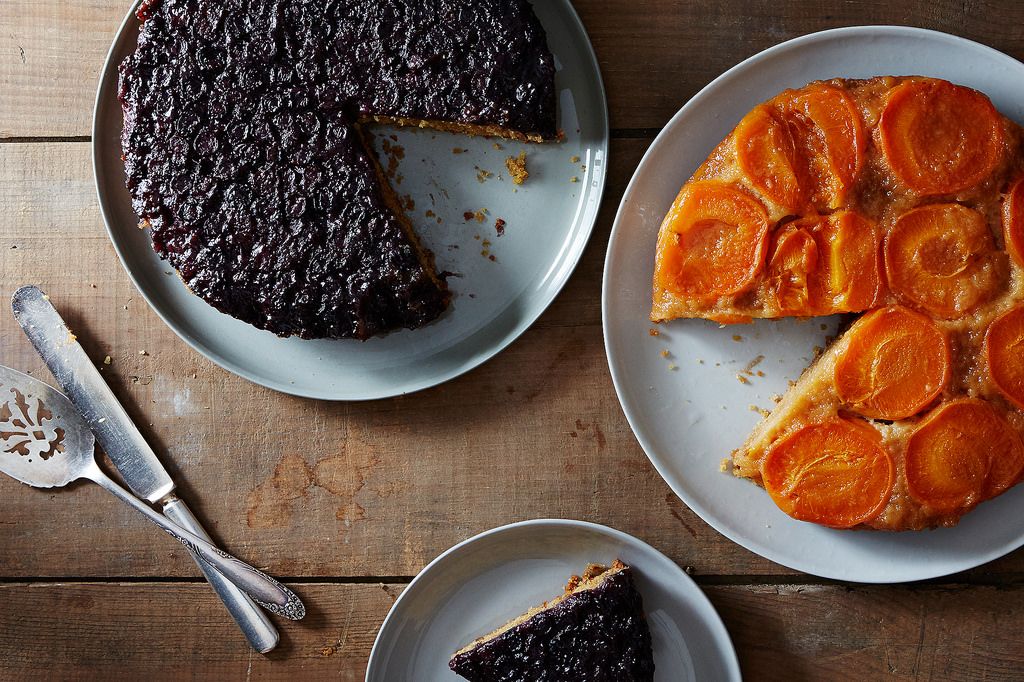
No matter how many maraschino-topped pineapple cakes you’ve seen in your life, it’s time to learn that upside-down cakes are so much more than this familiar standard. Almost any fruit can make a mighty fine upside-down cake, which makes these desserts a perfect way to celebrate a season’s bountiful produce harvest.
My favorite recipe for what I call “Any Fruit Upside-Down Cake” is moist and tender, with a slightly nutty flavor from the use of graham flour (though subbing whole wheat pastry flour works well, too). But the truth is, your cake batter choice is as adaptable as the type of fruit.
Read on to learn the tricks to a successfully simple, no-frosting-needed cake.
1. Choose your pan wisely.
There aren’t many tricky parts of making upside-down cakes, but choosing the right pan can make the difference between a massive success and a big ol’ mess. First, consider the size of your fruit: If you’re using smaller fruits like berries or cherries, you’ll be fine using a smaller pan (8 or 9 inches), but for larger fruits, you may want to go with a 10- or 12-inch pan, especially if you want to use the fruit in halves rather than slices. Sometimes I like to make upside-down cakes in springform pans (or traditional cake pans with a removable base). I like the option to unmold the outside ring, easily invert the cake, and then remove the base to help ensure that all those perfect fruit jewels stay in place. But traditional cake pans work, too, as do cast-iron skillets or even square pans (their larger surface area provides an opportunity for even more fruit!). Just remember that a larger pan may necessitate more batter and a longer bake time.
2. Prep the pan.
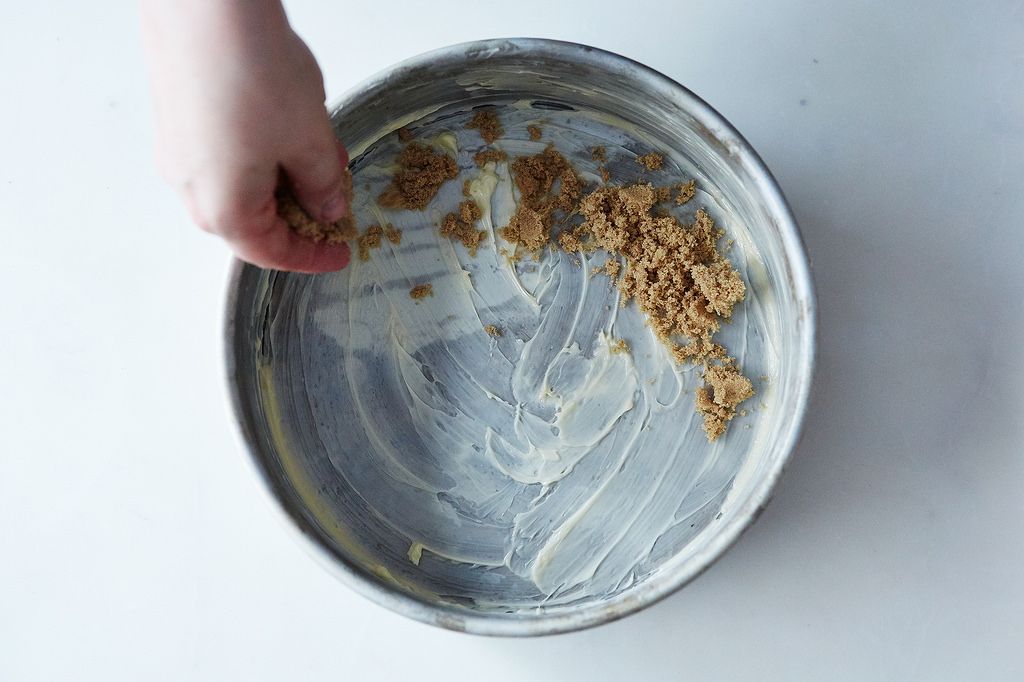
Unlike your average cake, greasing and flouring the pan is not the way to go. Since the key to a good upside-down cake is caramelization, these cakes get started with a generous greasing of butter. Grease the sides of the pan as you would normally (I use the spent butter wrapper, which saves my hands a little bit of greasy mess), but for the base, you’ll want a heftier amount of butter: about 2 tablespoons for an 8-inch pan, 3 for a 9-inch, and 4 for a 10- or 12-inch.
After that, you’ll sprinkle sugar in the base of the pan—I love to use brown sugar, but regular granulated sugar (or, even better, vanilla-scented sugar) is great, too. Remember that if you use a pan with a removable bottom you may want to bake the cake on a sheet tray lined with parchment, should there be a bit of leakage!
You’ll see that some recipes may call for the fruit to be mixed with sugar rather than a layer of sugar to be placed in the pan, but I find this second method works best for several reasons: For one, you get really nice, even coverage of caramel-y sugar. Also, on the off chance that you start the process and don’t finish right away, you’re not exposing the fruit to the sugar sooner than necessary. Since the sugared fruit will start to macerate and leach juices, it’s best to arrange the fruit on top of the sugar right before you bake so that all the juicy breakdown happens in the oven, with friendly cake nearby to sop it up.
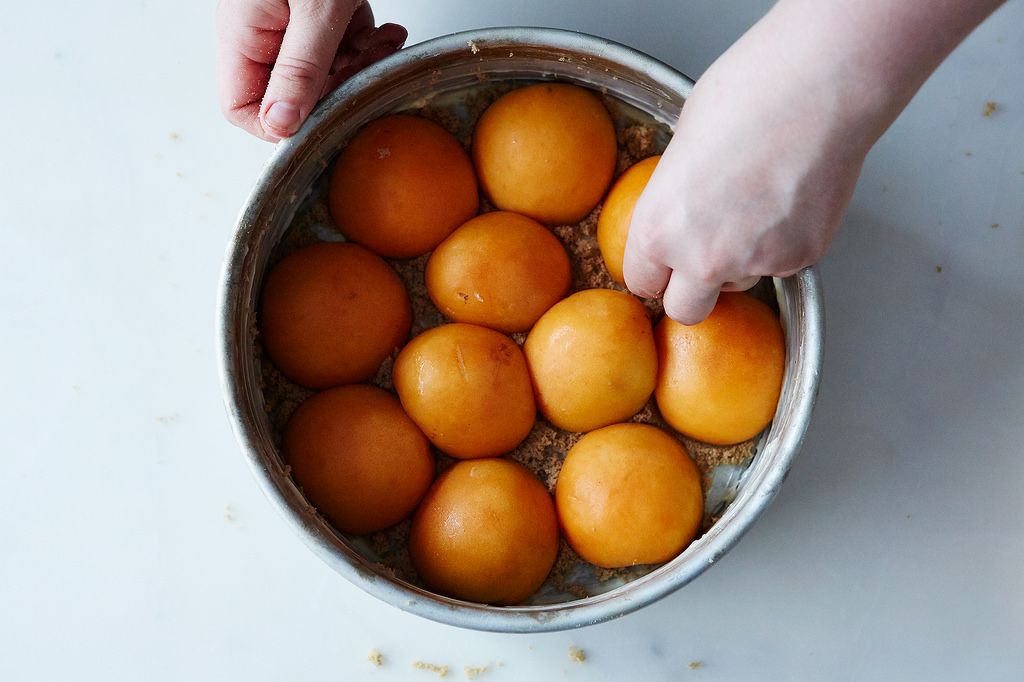
3. The fruit of your labor.
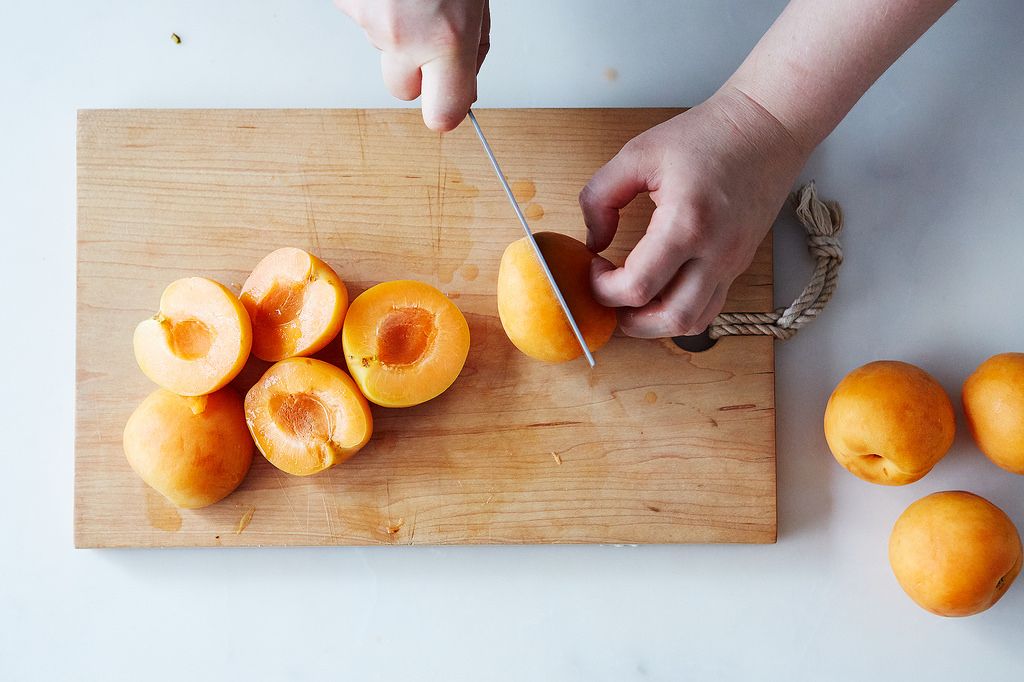
Use any fruit—and certainly not just pineapple! Whether it’s berries and stone fruit in the summer, apples and pears in the fall, citrus in the winter, or rhubarb in the spring, it’s all welcome in upside-down cake land. Just remember that if you’re creating your own recipe, so to speak, you need to give yourself a little leeway on the amount of fruit you buy. You want an even layer of fruit in the base of the pan, meaning that a larger pan will necessitate more fruit, whereas you might be able to eke by with just the leftovers on your counter if you’re using a smaller vessel. When it comes to larger fruit, you’ll need more fruit if you’re slicing it and less if you’re doing the very dramatic version where the fruit is halved.
Remember to put fruit presentation side down (because with these cakes, what starts down, will end up!). Cut edges look great pressed into the base of the pan, and will make for a flat finished cake. But there’s something to be said for the loveliness of the curved end of an apple, peach, or plum, skin side up, on the finished cake.
4. Batter up.
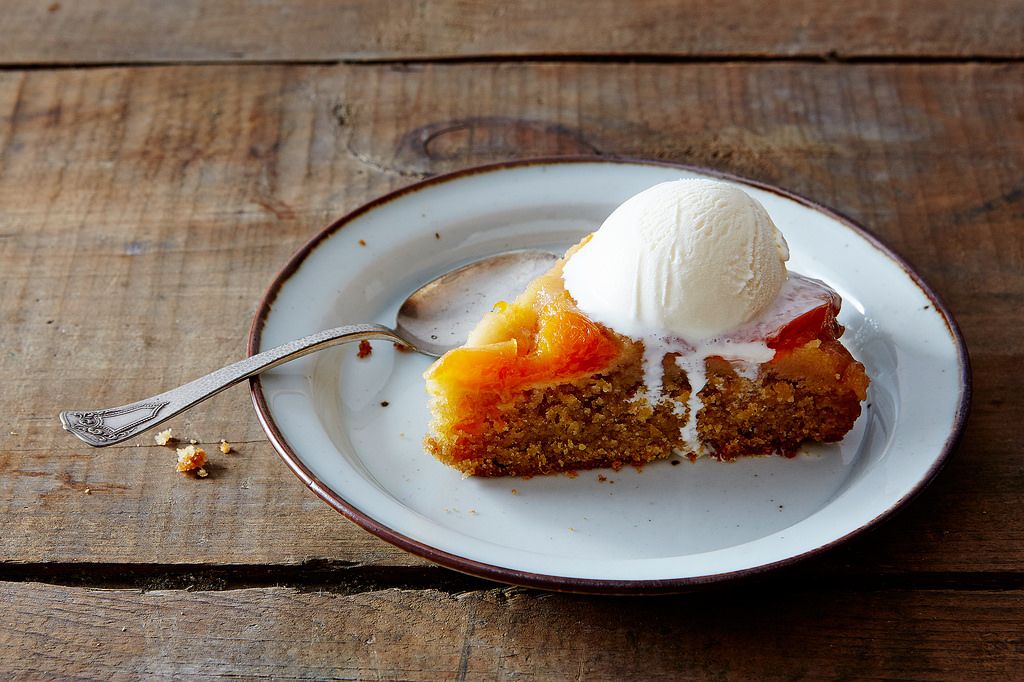
Like I said before, you really can make an upside-down cake with almost any kind of cake batter. A dense almond cake is perfect with peaches; a light ricotta cake pairs beautifully with plums; a tender spice cake is an excellent match for apples. My favorite, all-purpose, any-fruit-goes recipe is for a simple cake made with graham flour. The graham flour is nutty and toasty and somehow makes the whole thing taste like your morning bread with jam—but cakey.
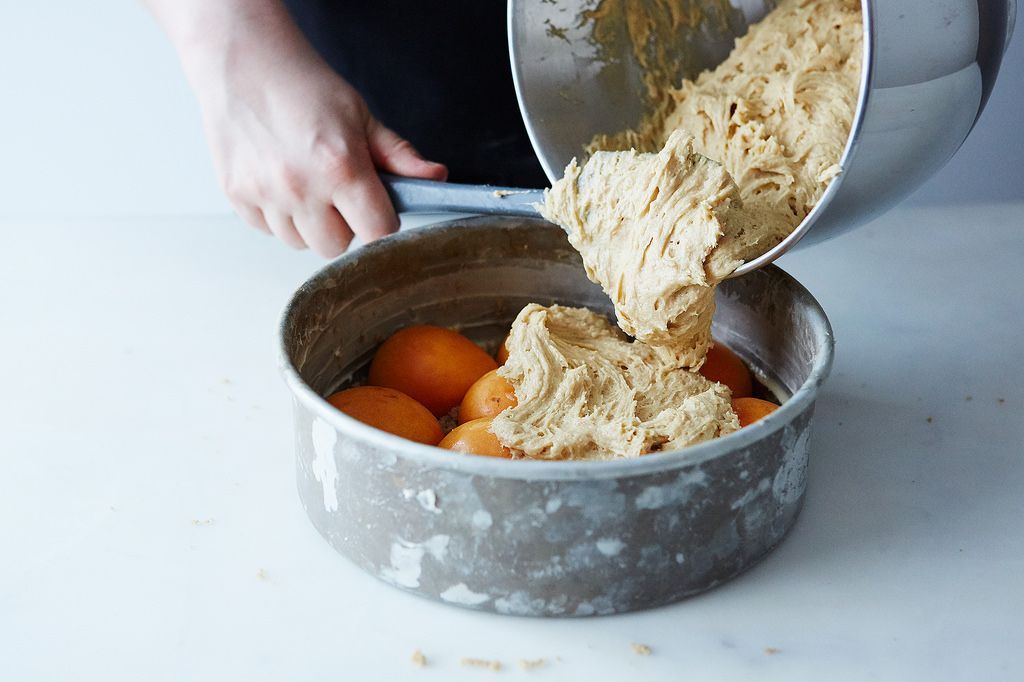
The main thing to remember here is texture. A thin batter can be poured right over the fruit, and with a little tilt or tap of the pan, you can be sure that it’s oozed into all the right places. But a thicker batter (the one in this recipe included) will need to be pushed (gently) until it’s in an even layer. Just take care with this process so you don’t displace any of your carefully arranged fruit.
5. Testing for doneness.
Don’t be fooled by your own upside-down cake! Remember that a cake tester inserted into the center may very well not come out clean. After all, you’ve made a juicy, caramelized, fruit mountain in there—any toothpick would be confused. Stick the tester 3/4 of the way in and take a look. Visible batter? It’s not done. Clean and/or with a few moist crumbs stuck to the tester? It’s finished.
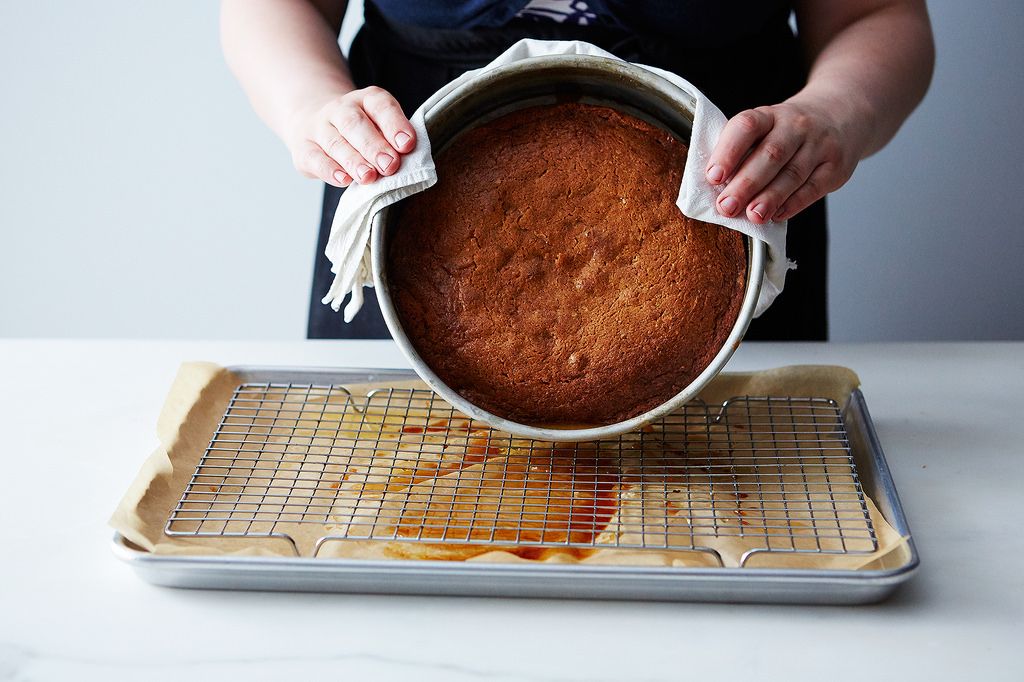
6. Unmolding.
Before unmolding an upside-down cake, let it cool for 10 to 15 minutes in the pan. Run a knife around the outside edge of the pan, then invert the cake onto a cooling rack. Lift the pan off of the cake. If it sticks, just nudge it a bit with an offset spatula to help it on out. If your pan has a removeable bottom, slide an offset spatula underneath it—it should lift right off. If some of the fruit sticks to the pan, just scrape it out and plop it back on afterward—no one has to know!
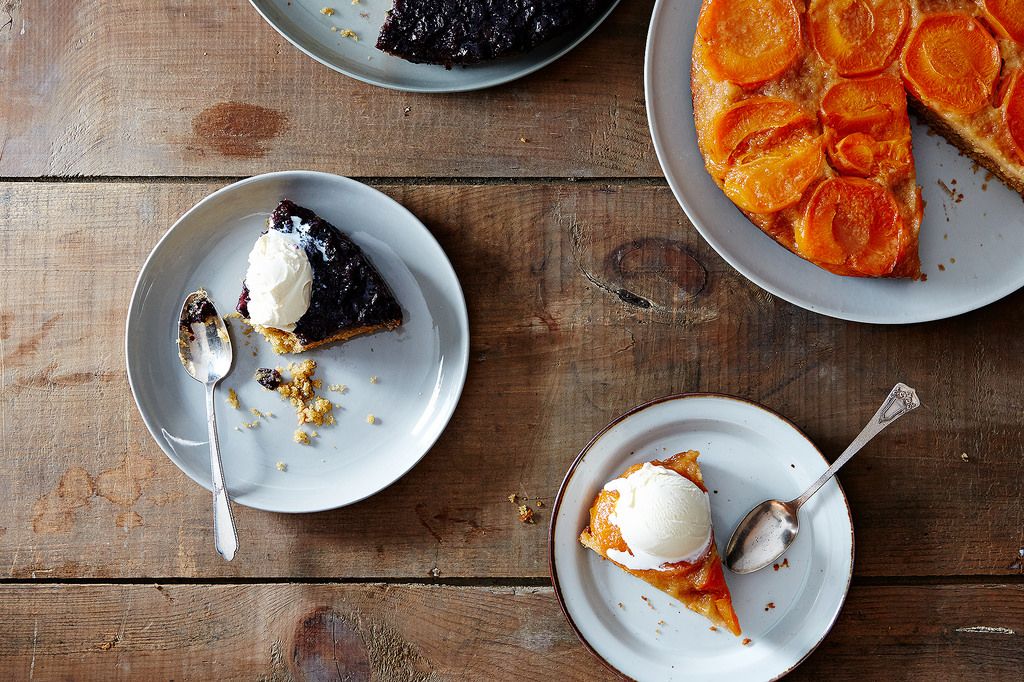
7. Finishing.
I’ve never met an upside-down cake that didn’t welcome a dollop of whipped cream or a hefty scoop of ice cream (or both).
Makes one 9 inch cake
For the topping:
3 tablespoons unsalted butter, softened
1/3 cup brown sugar
1 1/2 cups blueberries (or other small fruit/berries) or 4 to 5 apricots (or other large fruit), halved or sliced
For the cake:
2 sticks unsalted butter, softened
1/2 cup sugar
3/4 cup brown sugar
2 eggs
1 teaspoon vanilla extract
1 cup graham flour
1 cup all-purpose flour
1 1/2 teaspoons baking powder
1/2 teaspoon baking soda
1 teaspoon cinnamon
3/4 teaspoon salt
1 1/3 cups crème fraîche
See the full recipe (and save and print it) here.
Photos by Mark Weinberg
See what other Food52 readers are saying.