We should all have a solid command of the ABCs of baking. Thankfully, Food52's Test Kitchen Manager Erin McDowell is here, with tips and tricks to help you master the most essential desserts and the simplest breads.
Today: If you consider the crust to be the best part of a pie, stop what you're doing right now: We've got the pie for you.

Once upon an especially cold night this past winter, I decided to make what I called “The Crust Lover’s Pie.” Because it was winter, this meant shredding some leftover roast chicken and combining it with leeks, parsnips, carrots, mushrooms, and so on to make a particularly epic and tall potpie. When sliced, the pie had a perfect amount of crust for every bite of filling. I fell in love.
So now that it’s summer, I want to talk about this deep-dish pie in fruit form. This is an awesome pie. It requires a few extra steps and a bit of extra time, but the result is as impressive as it is delicious. Really, what this comes down to is: If you love crust, you must try making a deep-dish pie. Your crust-loving heart will go pitter-patter, and you will have an especially amazing slice of breakfast pie (if you don’t eat pie for breakfast, start A.S.A.P.).
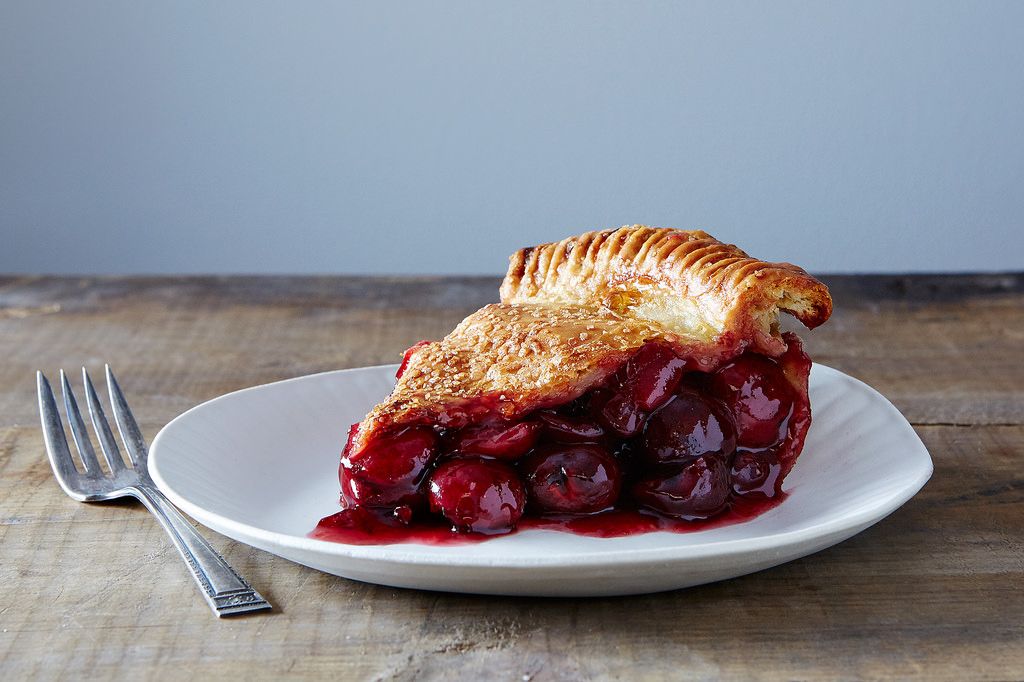
Follow these 15 steps to make this towering slice a reality, or skip straight to the recipe and try your hand right away:
1. Make a little more dough than usual.
My piecrust recipe makes me swoon because it’s so easy to measure and multiply into whatever amount I want. But whatever recipe you use, just know that you’ll need more than the typical double crust pie.
I multiplied my recipe for a single crust by 3, but had a bit leftover (which you can use to make pie crust “cookies” or decorative cutouts for the top crust). If you don’t want scraps, and your recipe multiplies easily and cleanly, you could multiply your preferred dough recipe by 2.5.
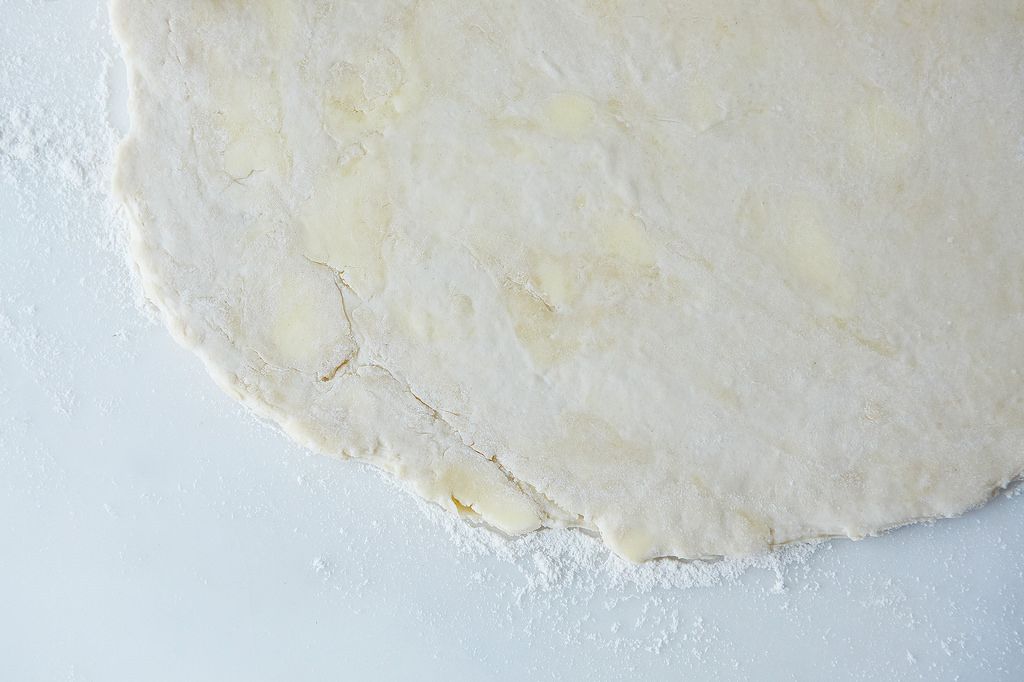 See the globs of butter in the dough? That's the sign of a flaky pie crust to come.
2. Start with cold dough.
I probably sound like a broken record since I mention this every time I talk about pie, write about pie, or whisper sweet pie nothings, but that’s how important it is: Roll out your dough when it’s nice and chilled, and once you transfer it to the baking vessel, chill it again. This is especially important in the summer because no matter how quickly you work (or how much you blast your A.C.), the butter in your dough is more likely to soften or melt.
More: Read Erin's everything-you-need-to-know guide to pie crust.
3. Grab a springform pan.
Yes, you heard me: No pie plates here. This pie is made in a 9-inch springform pan. My springform pan doesn’t tend to stick, but if you know yours does (or if you’re not sure), give it a quick coating of nonstick spray. For the bottom crust, you’ll use your favorite crust recipe that’s doubled (or multiplied by 1.5 for no scraps).
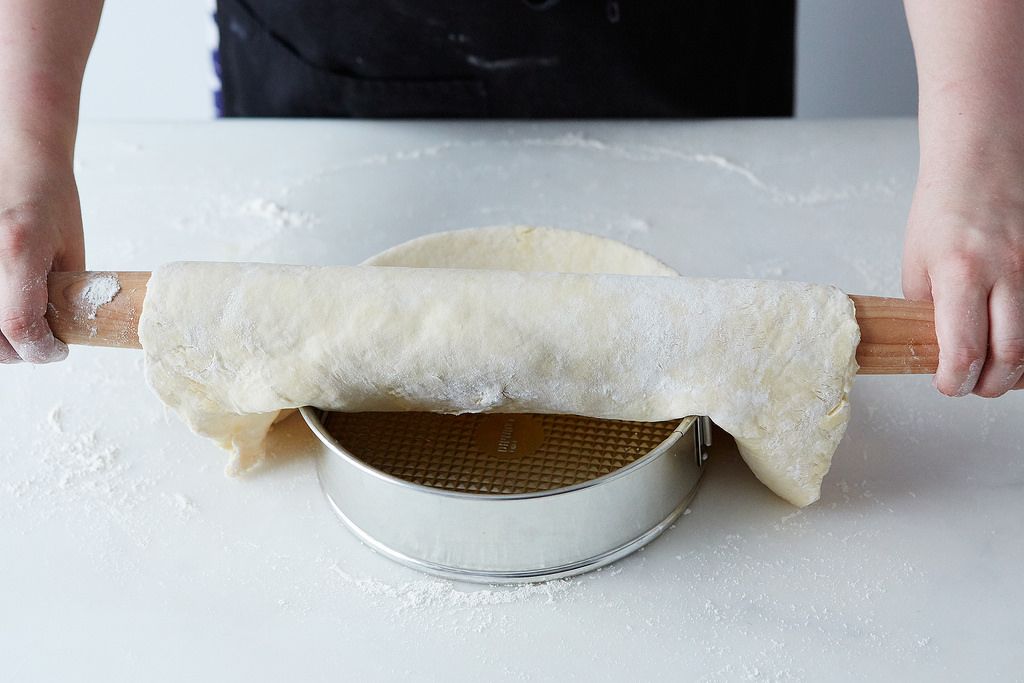
Transfer the dough to the springform pan using the traditional rolling pin method.
4. Roll thicker.
It’s important to roll out the bottom crust a bit thicker than usual—it’s about to have a lot of filling to support! Aim for around 1/3-inch thick. Transfer the dough to the pan using the rolling pin method, and carefully nudge it down, making sure it’s fully covering the base and snug up against the sides of the pan.
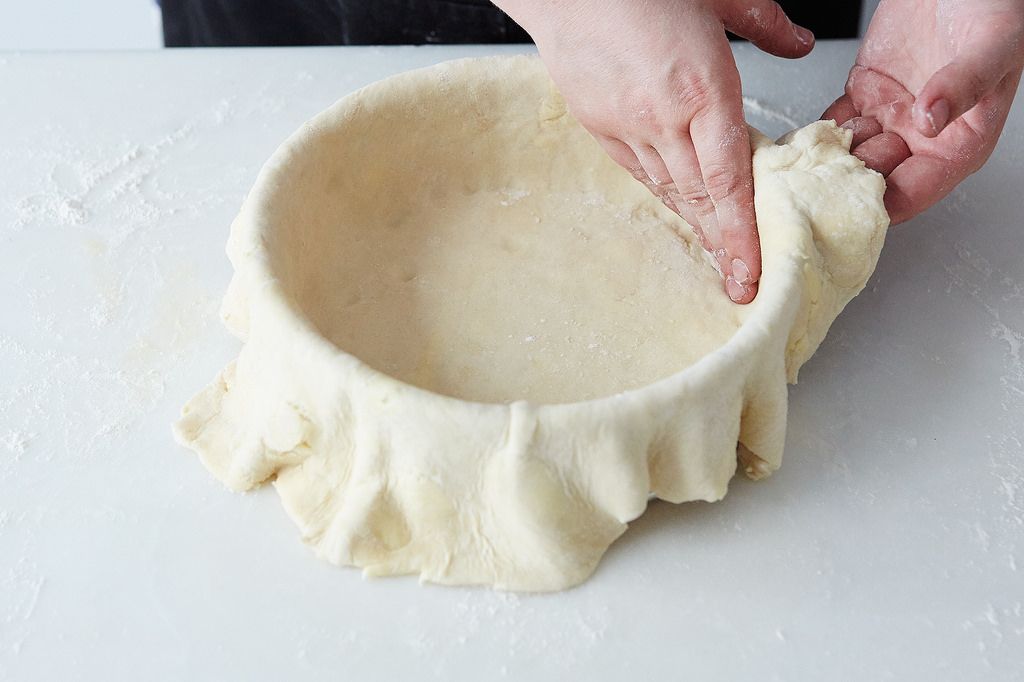
Make sure the dough is nice and snug around the perimeter of the pan, and especially where the sides of the pan meet the base.
Let the excess hang over the top edge of the pan, then trim the excess so there’s only about 1/2-inch all the way around. This will allow for any shrinkage that might occur during par-baking and give yourself enough room to help attach the top crust later.
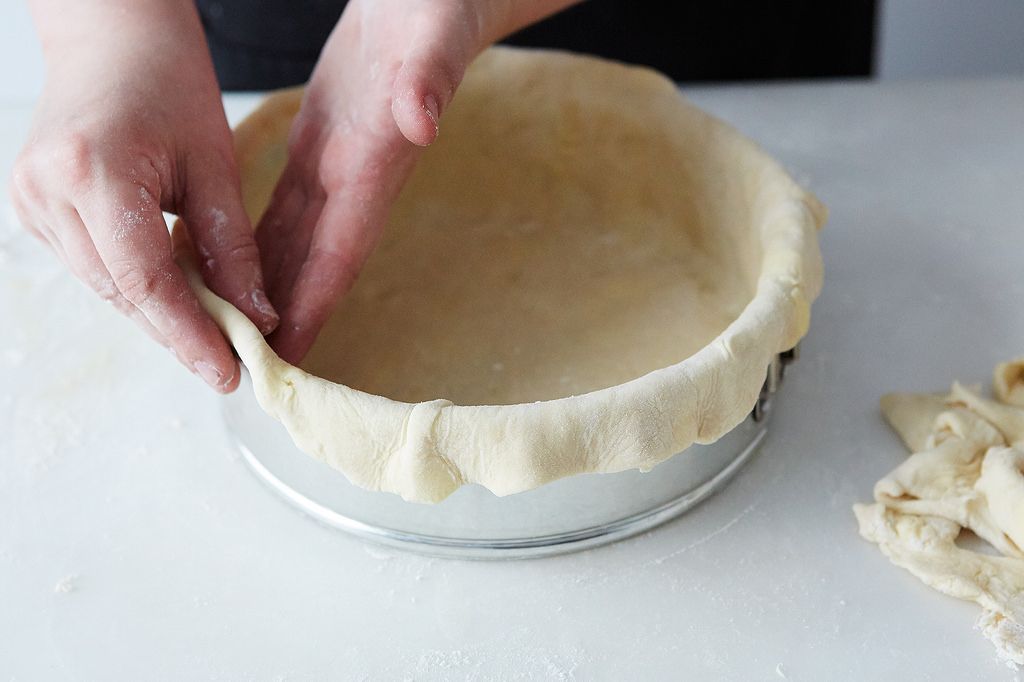 Trim the excess dough that's hanging over the edge of the pan, then tuck it under, nice and neat.
5. Dock, dock, dock.
Once the dough in the springform pan is nice and chilled (again), pierce the base of the dough with a fork. No need to go crazy, but make sure there you’ve poked it 10 to 15 times, all along the base and a few on the side of the crust.
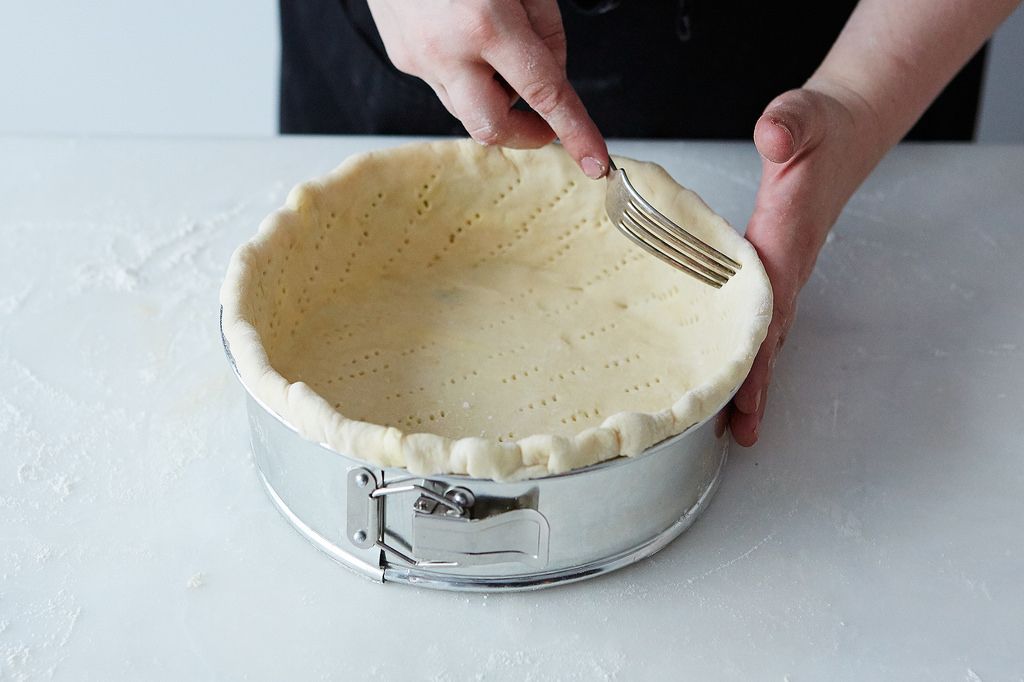
Don't forget to dock the crust on the bottom and the sides.
6. Weigh it down.
Cut a square of parchment paper that is slightly larger than the springform pan. Place it, centered, over the dough, and fill the cavity with pie weights (either ceramic reusable ones or just plain ol’ beans will work). The weights should be strong enough to hold the parchment paper in place and prevent the crust from puffing up. I usually fill the cavity about 1/4 of the way with beans or weights.
7. Par-bake!
If you hate soggy bottom crust (and let’s face it, who doesn’t?), you should par-bake almost always. I wrote a lengthy (and detailed) ode to par-baking last summer, but the basics bear repeating. Par-baking is necessary for some pies (custard pies, for example, where you pour the filling into an already baked crust) and is optionally encouraged for others (namely, juicy fruit pies). It’s ideal to par-bake the crust just until it begins to brown, which tends to happen more at the edges than on the bottom. When I par-bake, I like to put the pie on a rack closer to the bottom of the oven in order to make sure I start out right in getting it crisp. Par-baking will take about 15 to 20 minutes for a 9-inch deep-disher. The rest of the browning will happen during the longer baking time, after the pie is filled.
8. Bake at a high temperature.
I start (and often finish) all of my pies at 425° F. This high temperature is ideal for baking, because it causes the water in the butter to evaporate, creating steam, which creates a light and flaky crust. If the oven is too cold, the fat in the butter just melts, making your crust bake and brown unevenly. It also causes that dreaded shrinkage that can occur when the crust droops down off of the lip of the pie plate. This is especially important with a deep-dish pie because if the side crust slouches, you’ll have a harder time filling and topping the pie.
9. Cool it down a bit.
It’s especially important to cool your par-baked crust back to room temperature after baking because you’re going to be adding a top crust, and you won’t want the edges of your nicely chilled final layer to get all soft and squishy at the edges.
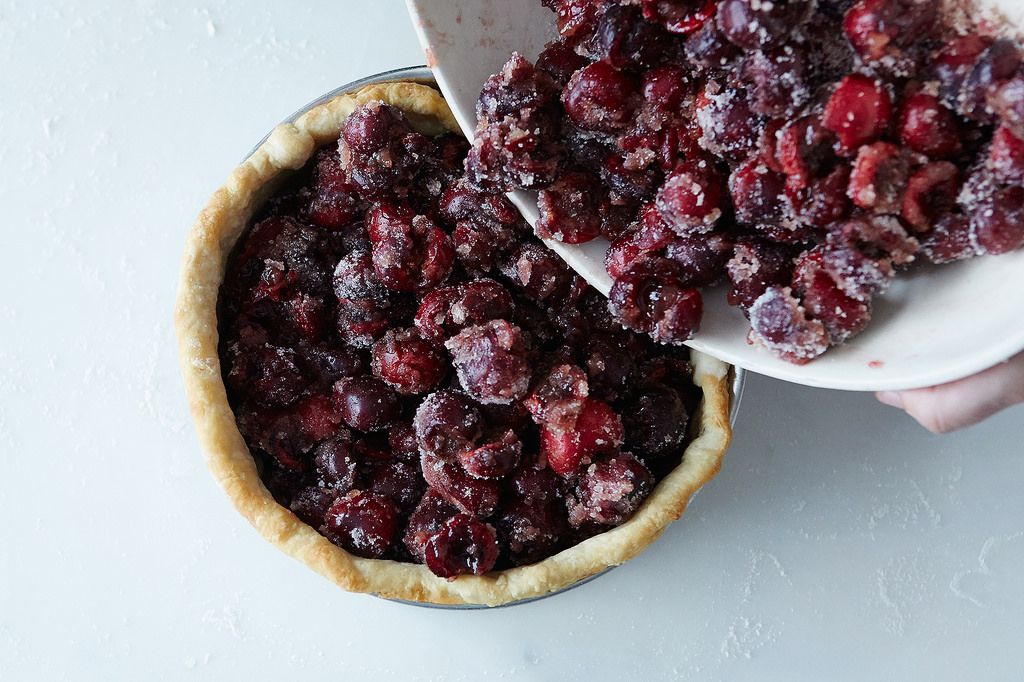
Once the crust is par-baked, it's time to add the fruit filling.
10. Fill 'er up!
A slight caveat of a deep-dish pie is that you need a lot of fruit to fill it. There are a lot of pros though. For one thing, this kind of pie serves more people than an average pie; because there’s more crust and more filling, you can get 12 to 15 slices out of this pie, whereas a typical pie is more like 8. Second, it’s summer, y’all! I don’t know about you, but I have fruit coming out of my ears already (and the best is yet to come). So why not put all that amazing deliciousness into an equally amazing pastry crust? Can’t find a reason? Me either.
I used four pounds of cherries for this deep-dish pie, and the weight shouldn’t vary too much with other fruit, though you have to compensate for peeling and pitting stone fruits, hulling strawberries, etc.
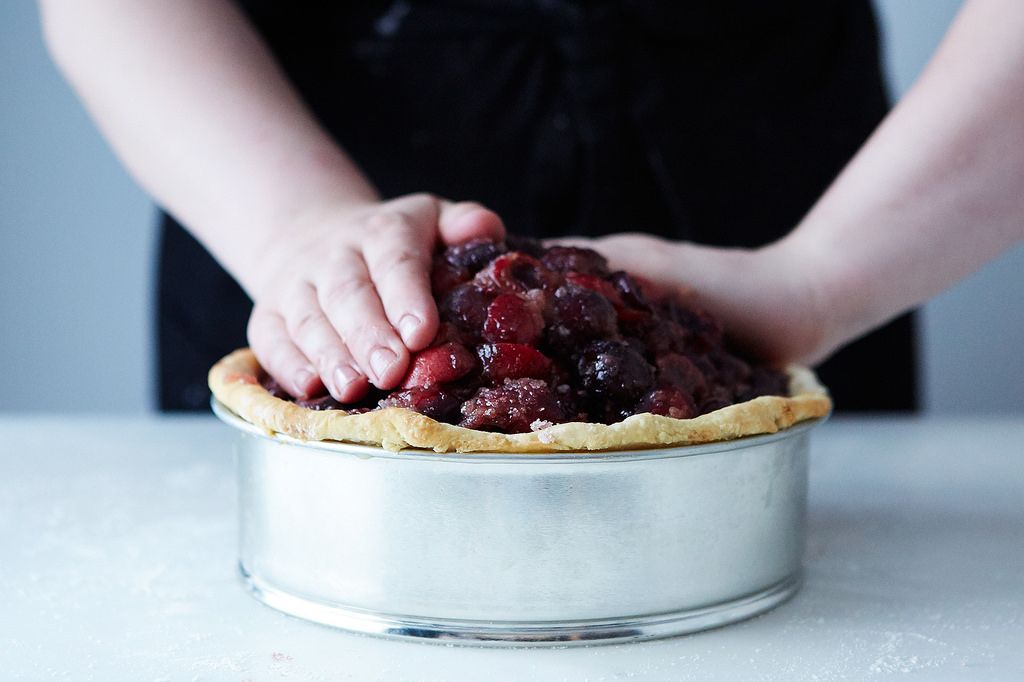
11. Love the mound.
Here’s one of those super amazing tricks every pie baker needs to know. Don’t be delicate with your filling: Really pack it in there. When there are air pockets surrounding the raw fruit, steam will “gather” there, and when the pie is cooling, it will escape through the vents and cause the pie to collapse. If you pack your filling in tight (I even suggest making sort of a shingled rosette sort of thing with sliced fruit like peaches or apples), you reduce the air pockets and your pie will look the same at the end of baking as it does at the beginning (except warmer, gooier, and way more delicious).
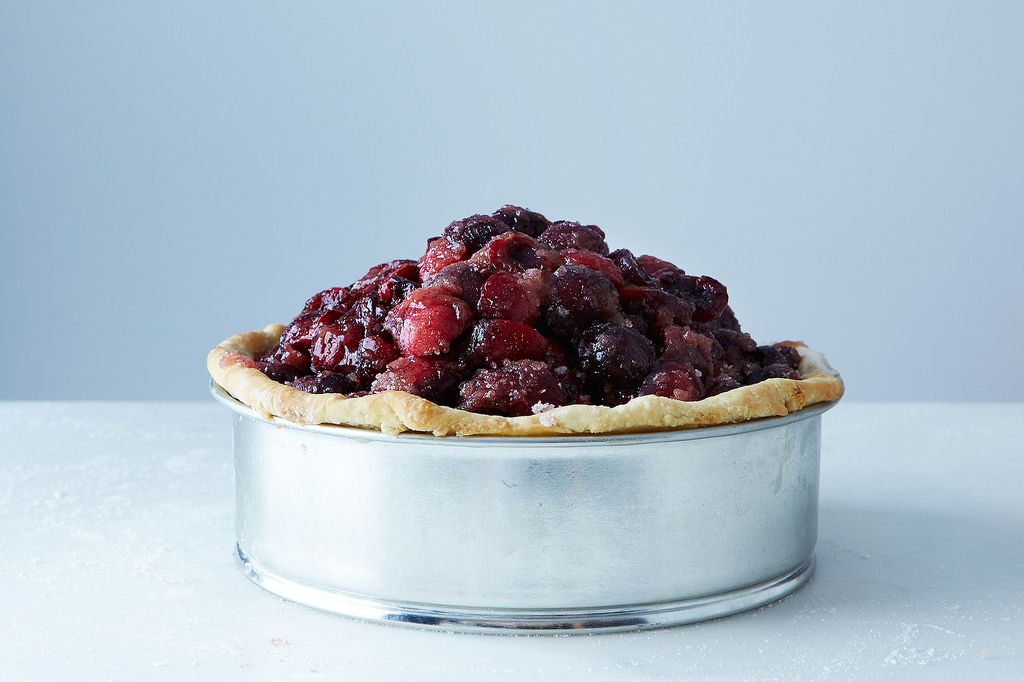
12. Top it off.
Apply a top crust the way you normally would, but allow a good amount of excess at the edge—around 3/4 inch. Nudge the edge down into the side of the springform pan so that it meets the top edge of the bottom crust. Push the crust down a bit so the excess puckers outward and creates a little “lip,” just like the edge of a typical pie. Press that outer lip together to seal a bit, then you can crimp the pie as you like from there. I tend to opt for a simple fork seal since it’s simple and there’s already a lot going on with this pie.
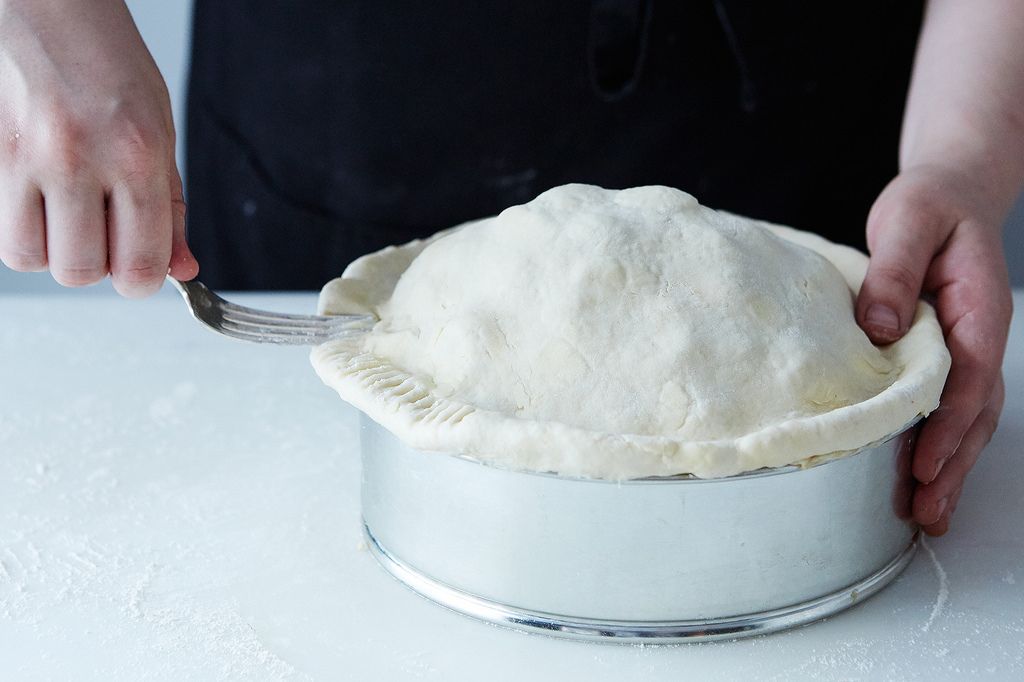
13. All the right finishes.
First up, egg-wash that pie. This helps with even browning and also seals the top of the crust and makes it shiny.
And I never bake a double crust pie without a generous sprinkling of turbinado sugar—I love its sparkly look and caramel-y flavor. Finally, cut vents in the pie. This is always important with double-crust pies, because you have to let all that pent up steam out or all your careful, chilled handiwork will be soggy anyway.
14. Bake that bad boy.
But before you do, walk around your kitchen with this giant, magnificent pie held high above your head. Not going to lie: I did a little bit a few laps around the Food52 island (Rocky-style) before I threw it in the oven. Be sure to bake it on a foil- or parchment-lined baking sheet (you’ll thank yourself later when it comes time to do dishes). During baking, if your crust is browning too quickly or too much, reduce the temperature to 375° F for the remainder of baking. If it’s still going too fast for your liking, you can tent the pan with foil.
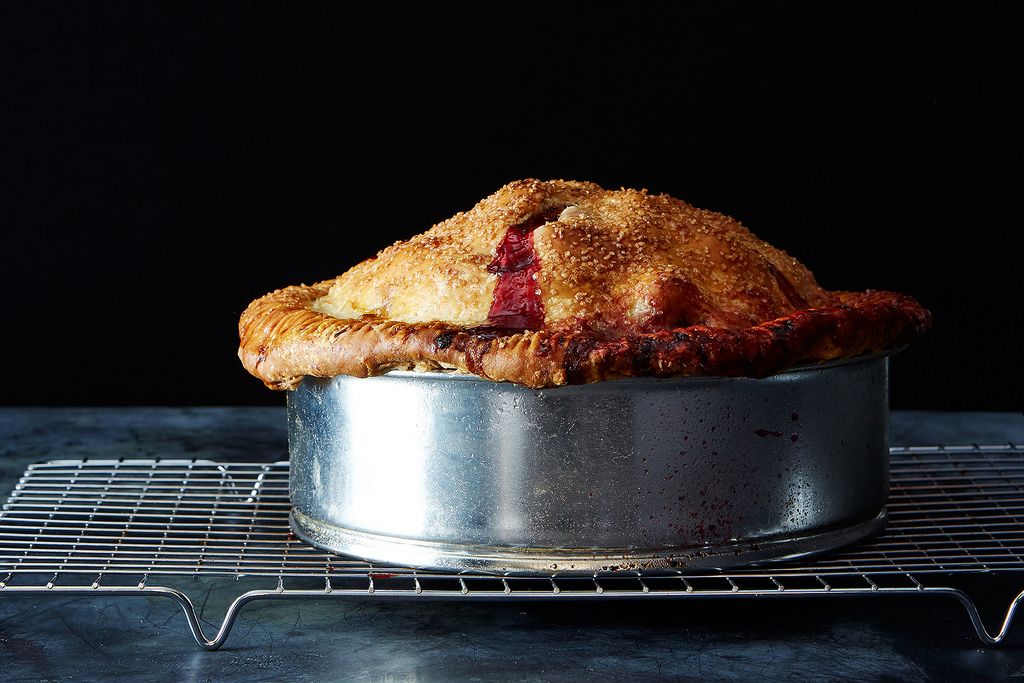
15. Cool it all the way down.
This is the hardest part of this whole thing: you really have to let it cool completely. Yeah, it sucks. If you really want the warm pie thing, you can warm it a little in a low-temperature oven or heat each slice after you’ve cut it, but trust me: The pie needs to be completely cool before you do anything. For one thing, it helps the structure set. Inside that perfectly brown, buttery crust is a liquid-y bomb of fruit juice that needs to set, which it will when it cools. Just like any fruit pie, you can go ahead and unmold and cut it, but it will be messy. If you don’t mind the mess, go for it. But if you want a look that’s a little cleaner, let it cool (for that reason, this is actually one of the rare pies that is good to make a day ahead of time).
Once it’s cool, undo the latch on the side of the springform and release. If the pie is baked properly, it should be easy to release the base of the pan, too: Run an offset spatula around the edge and nudge it toward the middle. If the crust is giving a little, you may want to just serve it as is. But most likely, it’s going to be crazy crisp, and once you’ve loosened it a tad, you can even pick it up with your hands and transfer it to your serving platter. (Also: Don’t be sad if your side crust springs a leak or two. It doesn’t always happen to me, but when it does, I sort of enjoy the ooze—it reminds me of the juicy bits that caramelize around the vents of a pie.)
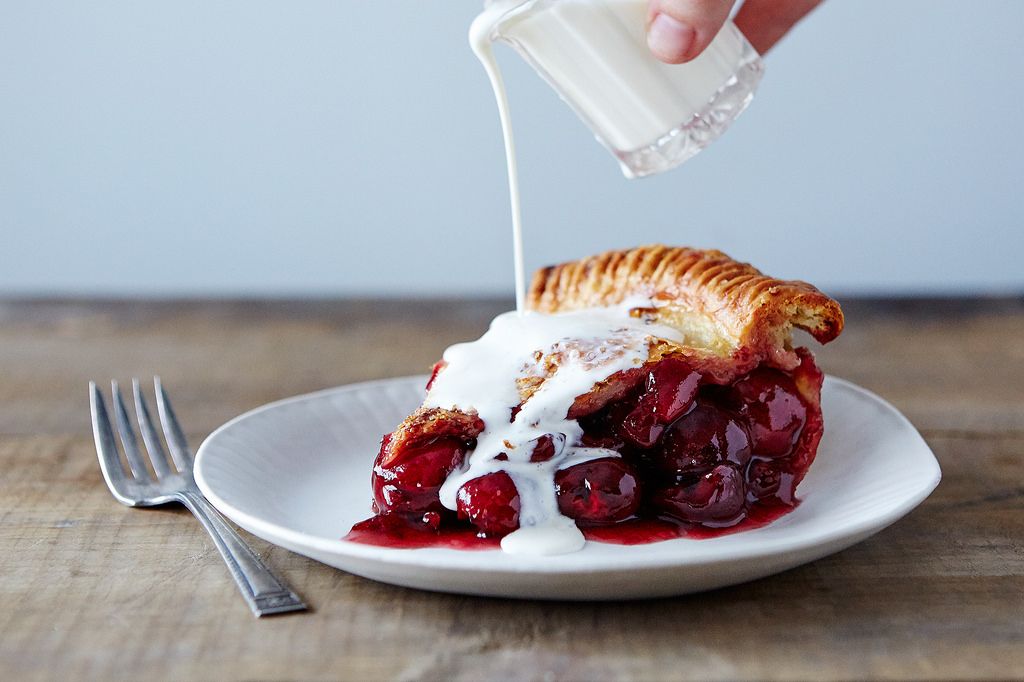
Deep-Dish Cherry Pie
Makes one 9-inch deep-dish pie; serves 12 to 15
For the pie crust:
3 3/4 cups all-purpose flour
3/4 teaspoon salt
3 sticks (12 ounces) cold unsalted butter, cubed
3/4 cup ice water, plus more as needed
For the finished pie:
4 pounds sour or sweet cherries, pitted
1 lemon, zested and juiced
1 tablespoon vanilla extract
2 1/4 cups granulated sugar
3/4 cup cornstarch
Egg wash, as needed for finishing
Turbinado sugar, as needed for finishing
See the full recipe (and save and print it) here.
Photos by Mark Weinberg


 See the globs of butter in the dough? That's the sign of a flaky pie crust to come.

 Trim the excess dough that's hanging over the edge of the pan, then tuck it under, nice and neat.


See what other Food52 readers are saying.